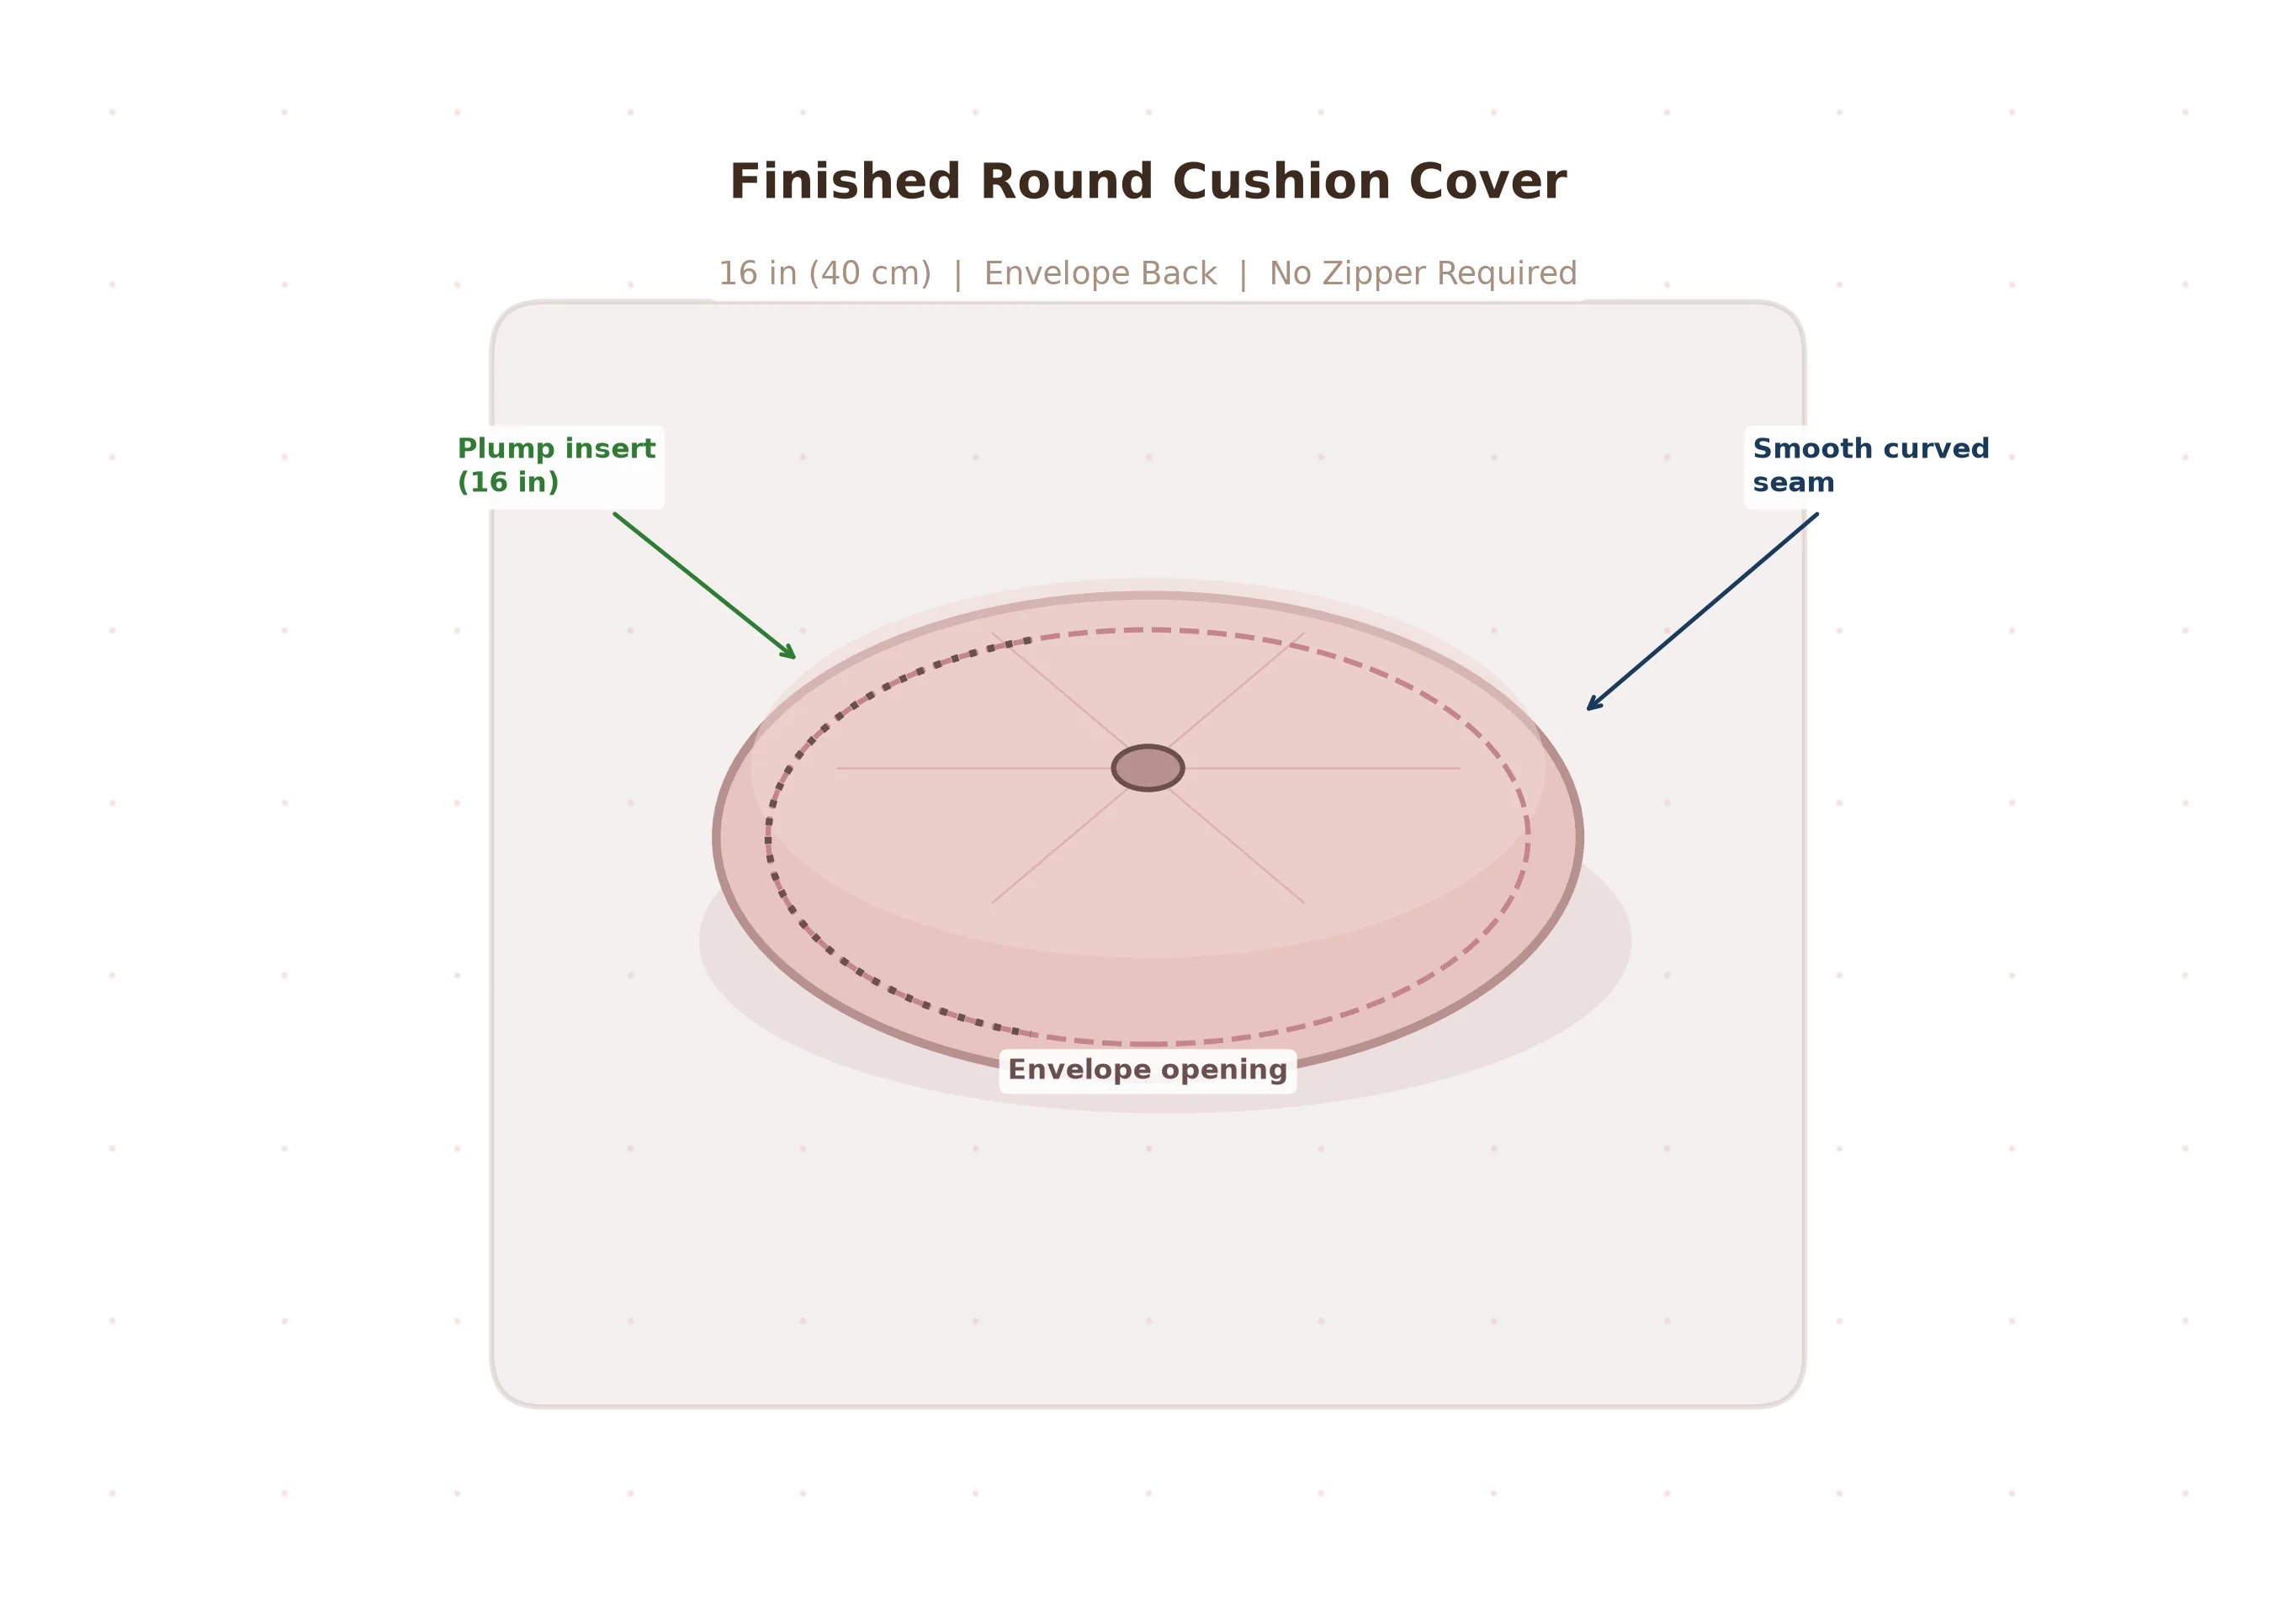
How to Sew a Round Cushion Cover with an Easy Envelope Back
Round cushions have a quiet elegance that square pillows simply cannot match. They soften the hard lines of a wooden chair, add a whimsical touch to a child's reading nook, and look absolutely gorgeous stacked on a window seat. Yet many beginner sewists assume that sewing a circle must be impossibly difficult — all those curves, no straight edges to rely on. Here is the wonderful secret: a round cushion cover is one of the most forgiving projects you will ever make. There are no corners to miter, no fiddly zipper installations (we are using a clever envelope back instead), and the entire cover comes together with a single continuous seam. If you can guide your fabric under the presser foot and pivot gently around a curve, you already have every skill this project requires. In this tutorial, you will learn how to draft a perfect circle from scratch using nothing more than a pin and a piece of string, how to create an overlap back that makes inserting and removing the cushion form effortless, and the essential technique of clipping curved seam allowances so your finished cover lies smooth and flat. By the time you stitch your final backstitch, you will have a professional-looking round cushion cover that you can proudly display in your home — and the confidence to tackle curved seams in any future project.
What You Will Learn
This project builds directly on the straight-seam skills you developed in earlier tutorials and introduces you to the world of curved sewing. You will practice drawing precise circles on fabric without a commercial pattern, sewing a smooth continuous curve with an even seam allowance, and clipping and notching seam allowances so that curved edges turn beautifully. You will also learn how to construct an envelope-style back closure, which is one of the most useful techniques in home sewing because it eliminates the need for zippers, buttons, or snaps while still allowing you to remove the cover for washing. These skills transfer directly to curved garment seams, circular skirts, rounded bag bases, and dozens of other projects you will encounter as your sewing journey continues.
Materials and Tools
What You Need
- 1 yard (90 cm) medium-weight cotton or linen, 44 in wide
- 16 in (40 cm) round cushion insert
- Matching all-purpose polyester thread
- Sewing machine with standard presser foot
- Fabric scissors or rotary cutter and mat
- Straight pins or sewing clips
- Fabric marker, tailor's chalk, or water-soluble pen
- Measuring tape and a long ruler
- A pin and 20 in (50 cm) of string (for the compass)
- Iron and ironing board
Choosing Your Fabric
For your first round cushion cover, reach for a medium-weight woven fabric that presses well and does not stretch. Quilting cotton is the gold standard for beginners because it is stable, comes in an endless array of prints, and responds beautifully to the iron. Linen and cotton-linen blends are equally excellent choices and give the finished cushion a relaxed, natural texture that looks especially lovely in living rooms and sunrooms. If you want a more luxurious feel, a lightweight cotton velvet or corduroy works well, though these fabrics require a bit more care when sewing curves because the pile can shift under the presser foot. Avoid very slippery fabrics like satin or silk for this project, as they make it difficult to maintain an even seam allowance around the circle. Stretchy knit fabrics are also not recommended because they will distort the shape of the cushion and make the envelope back gap open. Whatever fabric you choose, pre-wash and press it before cutting to eliminate any shrinkage that could warp your carefully sewn circle after the first trip through the laundry.
Cutting Layout
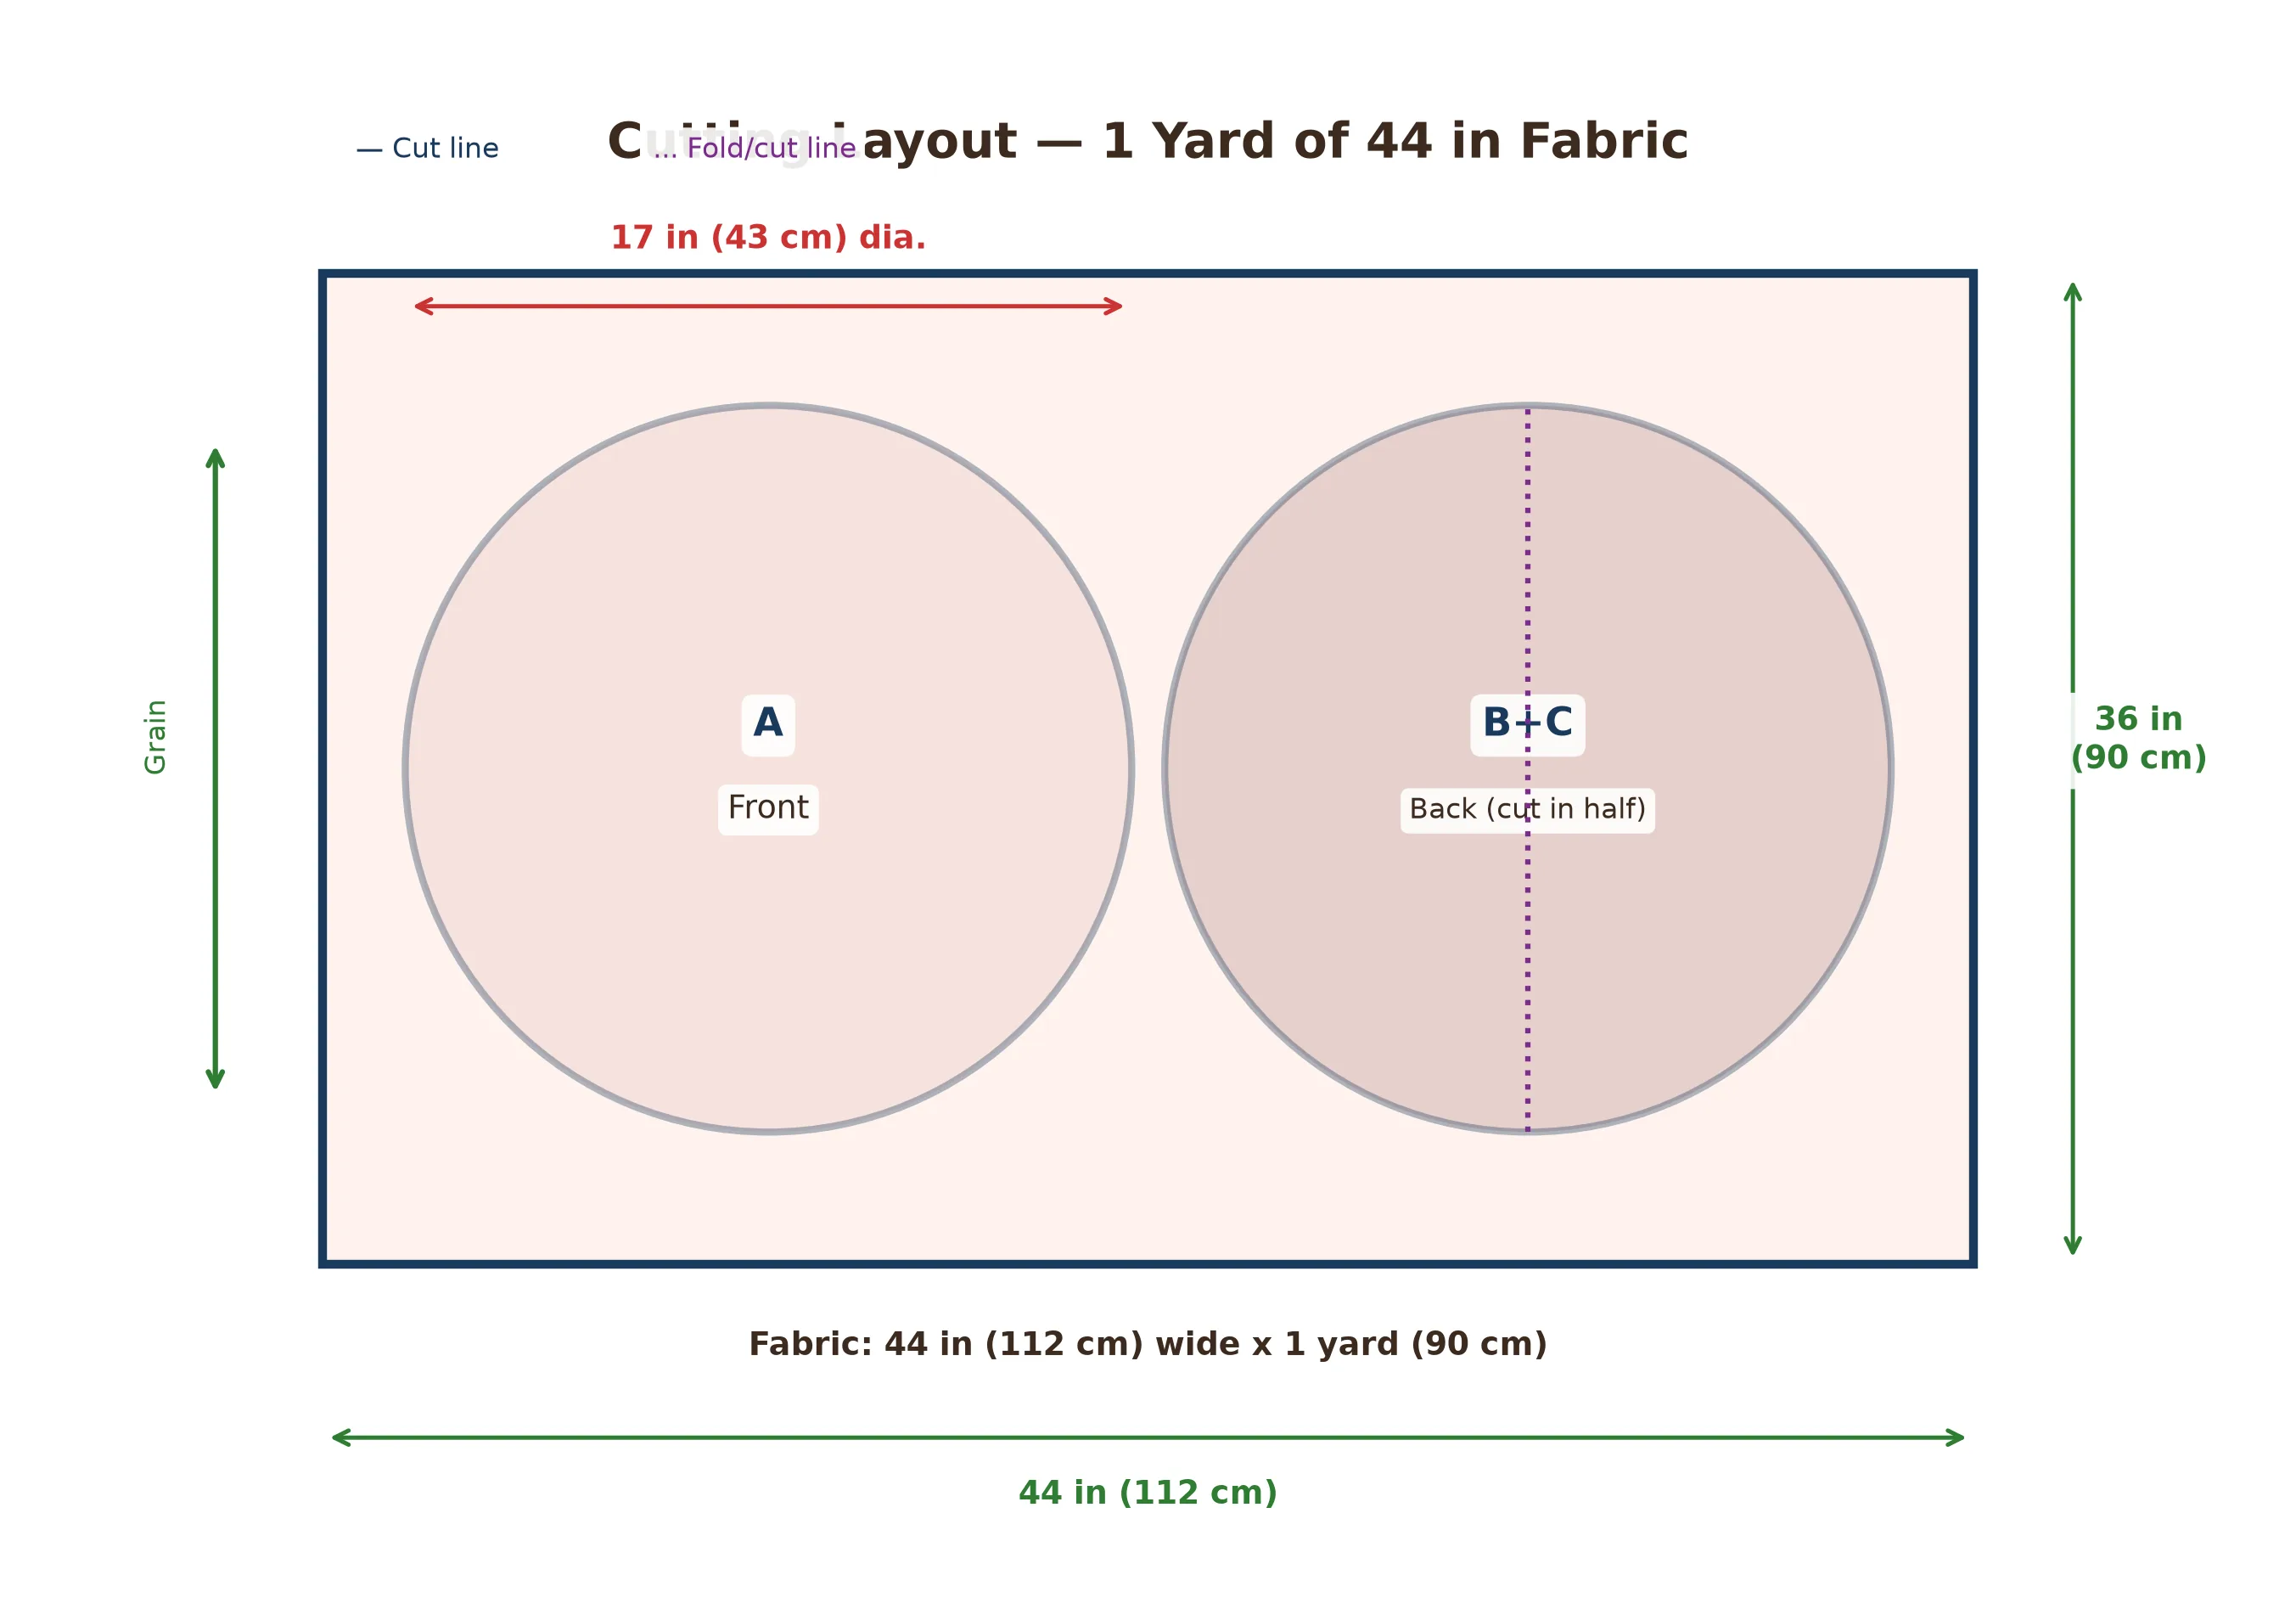
From your one yard of 44-inch-wide fabric, you need to cut two full circles and then modify one of them to create the overlapping back pieces. The most efficient layout places the two circles side by side across the width of the fabric. Each circle requires a 17-inch diameter (to allow for the ½-inch seam allowance around a 16-inch finished cushion), so two circles fit comfortably within the 44-inch width with a little room to spare. After cutting both circles, you will slice one of them in half and add overlap extensions to create the back pieces. The remaining fabric scraps are perfect for small projects like the cloth napkins from Post 3 or the scrunchies from Post 4.
Pattern Pieces
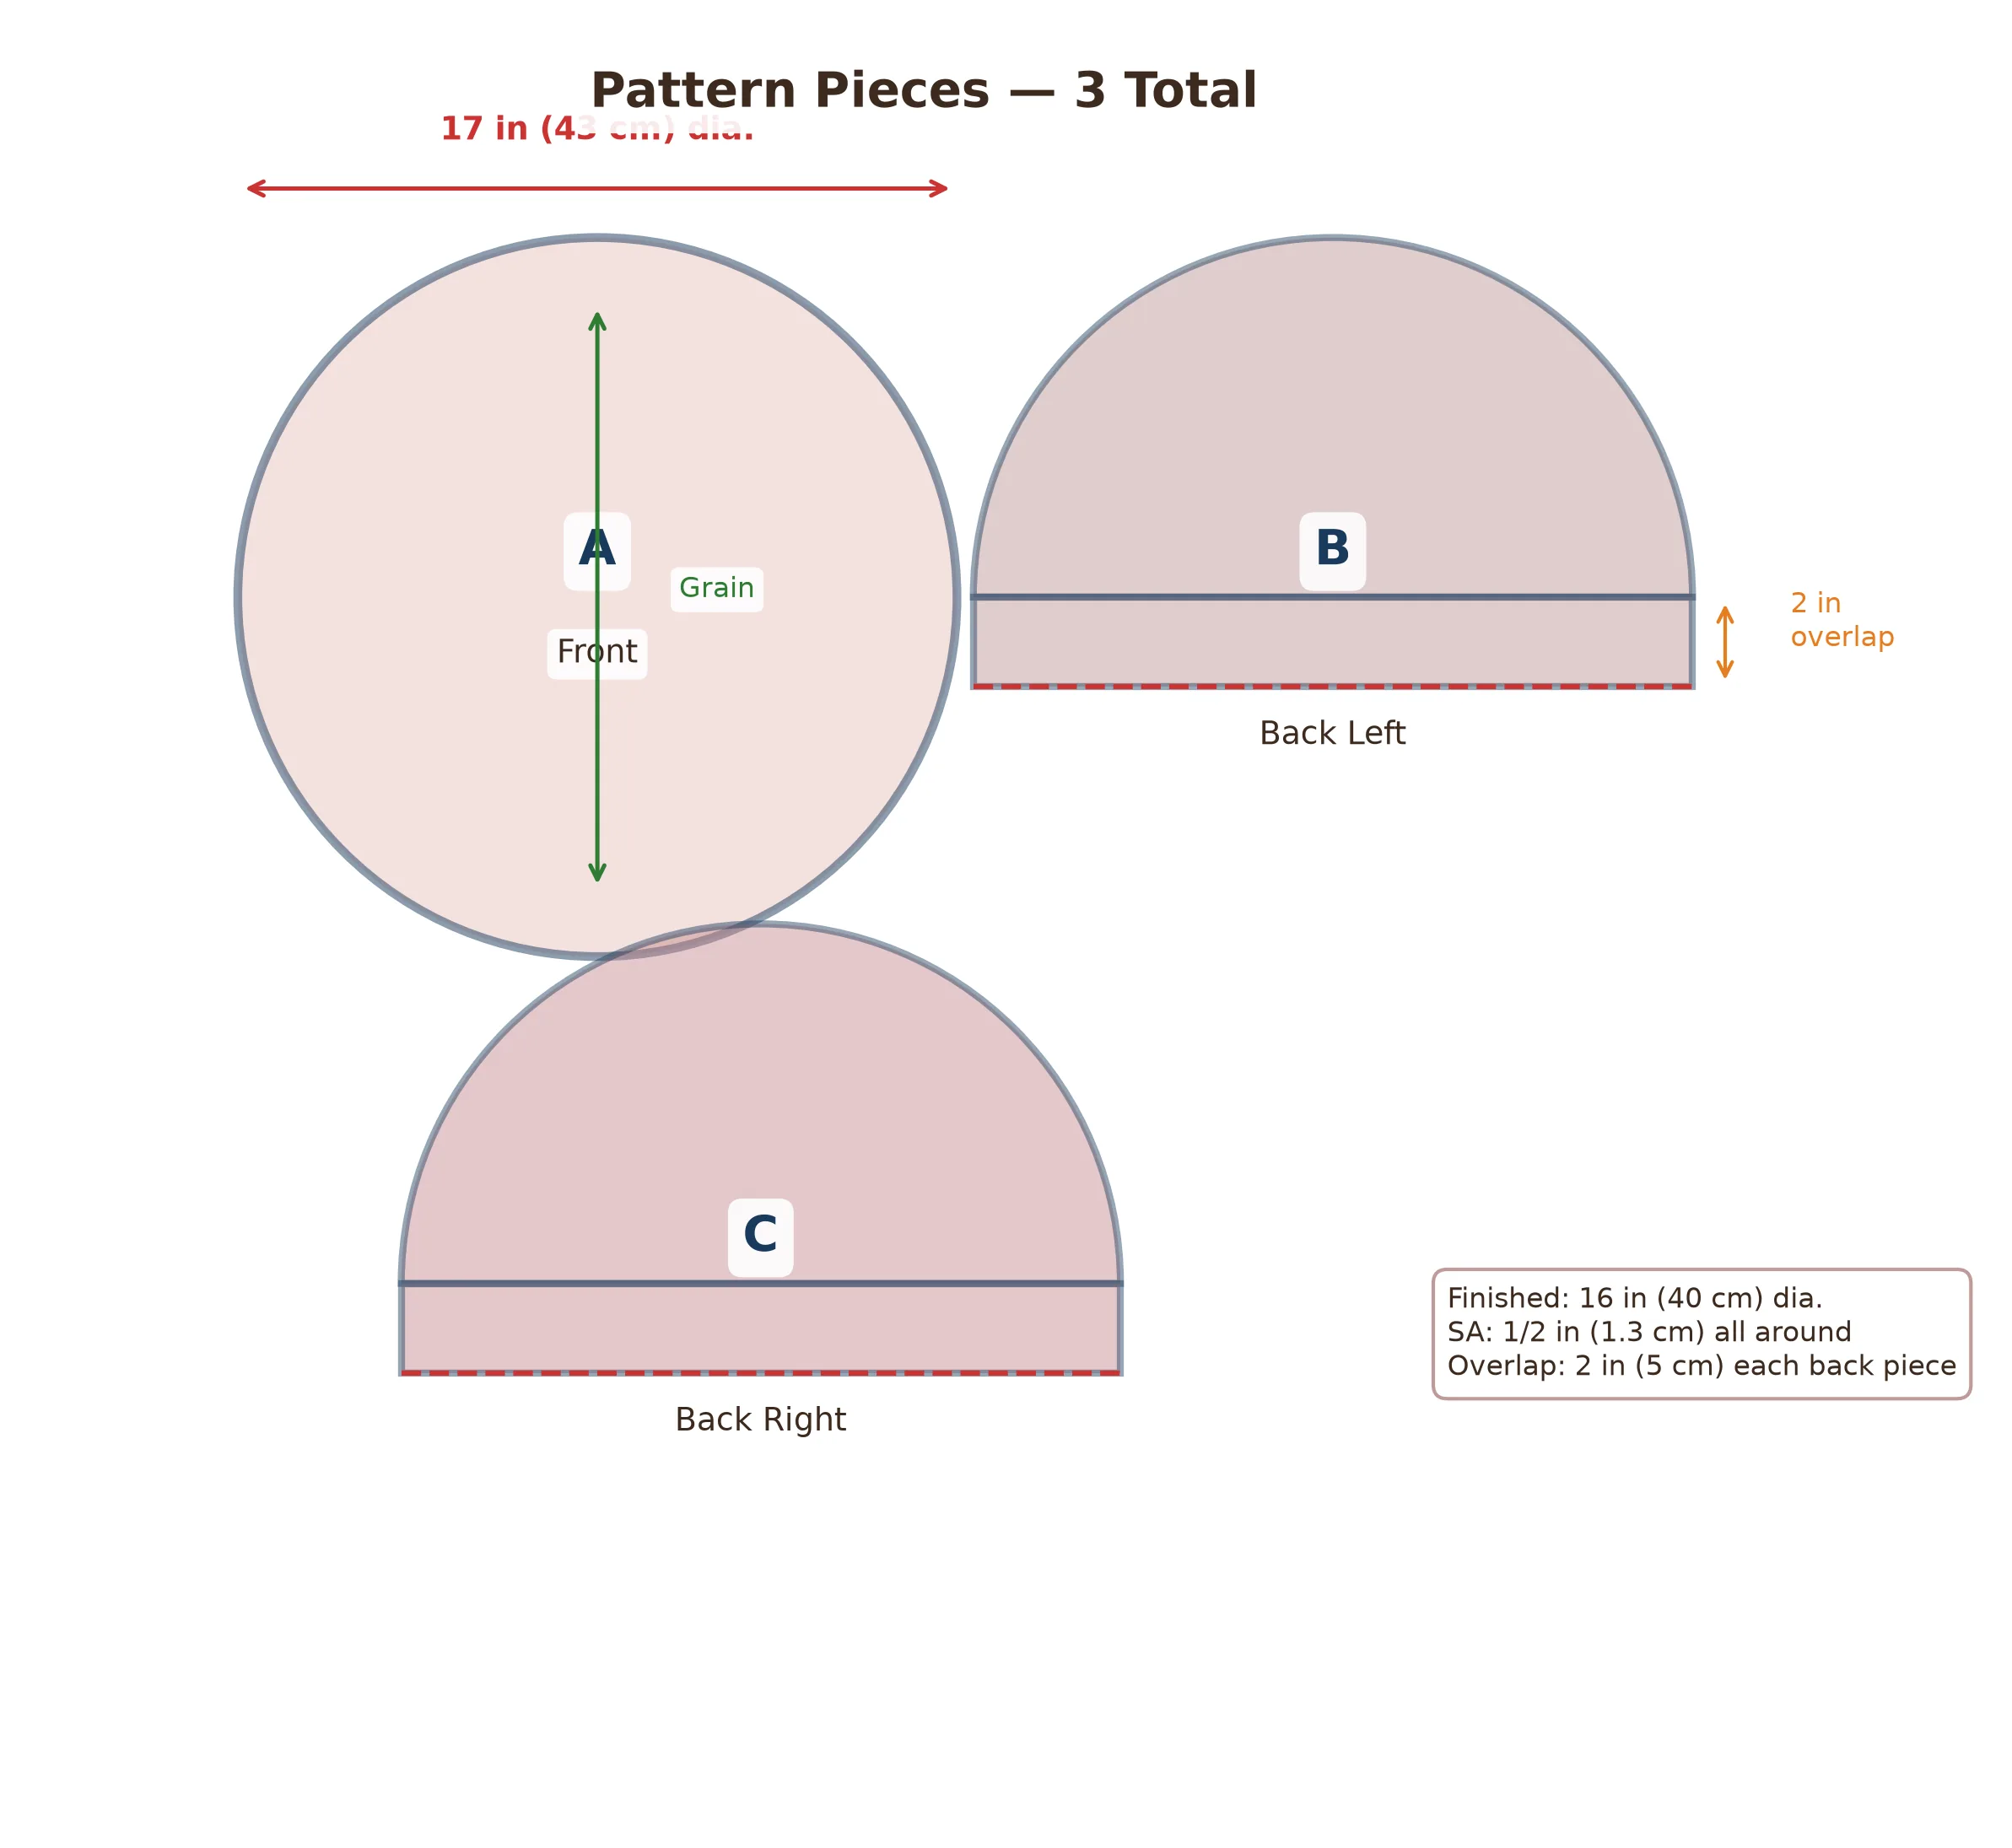
This project uses only three pieces of fabric, making it wonderfully simple. The front is a single full circle cut at 17 inches in diameter. The back consists of two half-circle pieces, each with a 2-inch overlap extension added along the straight cut edge. When the two back pieces are layered over the front, their overlap creates a hidden opening through which you can slide the cushion insert in and out. No zipper, no buttons, no fuss. The overlap also ensures that the back of the cushion looks neat and finished from every angle, with no gap or exposed insert.
Step-by-Step Instructions
Mark and Cut Your Circles
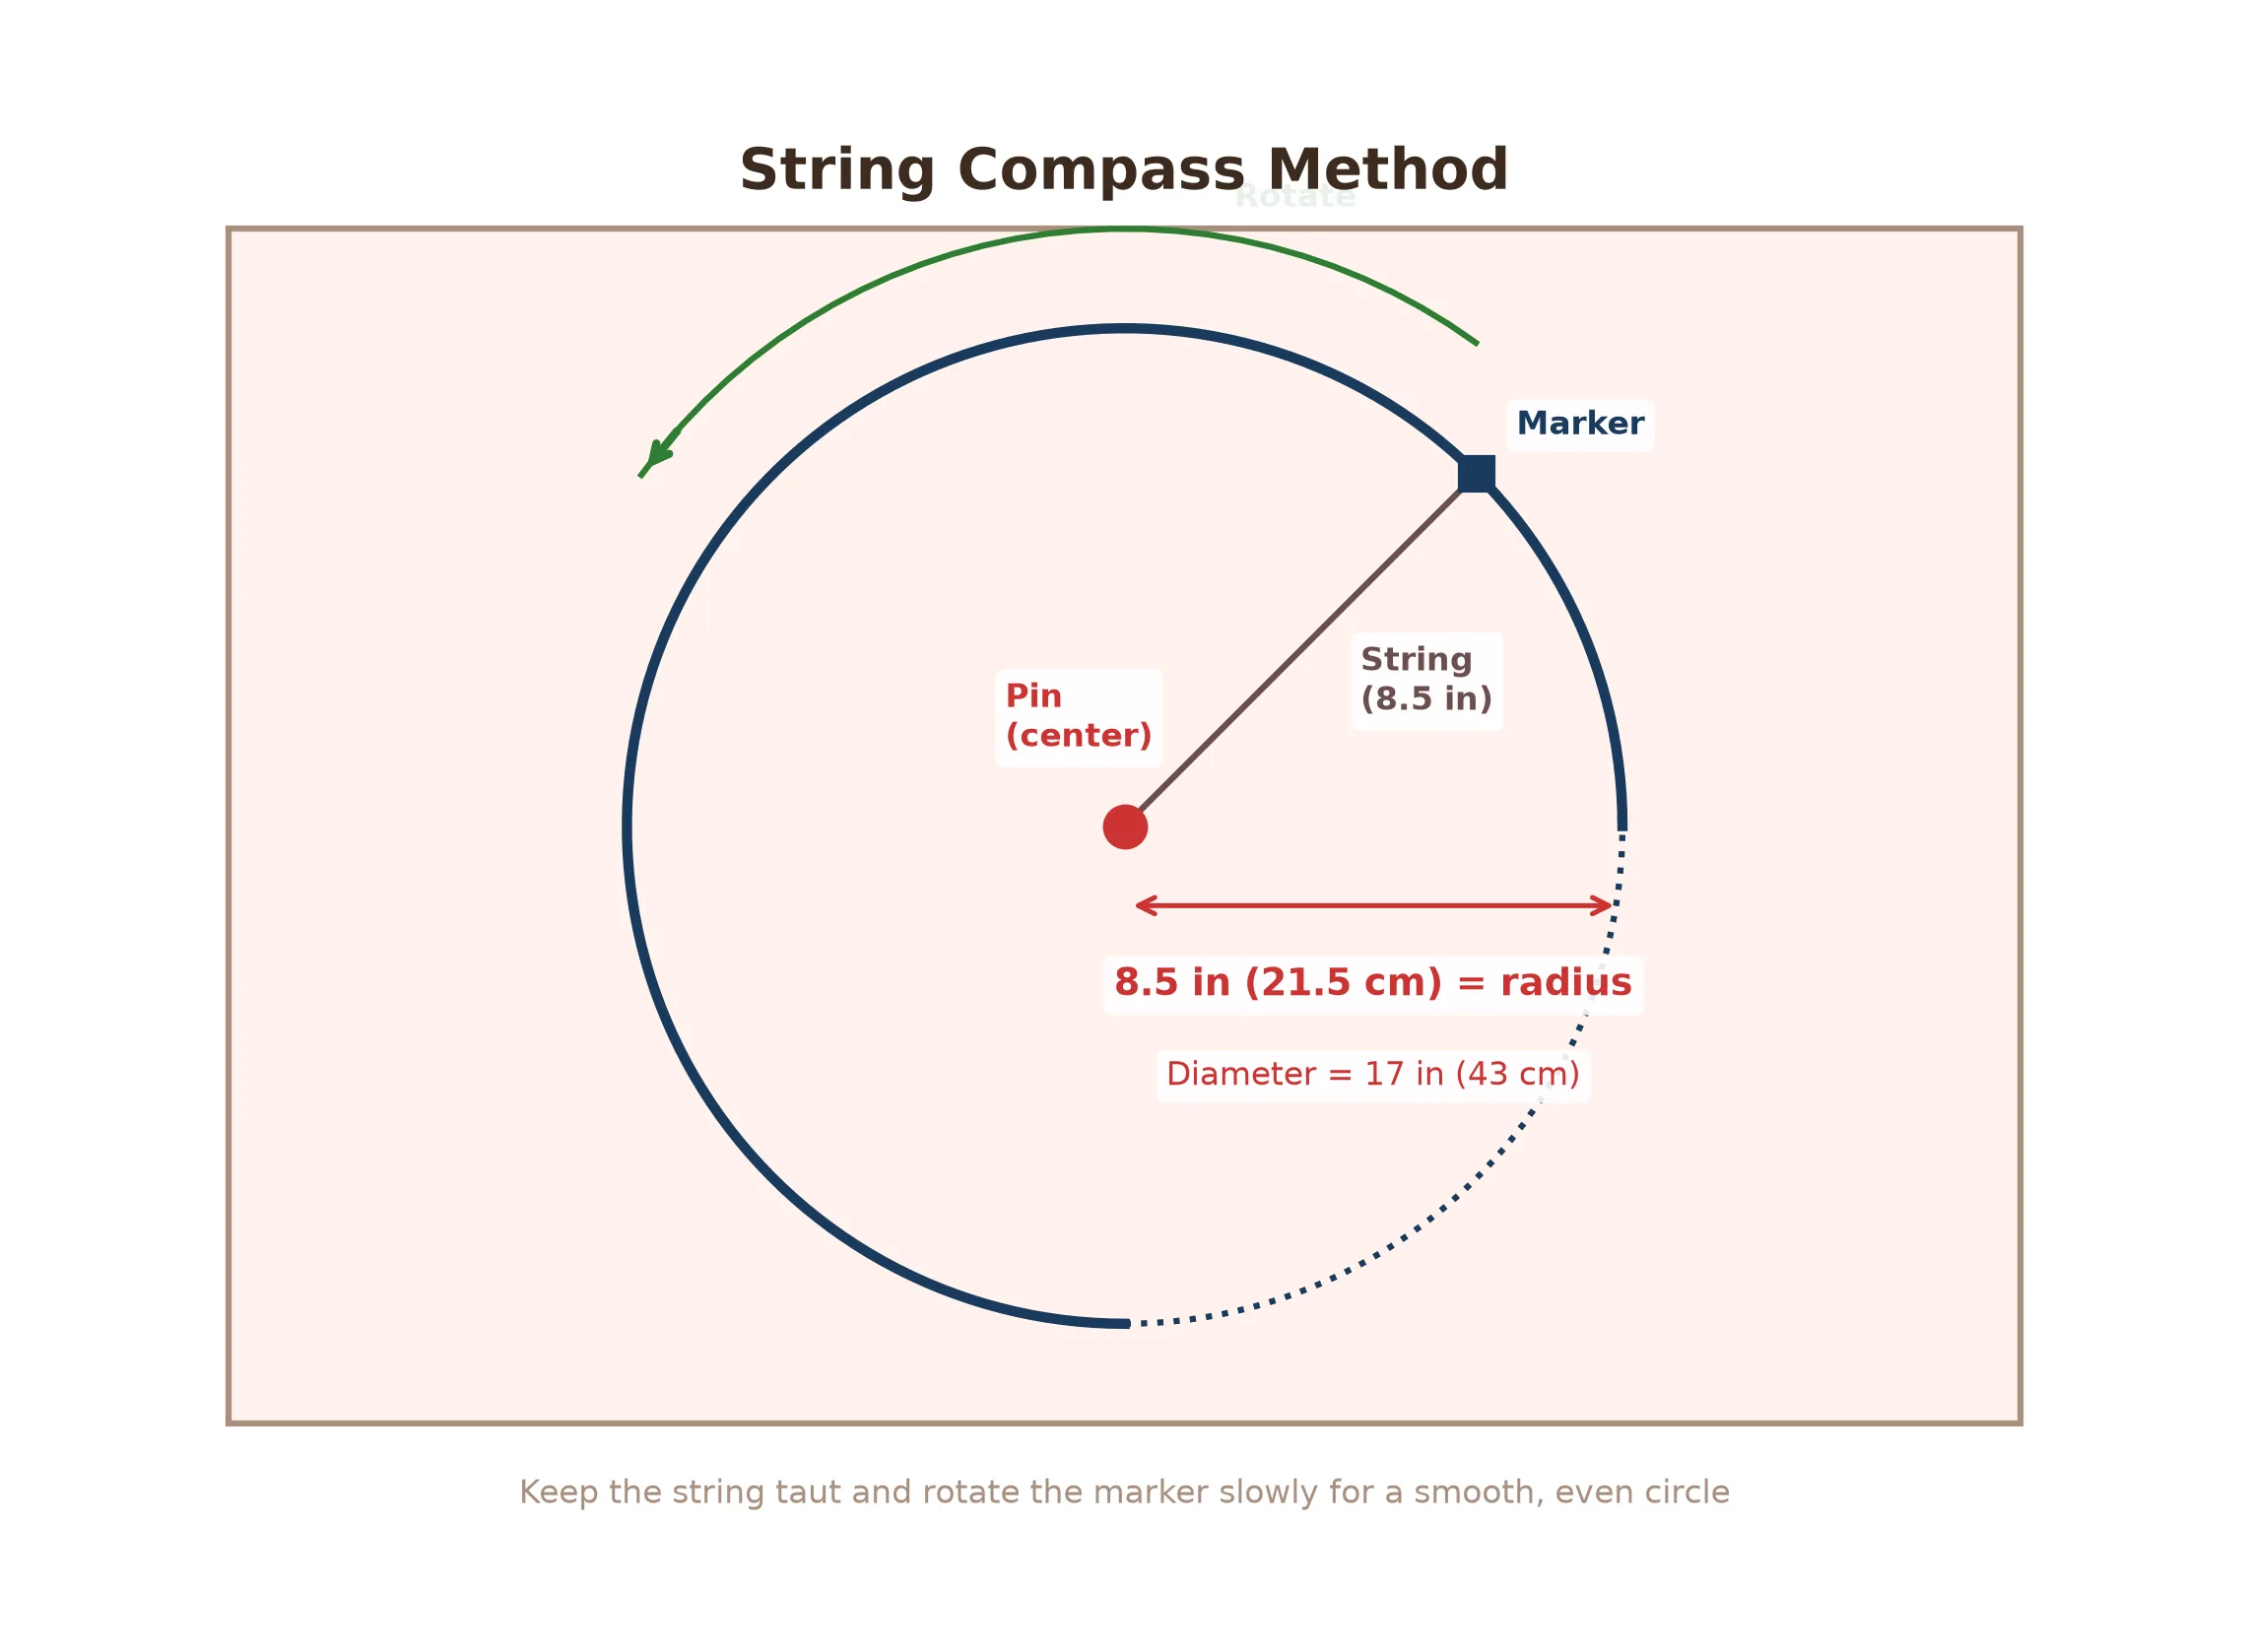
Begin by pressing your pre-washed fabric smooth and laying it flat on a large table or the floor. To draw a perfect 17-inch diameter circle, you will use the age-old string compass technique. Measure and cut a piece of string to exactly 8½ inches — this is the radius of your circle. Tie one end of the string securely around a sharp pin and the other end around the tip of your fabric marker. Push the pin into the center of the area where you want the circle, pull the string taut, and slowly rotate the marker around the pin, keeping the string tight at all times. The result will be a smooth, even circle. Draw two identical circles on your fabric, positioning them side by side across the width. Cut both circles out carefully with sharp fabric scissors, rotating the fabric rather than the scissors to maintain a smooth cutting line.
Prepare the Back Overlap Pieces
Set one of your circles aside — this is your front piece and it stays intact. Take the second circle and fold it exactly in half, matching the edges carefully. Press the fold lightly with your iron to create a crease, then cut along the fold line to produce two identical half-circles. These will become the overlapping back pieces. Now, on the straight edge of each half-circle, you need to add a 2-inch overlap extension. Measure 2 inches inward from the straight edge and draw a parallel line across the full width of the half-circle. This extra fabric is what allows the two back pieces to cross over each other and create the envelope opening. Do not cut along this line — it is simply a guide for the hem you will create in the next step.
Finish the Back Straight Edges
With wrong side facing up, fold the straight edge of each back half-circle inward by ½ inch and press. Then fold it inward again by 1½ inches to enclose the raw edge, creating a clean double hem that aligns with your 2-inch guide line. Pin or clip the hem in place, then edgestitch along the inner folded edge using a straight stitch and a ⅛-inch seam allowance. This topstitched hem will be visible on the back of your finished cushion, so take your time to keep the stitching even and straight. Press the hems flat once you are done. You now have two back pieces, each with a beautifully finished straight edge that will form the envelope opening.
Layer and Pin the Pieces
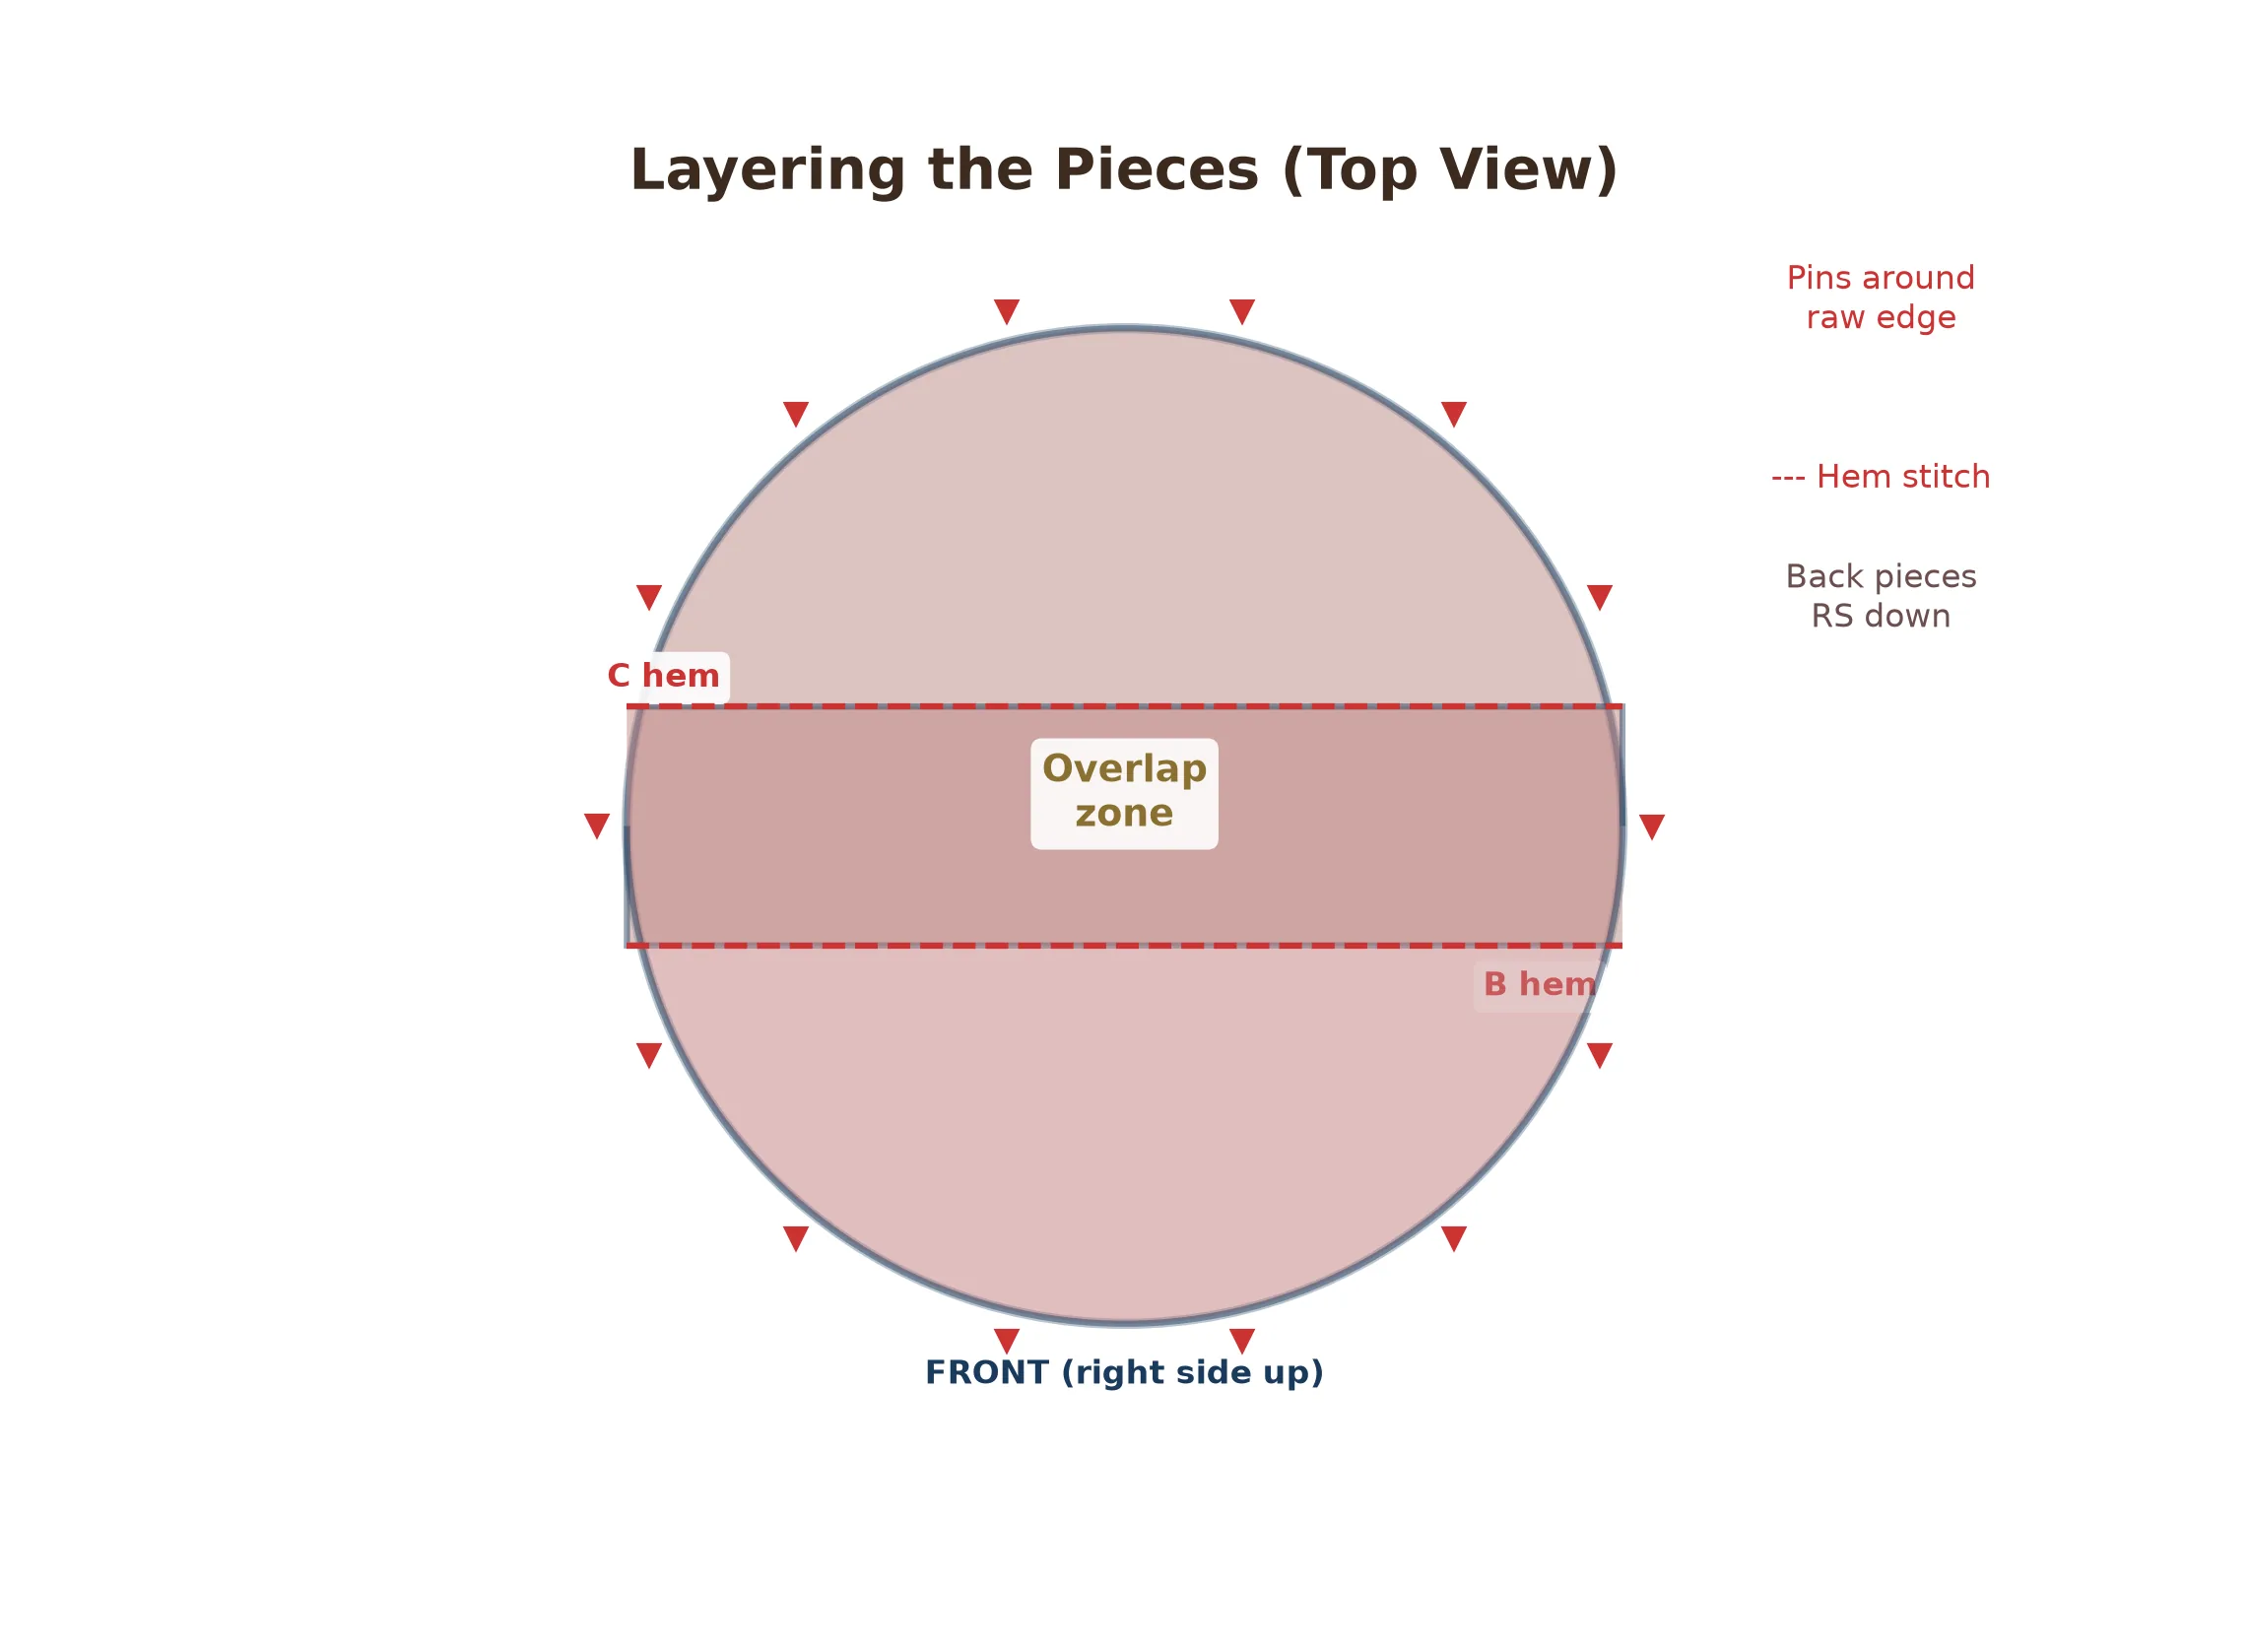
Lay your front circle on the table with the right side facing up. Take one of the back half-circles and place it right side down on top of the front circle, aligning the curved raw edges perfectly. The finished straight hem should sit roughly across the center of the front circle. Pin the curved edges together, placing pins perpendicular to the edge every 2 to 3 inches. Now take the second back half-circle and layer it right side down on top, overlapping the first back piece so that the two finished hems cross each other in the center. The overlap should be approximately 3 to 4 inches wide in the middle of the cushion. Pin the remaining curved edges together. All three layers — front and two backs — should now be pinned together around the entire circumference, with all raw curved edges aligned and the right sides of the fabric facing each other inside the sandwich.
Sew Around the Circle
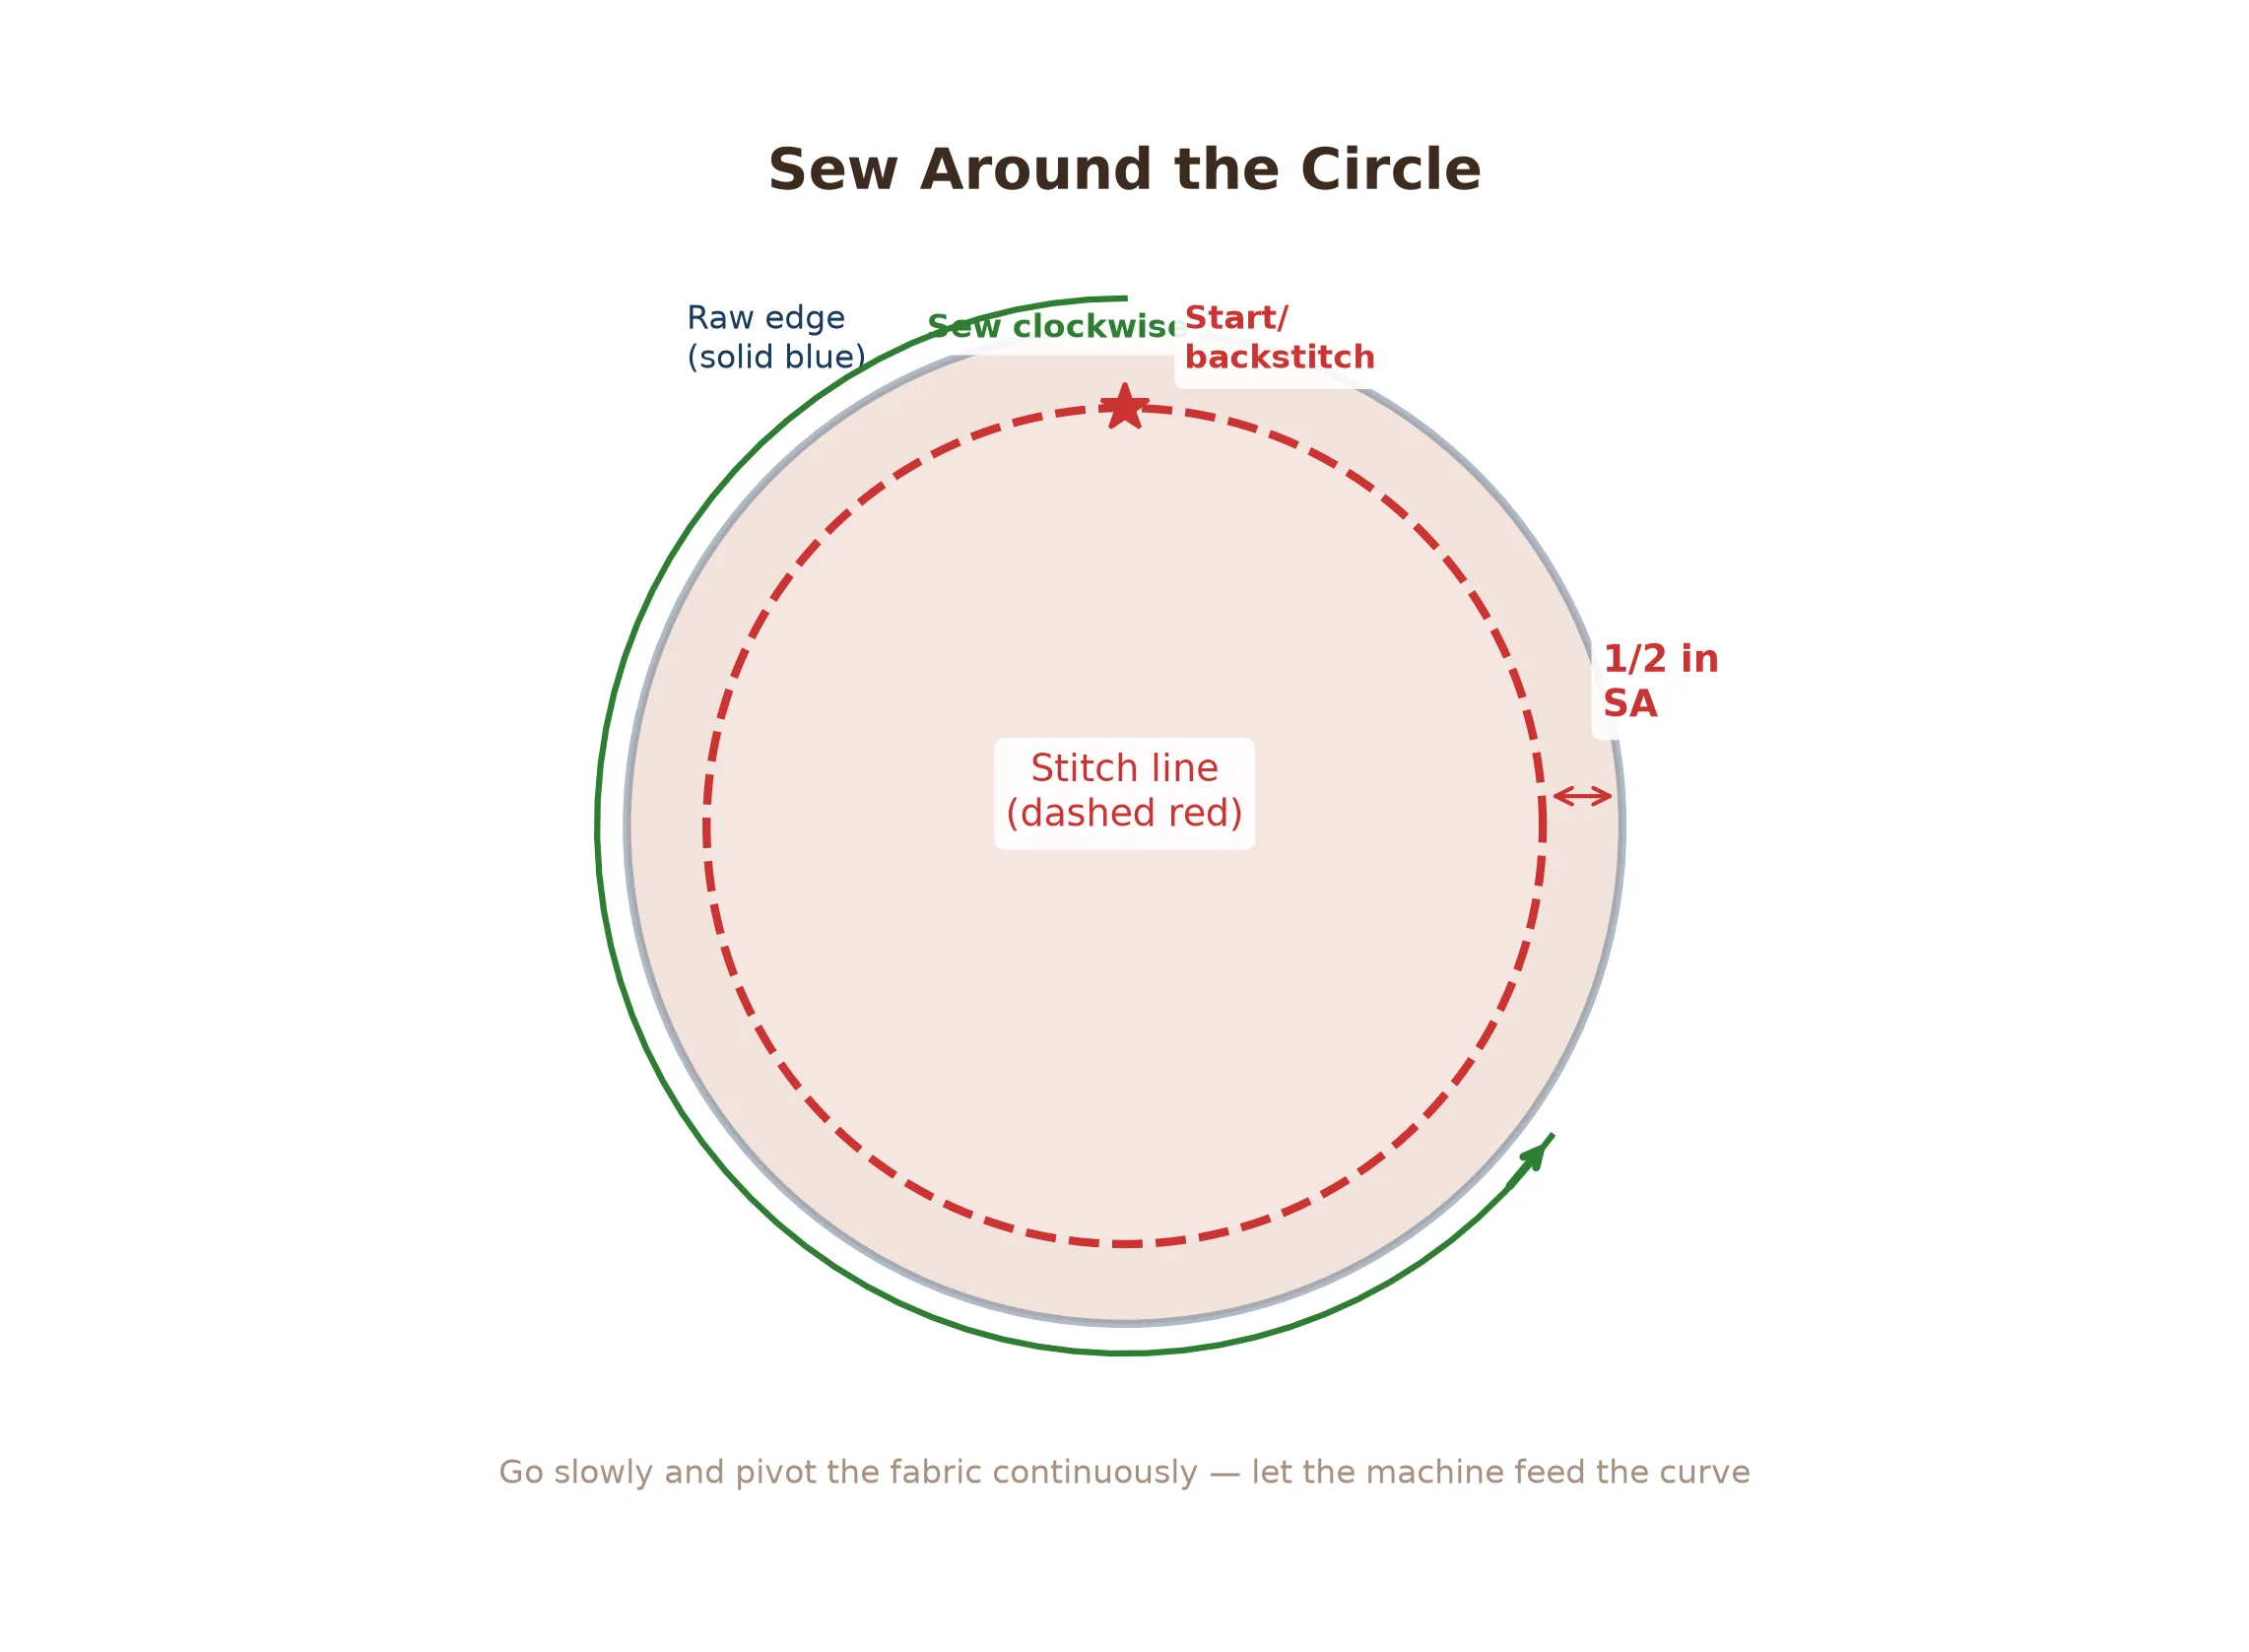
Carry your pinned cushion cover to the sewing machine. Using a straight stitch set to a medium length of 2.5 mm, begin sewing at any point along the curved edge with a ½-inch seam allowance. The key to sewing a smooth circle is to go slowly and pivot the fabric continuously rather than trying to sew in a straight line. Keep your eyes on the seam allowance guide on your needle plate, not on the needle itself, and gently rotate the fabric with both hands as you stitch. When you reach the area where the back pieces overlap, simply sew through all three layers — the machine will handle the extra thickness without any trouble. Continue stitching all the way around the circle until you return to your starting point. Backstitch for about ½ inch to secure the seam, then trim the thread tails.
Clip and Notch the Curves
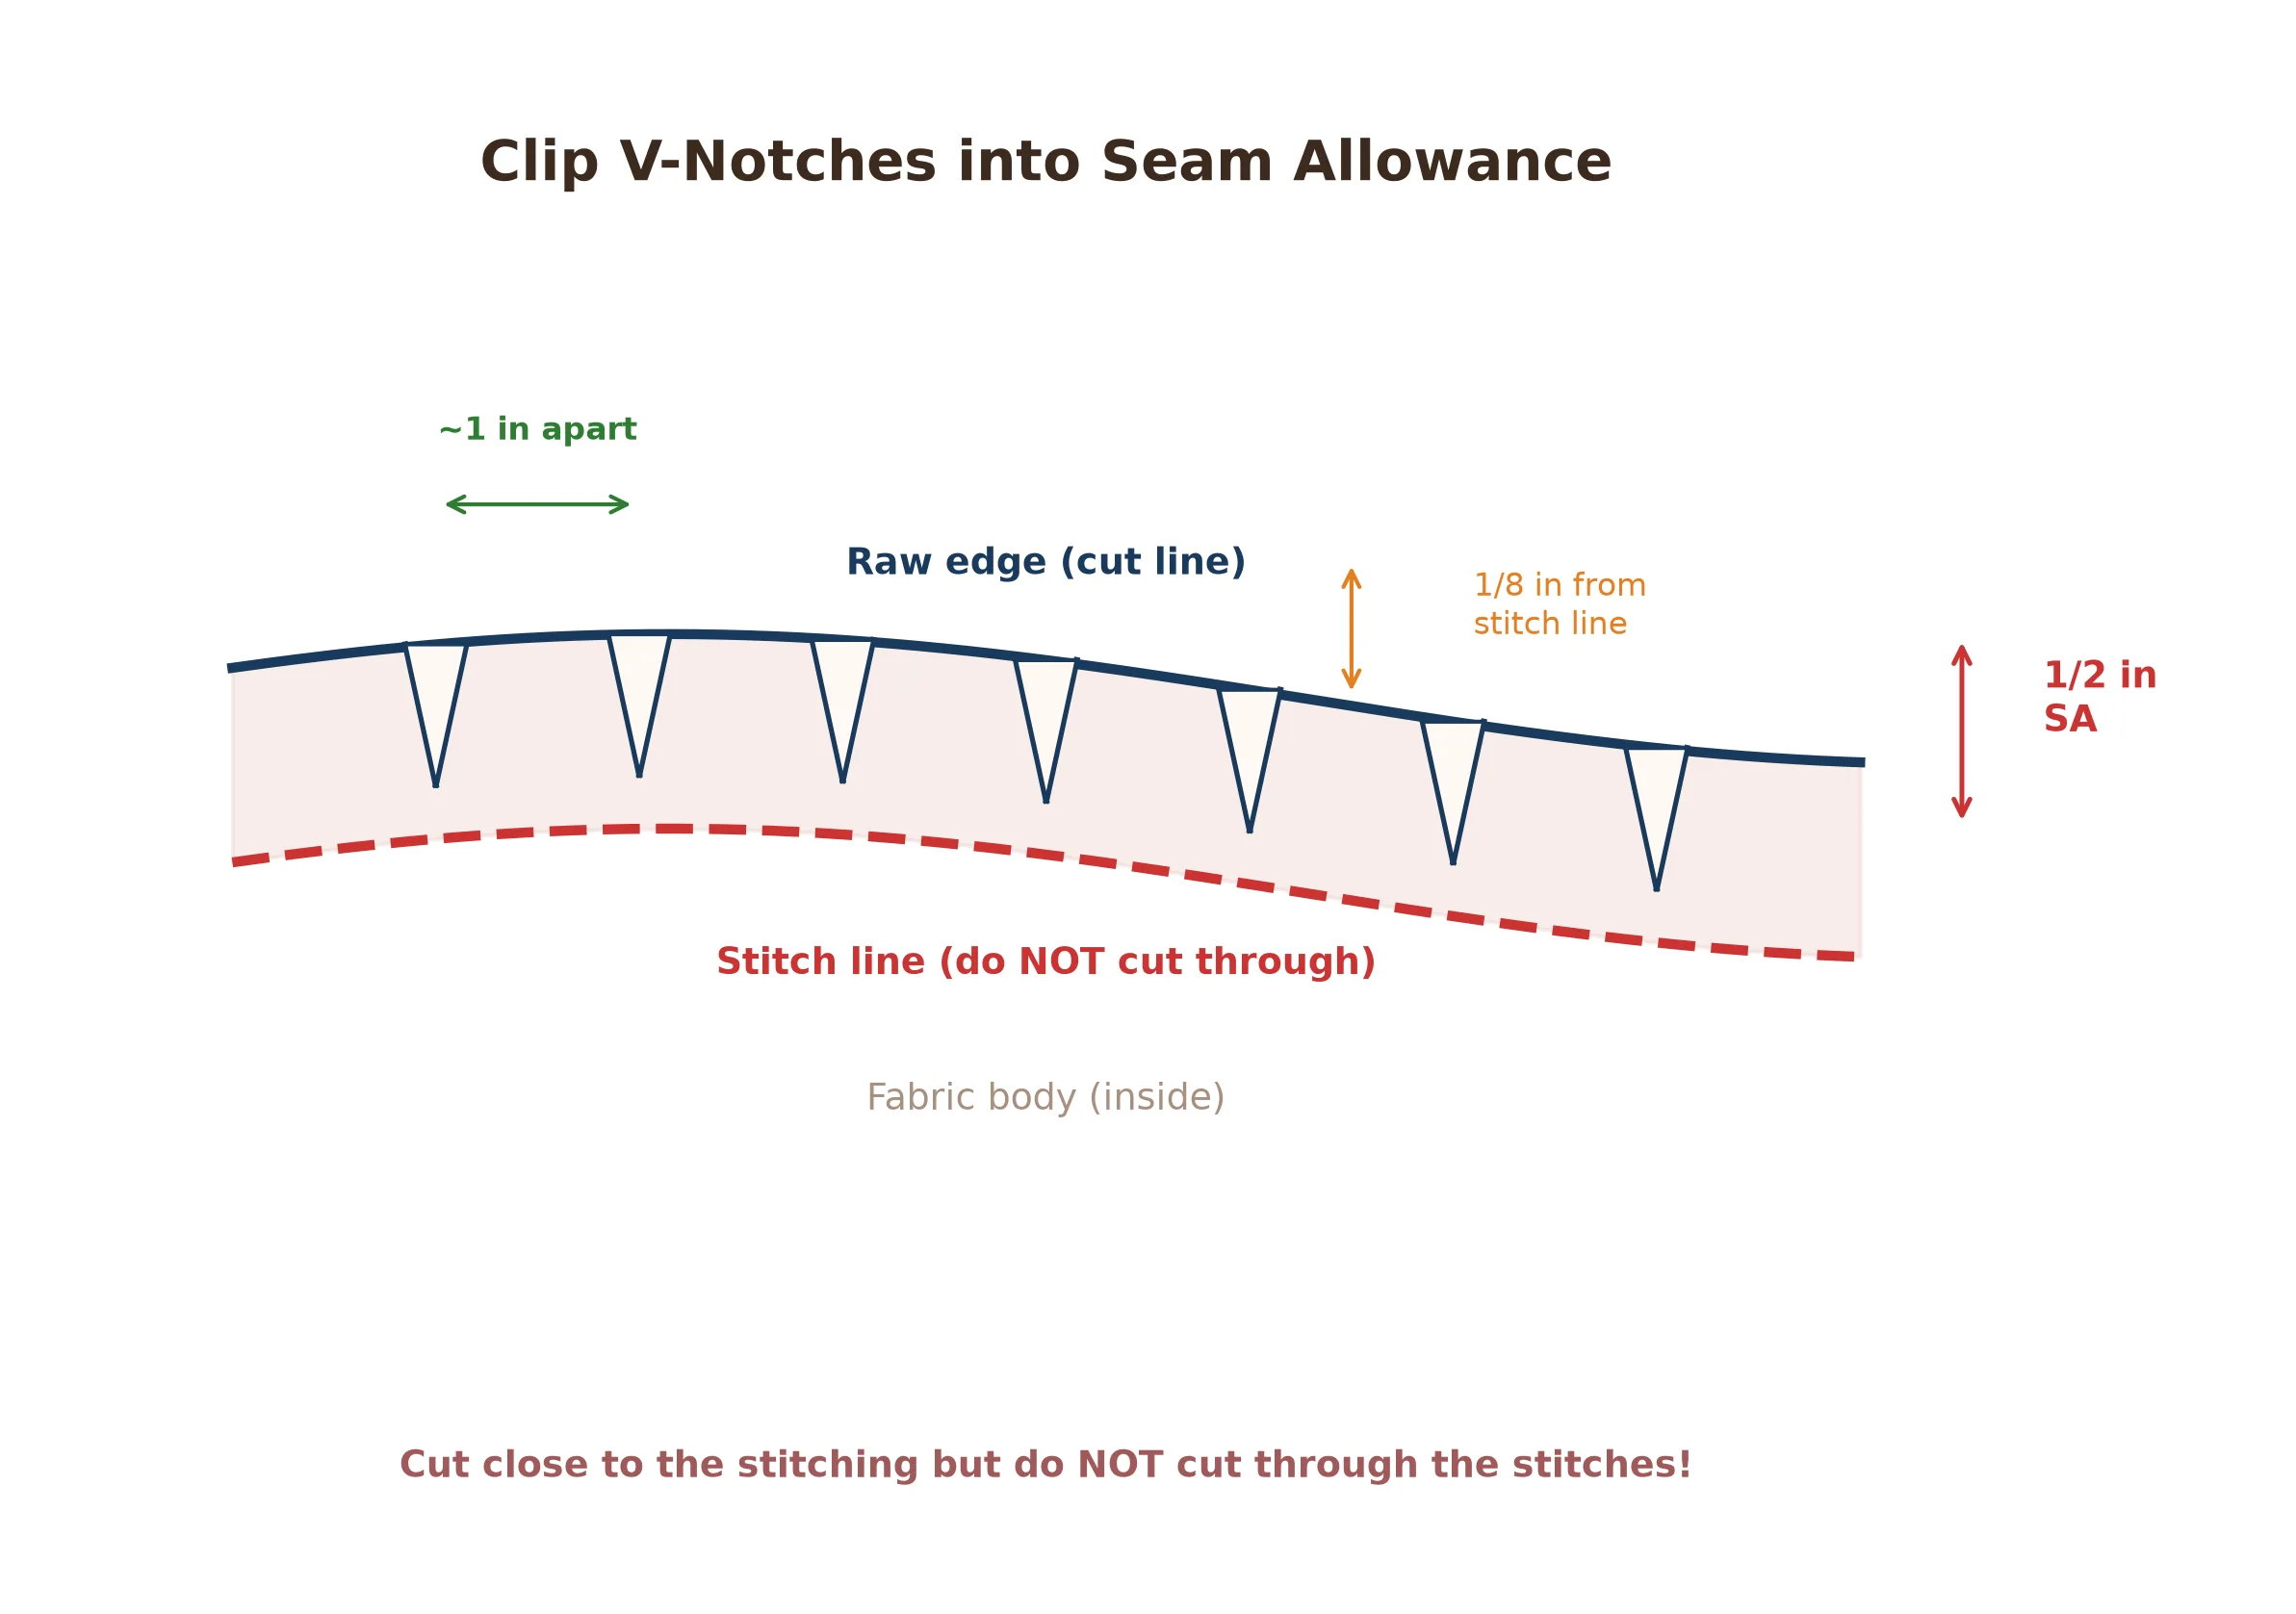
This is the step that transforms a puckered, lumpy circle into a smooth, professional-looking cushion cover, so do not skip it. Using sharp scissors, cut small V-shaped notches into the seam allowance all the way around the circle, spacing them approximately 1 inch apart. Each notch should cut deep into the seam allowance, stopping about ⅛ inch from your stitching line — close enough to release the tension but not so close that you risk cutting through your stitches. On tighter curves, you may want to space the notches even closer together, about ¾ inch apart. The purpose of these notches is to remove excess fabric bulk from the seam allowance so that when the cover is turned right side out, the curved edge can spread open and lie flat instead of bunching up and creating unsightly puckers.
Turn, Press, and Finish
Reach through the envelope opening in the back and carefully pull the entire cover right side out. Use a blunt tool such as a chopstick or a point turner to gently push the seam out along the curved edge, working your way around the full circumference until the seam sits crisply on the very edge of the cushion. Press the entire cover with a warm iron, paying special attention to the curved seam and the overlap opening on the back. The cover should now look smooth, round, and beautifully finished. Slide your 16-inch round cushion insert through the envelope opening, adjust the fabric so it is evenly distributed, and fluff the cushion into shape. Stand back and admire your work — you have just sewn a professional-quality round cushion cover from scratch!