How to Sew a Simple Kitchen Apron with Bib and Pocket
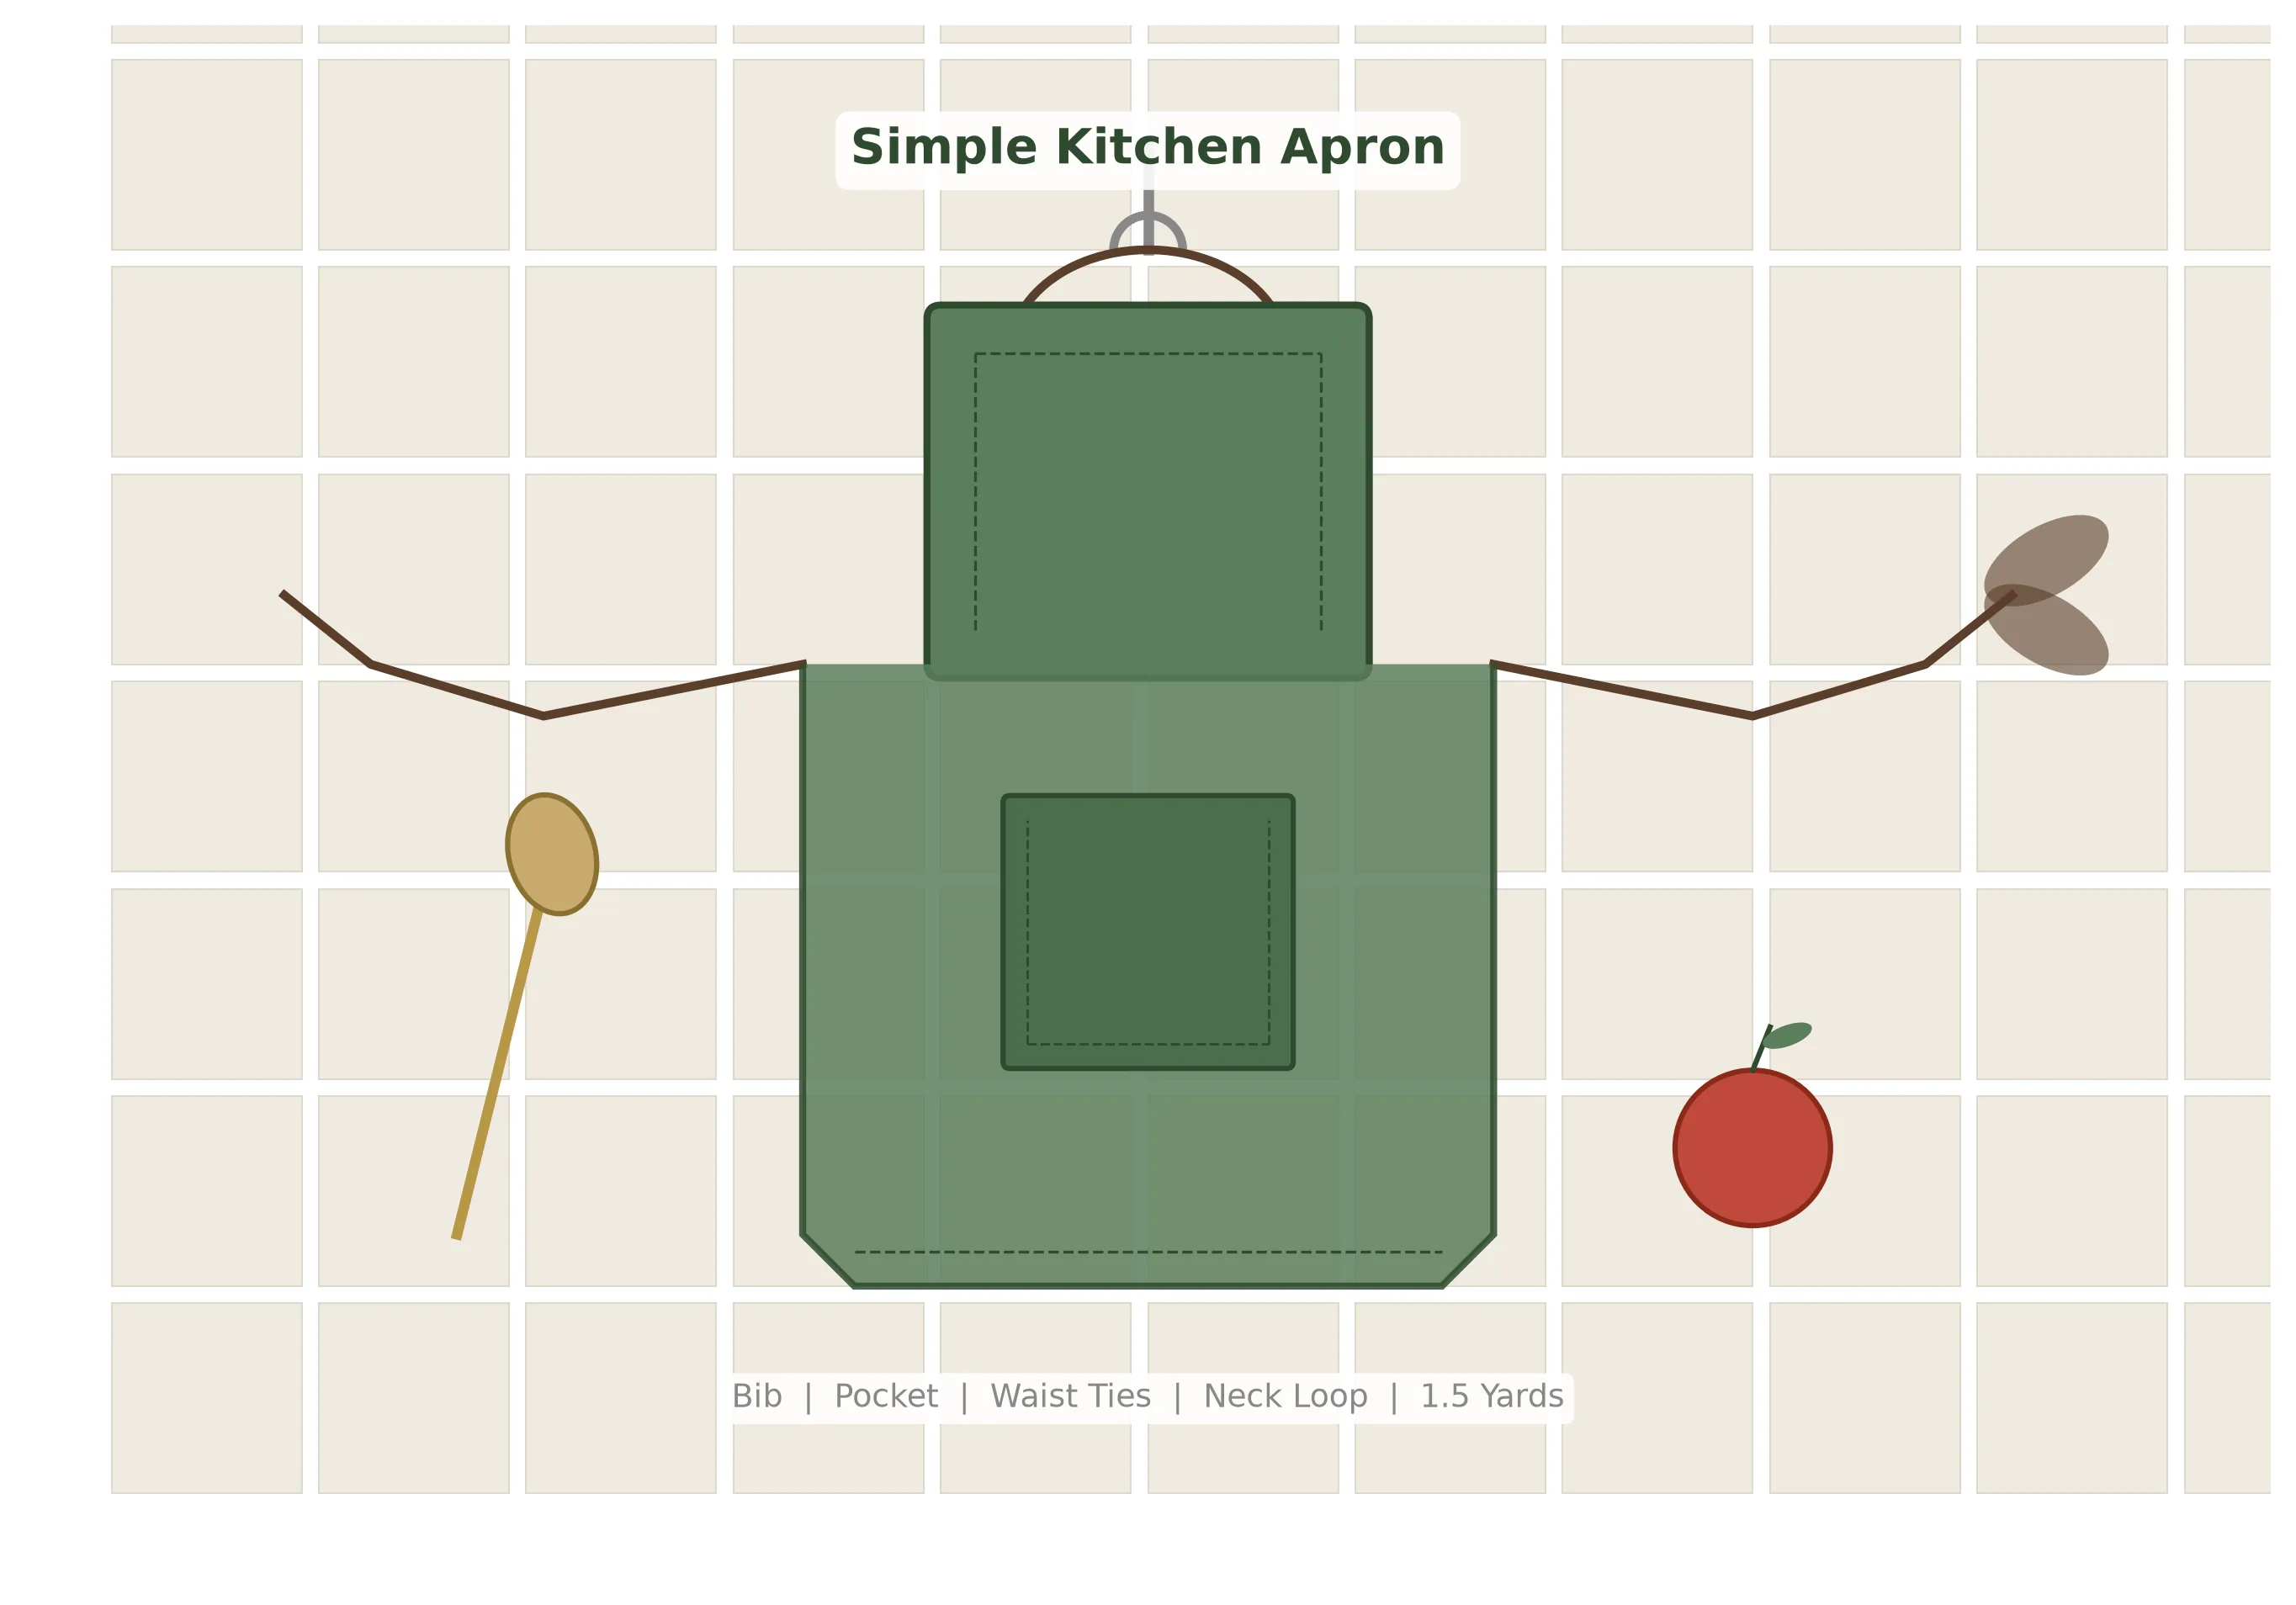
Every sewist needs an apron, and there is no better apron than one you have made yourself. A handmade apron is one of those rare projects that is simultaneously practical, personal, and deeply satisfying to use every single day. It protects your clothes from flour dust and tomato splatters, keeps your phone and measuring spoons within easy reach in its front pocket, and makes you feel like a proper maker every time you tie the strings behind your back. The simple apron is also one of the most forgiving projects in all of sewing. There are no zippers, no buttonholes, no curved seams, and no fitting issues to worry about. The entire apron is constructed from straight lines and rectangles, making it an ideal project for beginners who want to practice their hemming, topstitching, and seam construction skills on something they will actually use every day. In this tutorial, you will learn how to cut and assemble a classic bib apron with a full skirt, adjustable waist ties, a comfortable neck loop, and a generous front pocket. The construction is straightforward enough to complete in a single afternoon, and the result is a beautiful, functional apron that makes a wonderful gift for the cooks, bakers, gardeners, and crafters in your life. Once you have mastered the basic construction, you will find it easy to customize the apron with different fabrics, trims, pocket shapes, and tie lengths to suit any recipient or occasion.
What You Will Learn
This project brings together many of the foundational skills you have been building throughout the First Stitches series. You will practice sewing precise hems on multiple edges, constructing narrow fabric tubes for the ties and neck loop, attaching a patch pocket with clean topstitching, and joining two large panels together with a strong, flat seam. The apron also introduces you to the concept of topstitching as both a functional and decorative technique — the visible rows of stitching along the hems, pocket, and bib edges not only hold the fabric folds in place but also add a crisp, professional finish that elevates the entire project. You will learn how to press each component before assembling the whole, which is the secret to achieving the clean, flat look that distinguishes a handmade apron from a store-bought one. These skills transfer directly to garment sewing, where hems, facings, pockets, and topstitching are used on virtually every pattern you will encounter.
Materials and Tools
What You Need
- 1.5 yards (1.4 m) medium-weight cotton, 44 in wide
- Matching all-purpose polyester thread
- Sewing machine with standard presser foot
- Fabric scissors or rotary cutter and mat
- Straight pins or sewing clips
- Measuring tape and clear ruler
- Fabric marker, tailor's chalk, or water-soluble pen
- Safety pin or loop turner (for ties)
- Iron and ironing board
- Point turner or chopstick
Choosing Your Fabric
A kitchen apron needs to be durable, absorbent, and easy to wash, which makes medium-weight cotton the ideal choice. Quilting cotton works beautifully and comes in an endless variety of cheerful prints — think fruits, vegetables, herbs, gingham checks, and vintage kitchen motifs. Cotton-linen blends are another excellent option, offering a slightly more textured, rustic look that softens beautifully with each wash. For a heavier-duty apron that will stand up to serious cooking sessions, consider a lightweight canvas or denim, though you may need to increase your needle size to a 90/14 and use a longer stitch length to handle the thicker fabric. Avoid synthetic fabrics like polyester or nylon, which do not absorb spills well and can melt if they come into contact with a hot pan or open flame. Stretchy knit fabrics are also not recommended because they will sag and lose their shape over time. Whatever fabric you choose, pre-wash and dry it before cutting to eliminate any shrinkage that could warp the apron after its first trip through the laundry. A pre-washed apron will also be softer and more comfortable to wear from the very first use.
Cutting Layout
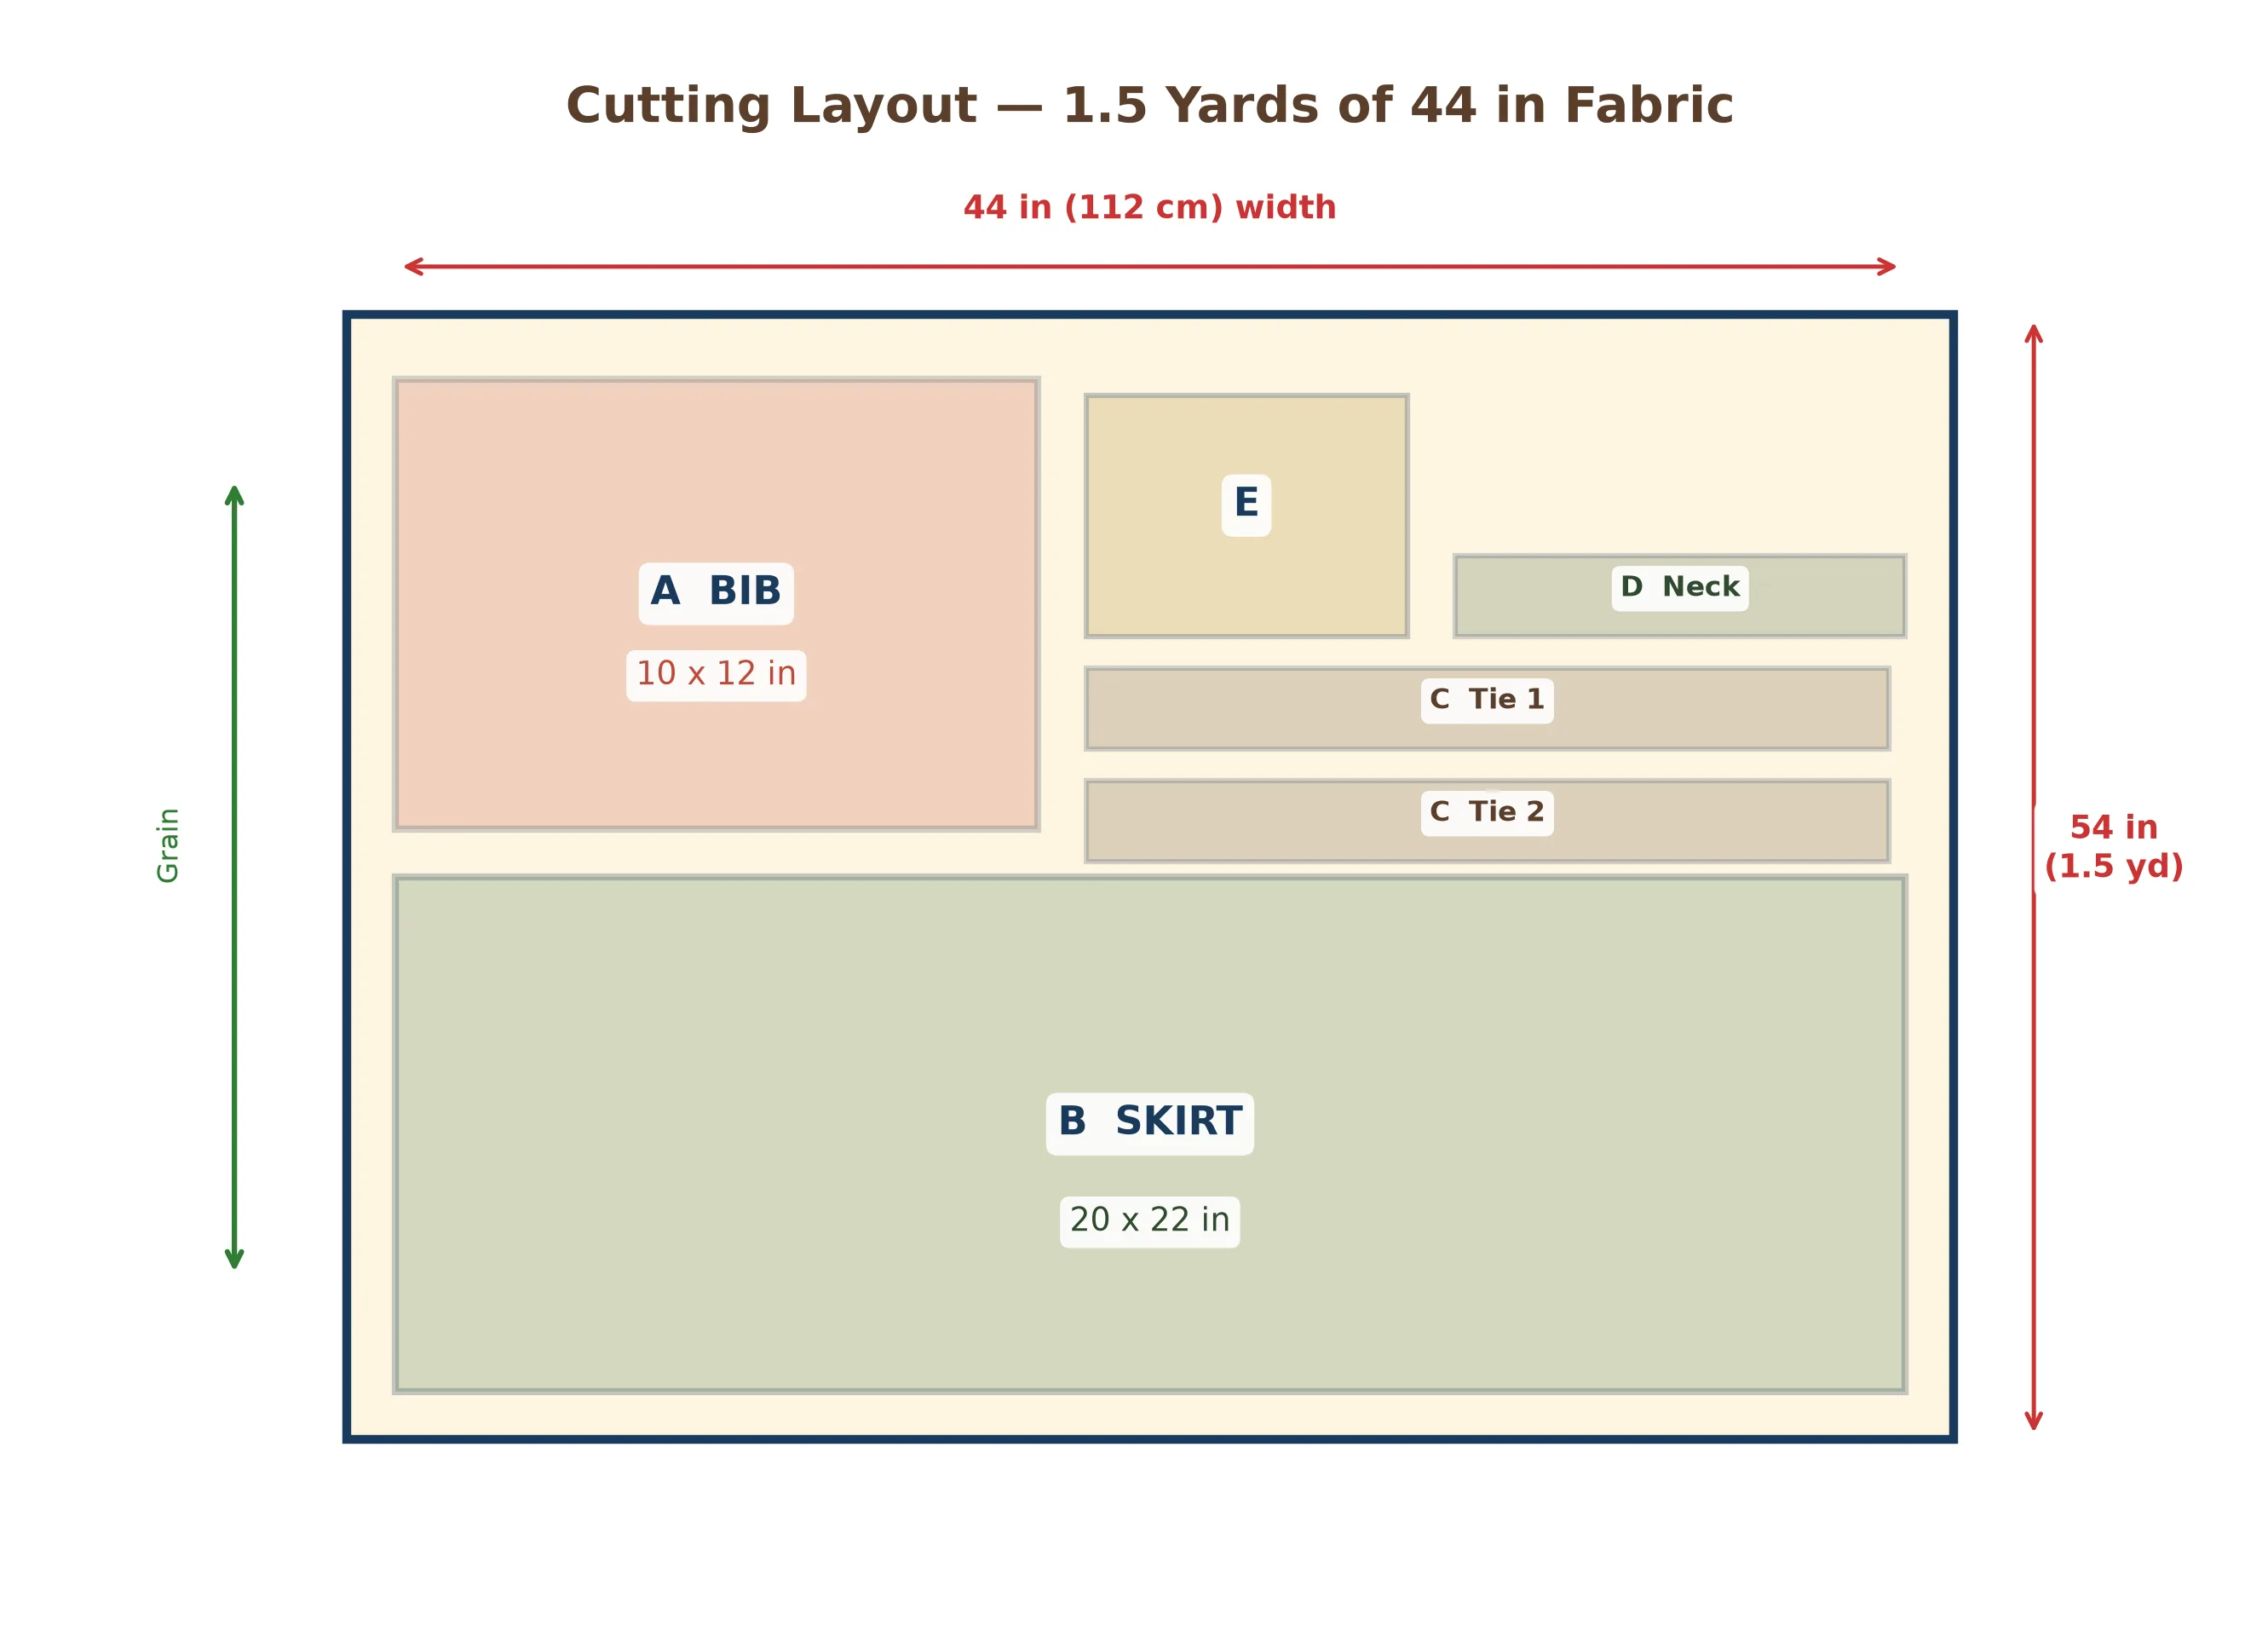
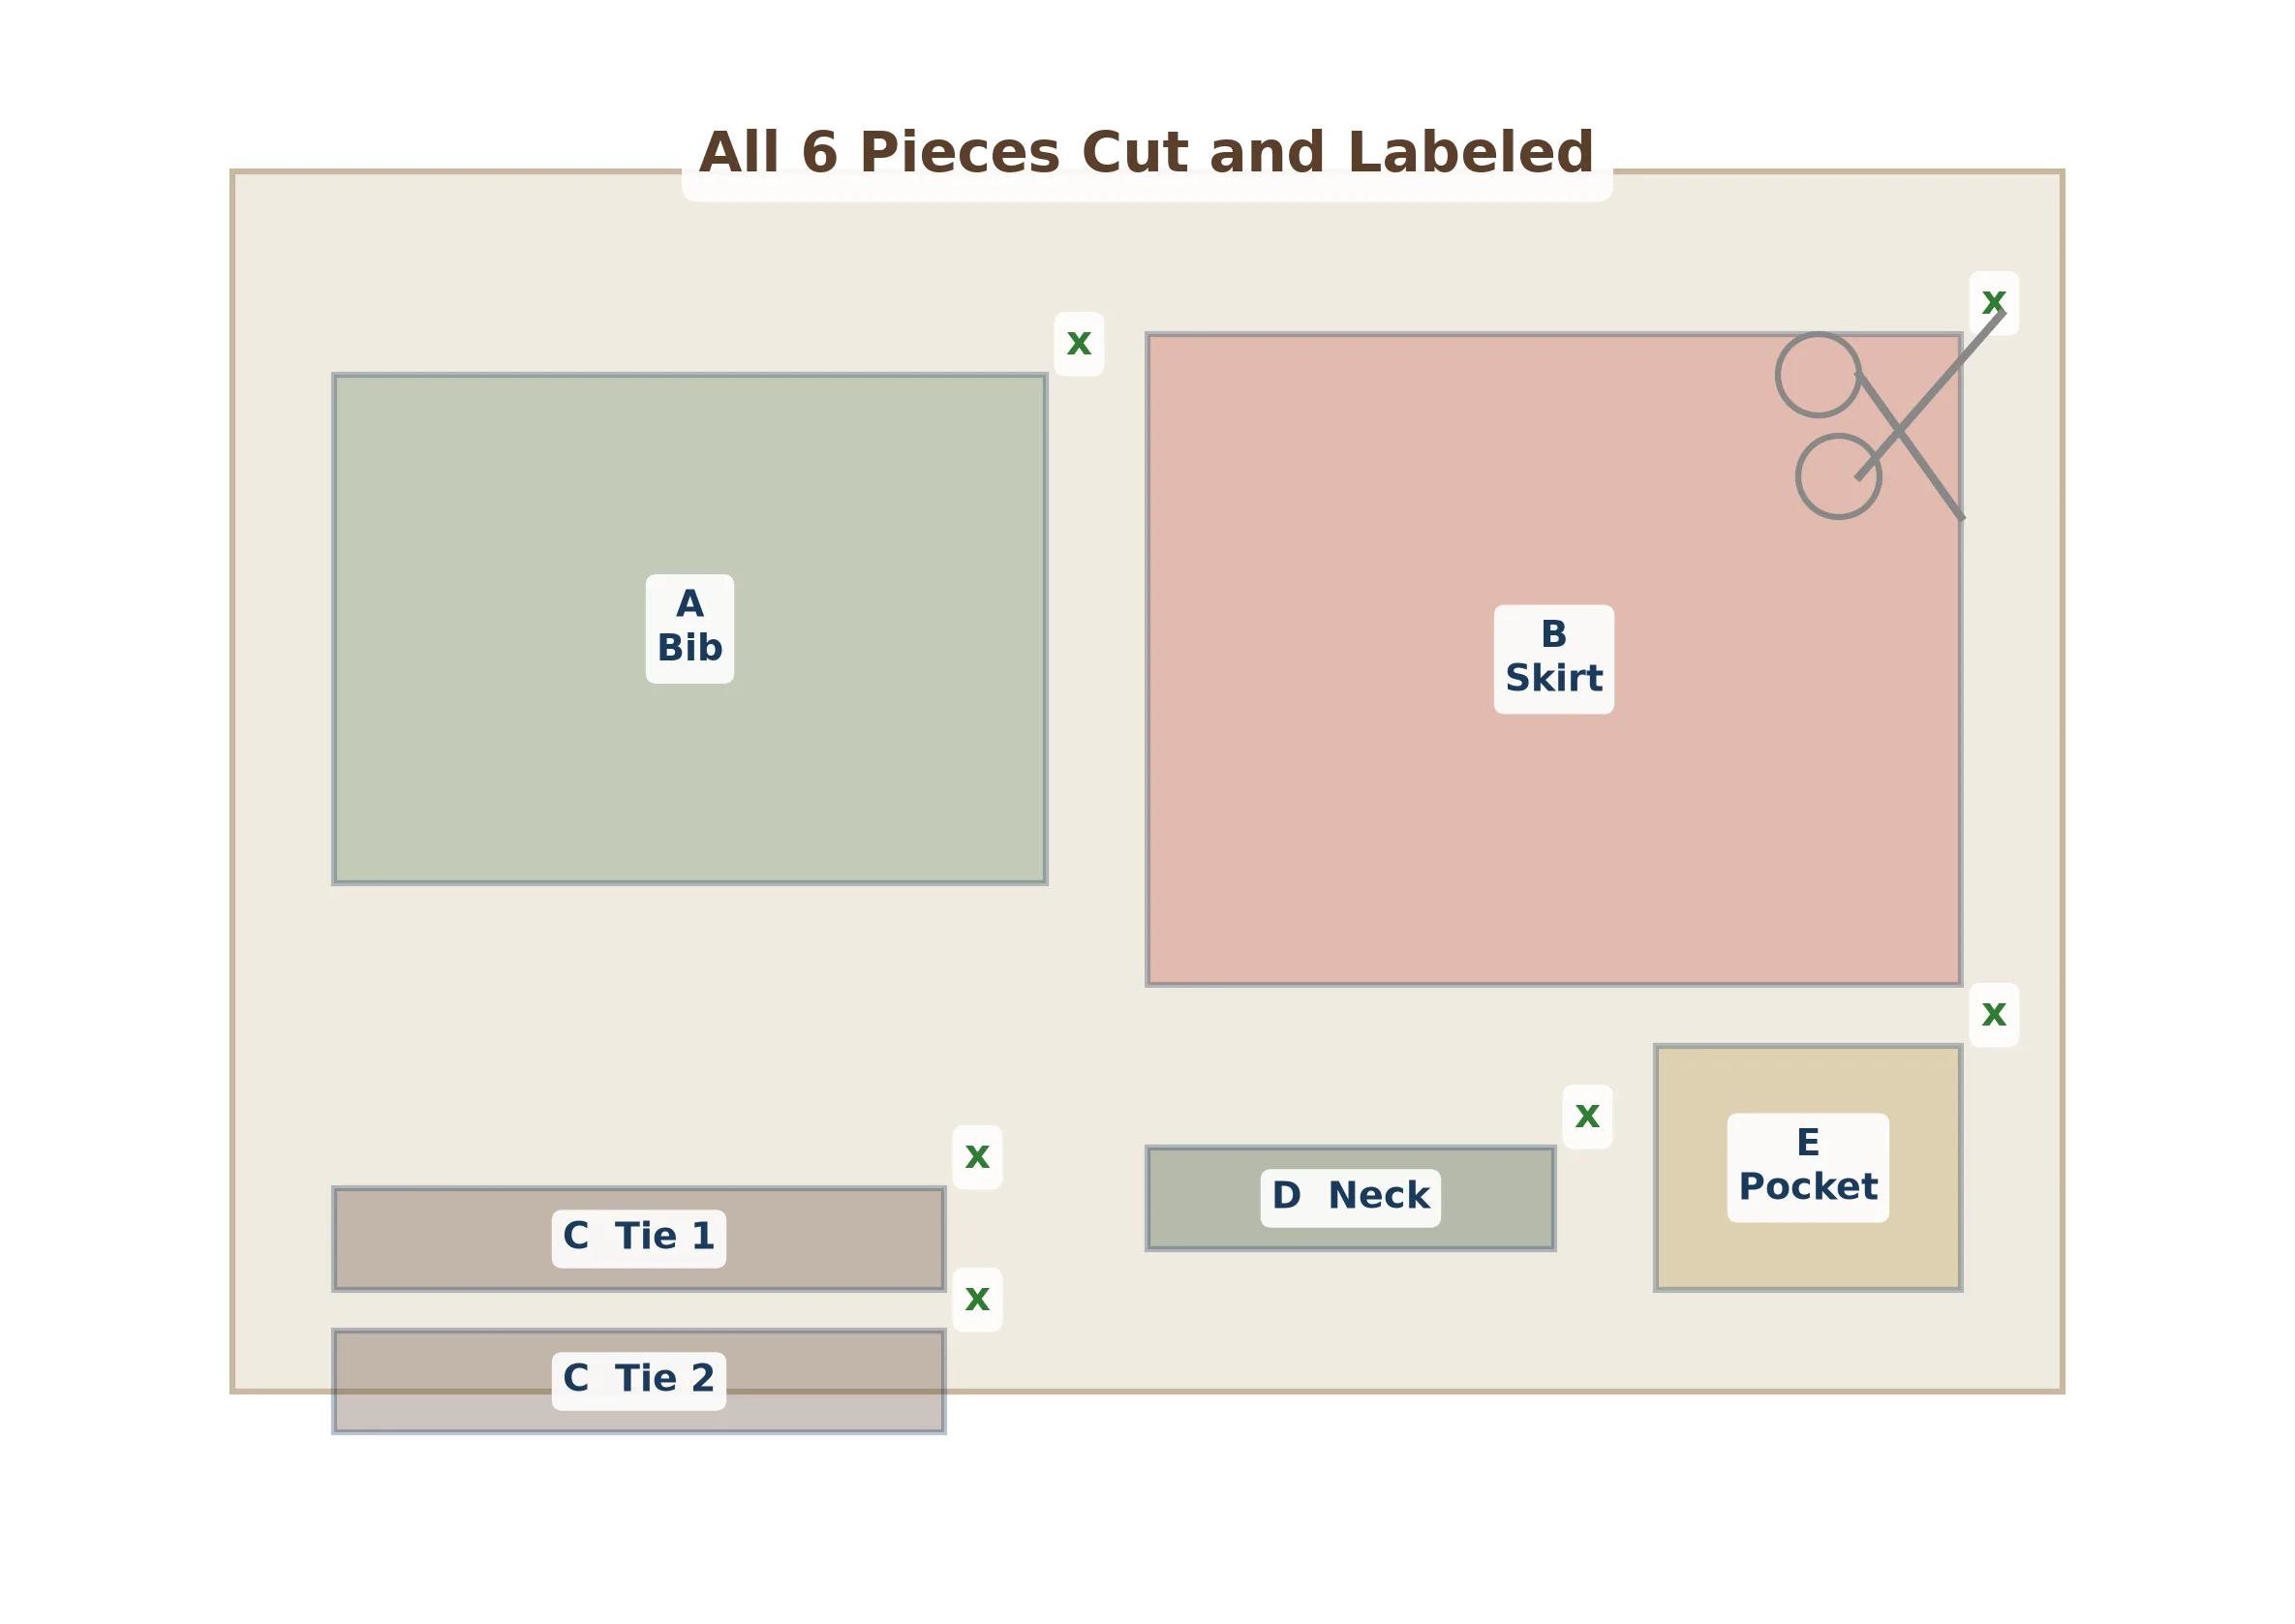
From your 1.5 yards of 44-inch-wide fabric, you need to cut six pieces: one bib rectangle, one skirt rectangle, two waist tie strips, one neck loop strip, and one pocket rectangle. The most efficient layout places the large skirt panel across the full width of the fabric at one end, with the bib panel and pocket cut from the remaining length alongside the tie strips. The tie and neck loop strips are narrow and long, so they fit neatly into the gaps left by the wider pieces. If your fabric has a directional print, make sure the skirt and bib are oriented so the pattern runs upright when the apron is worn. The layout below shows the recommended arrangement for minimal fabric waste.
Pattern Pieces
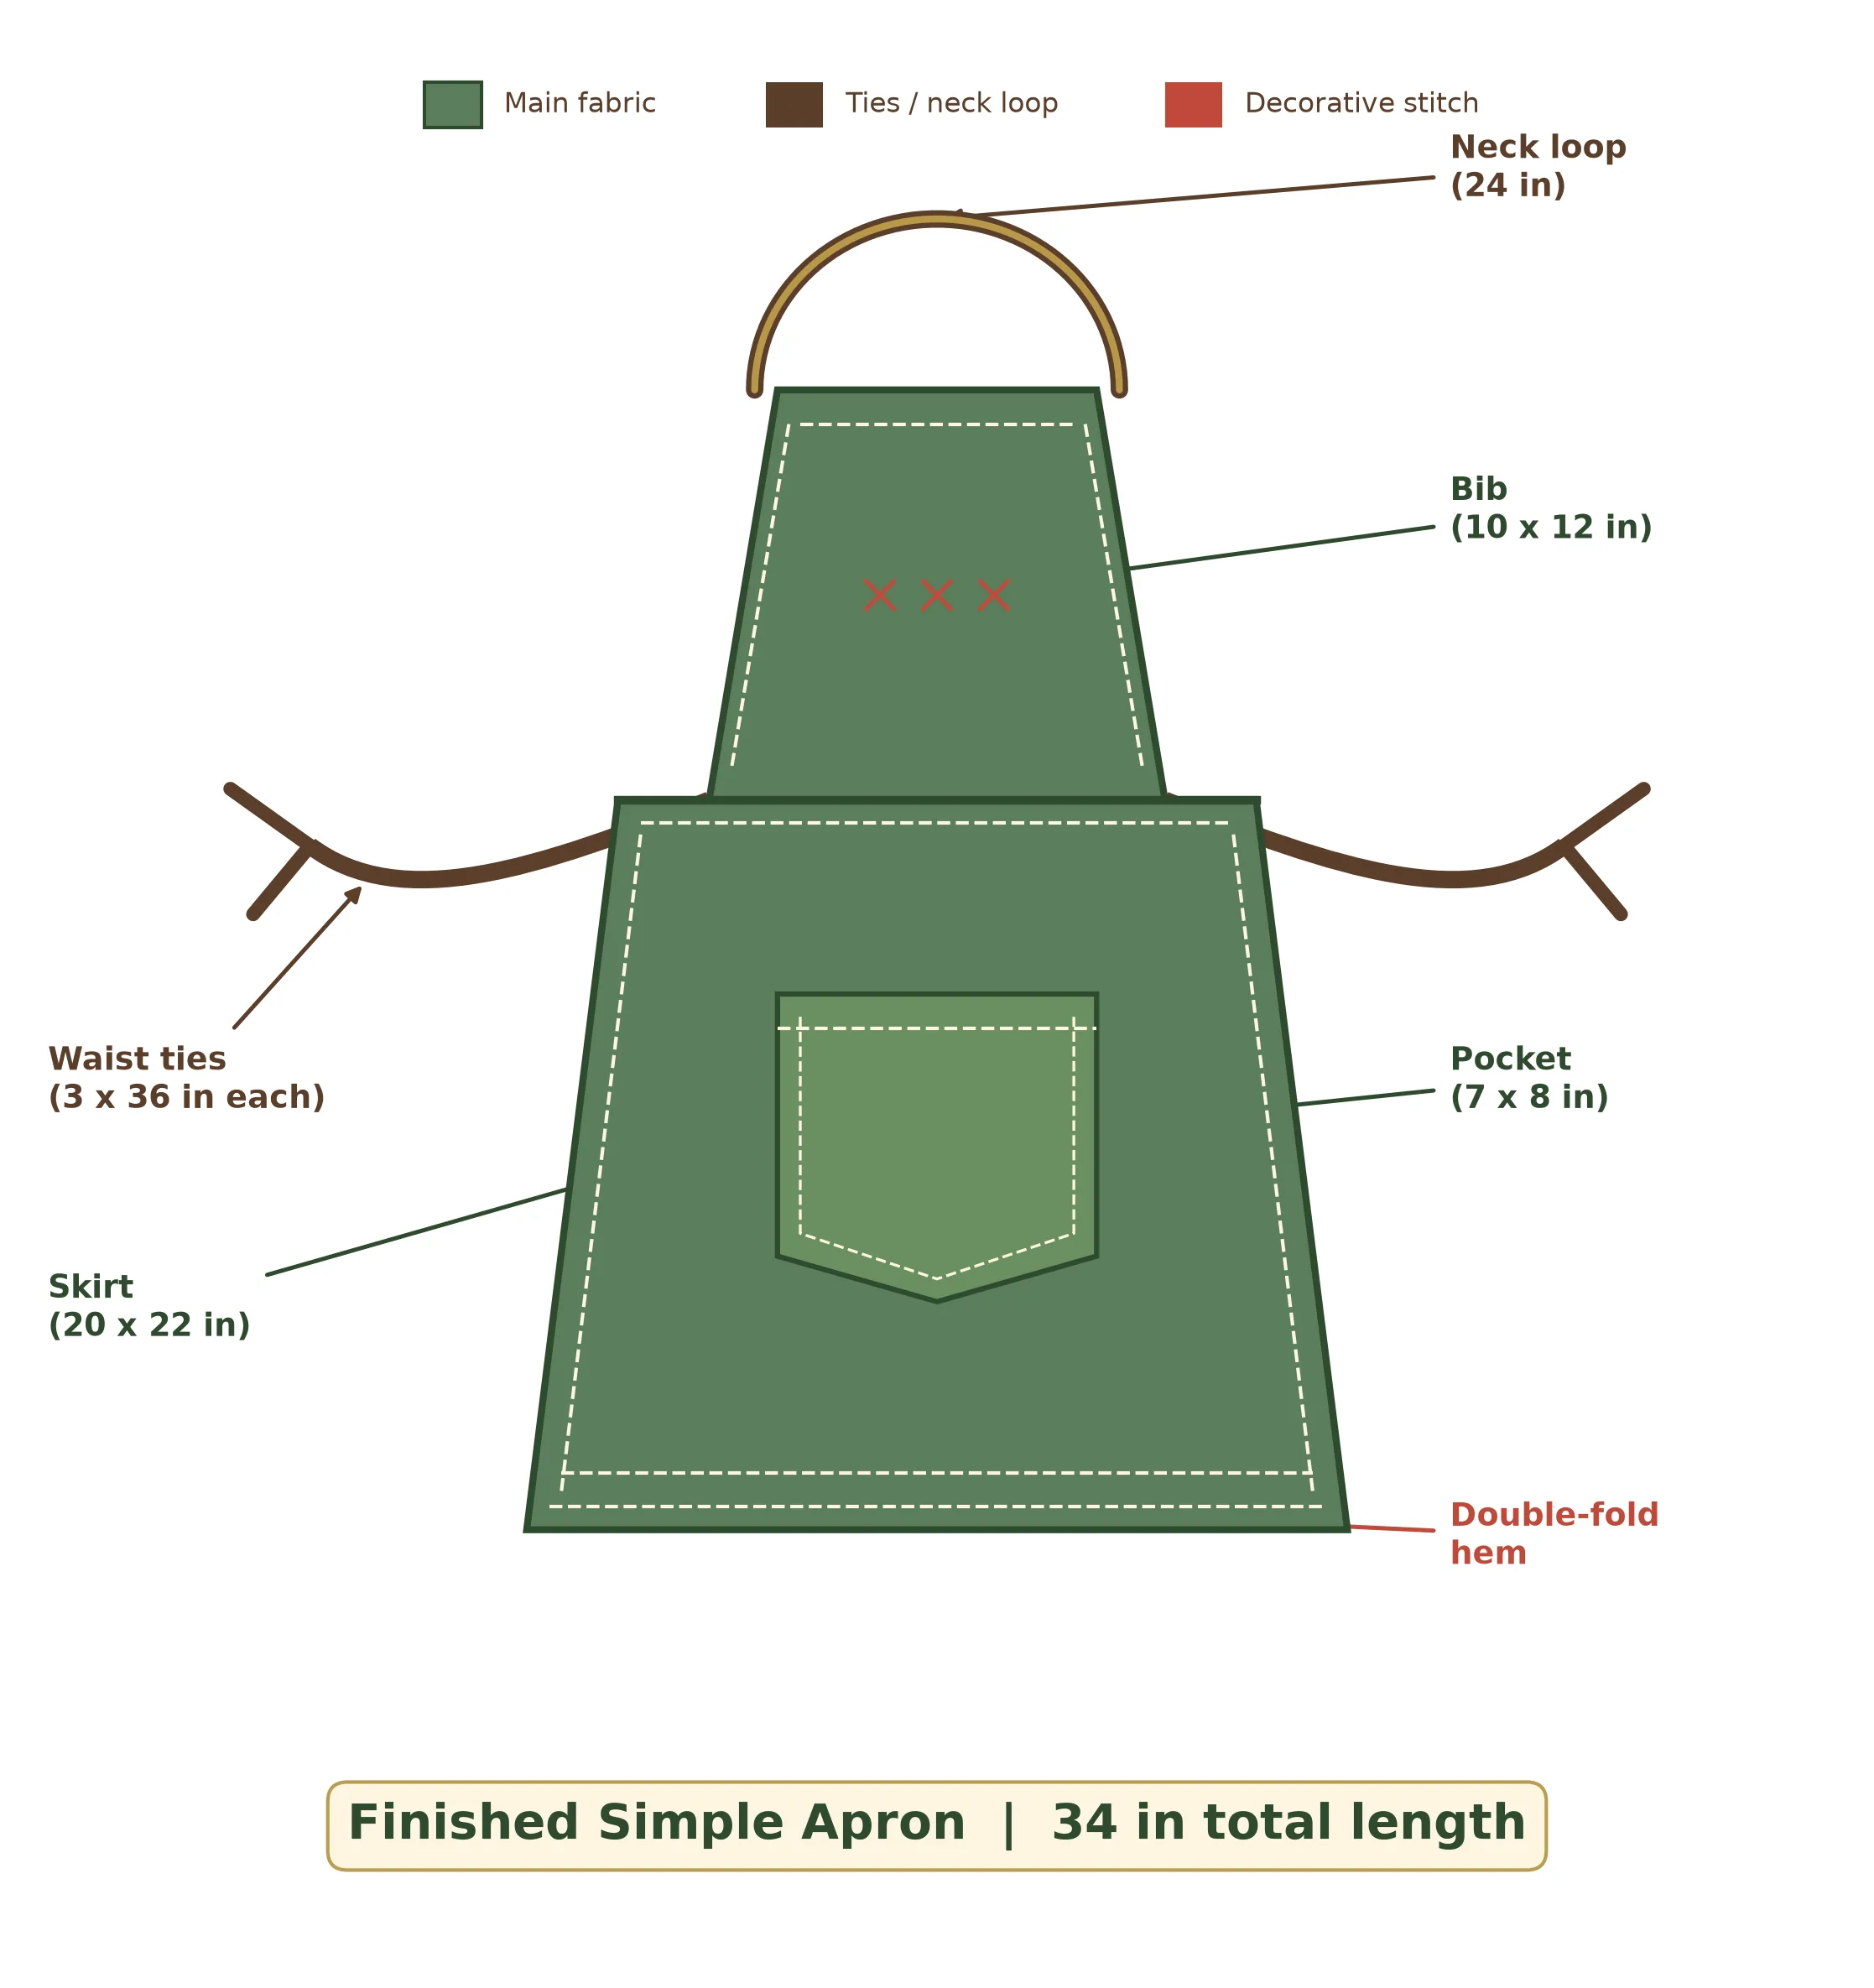
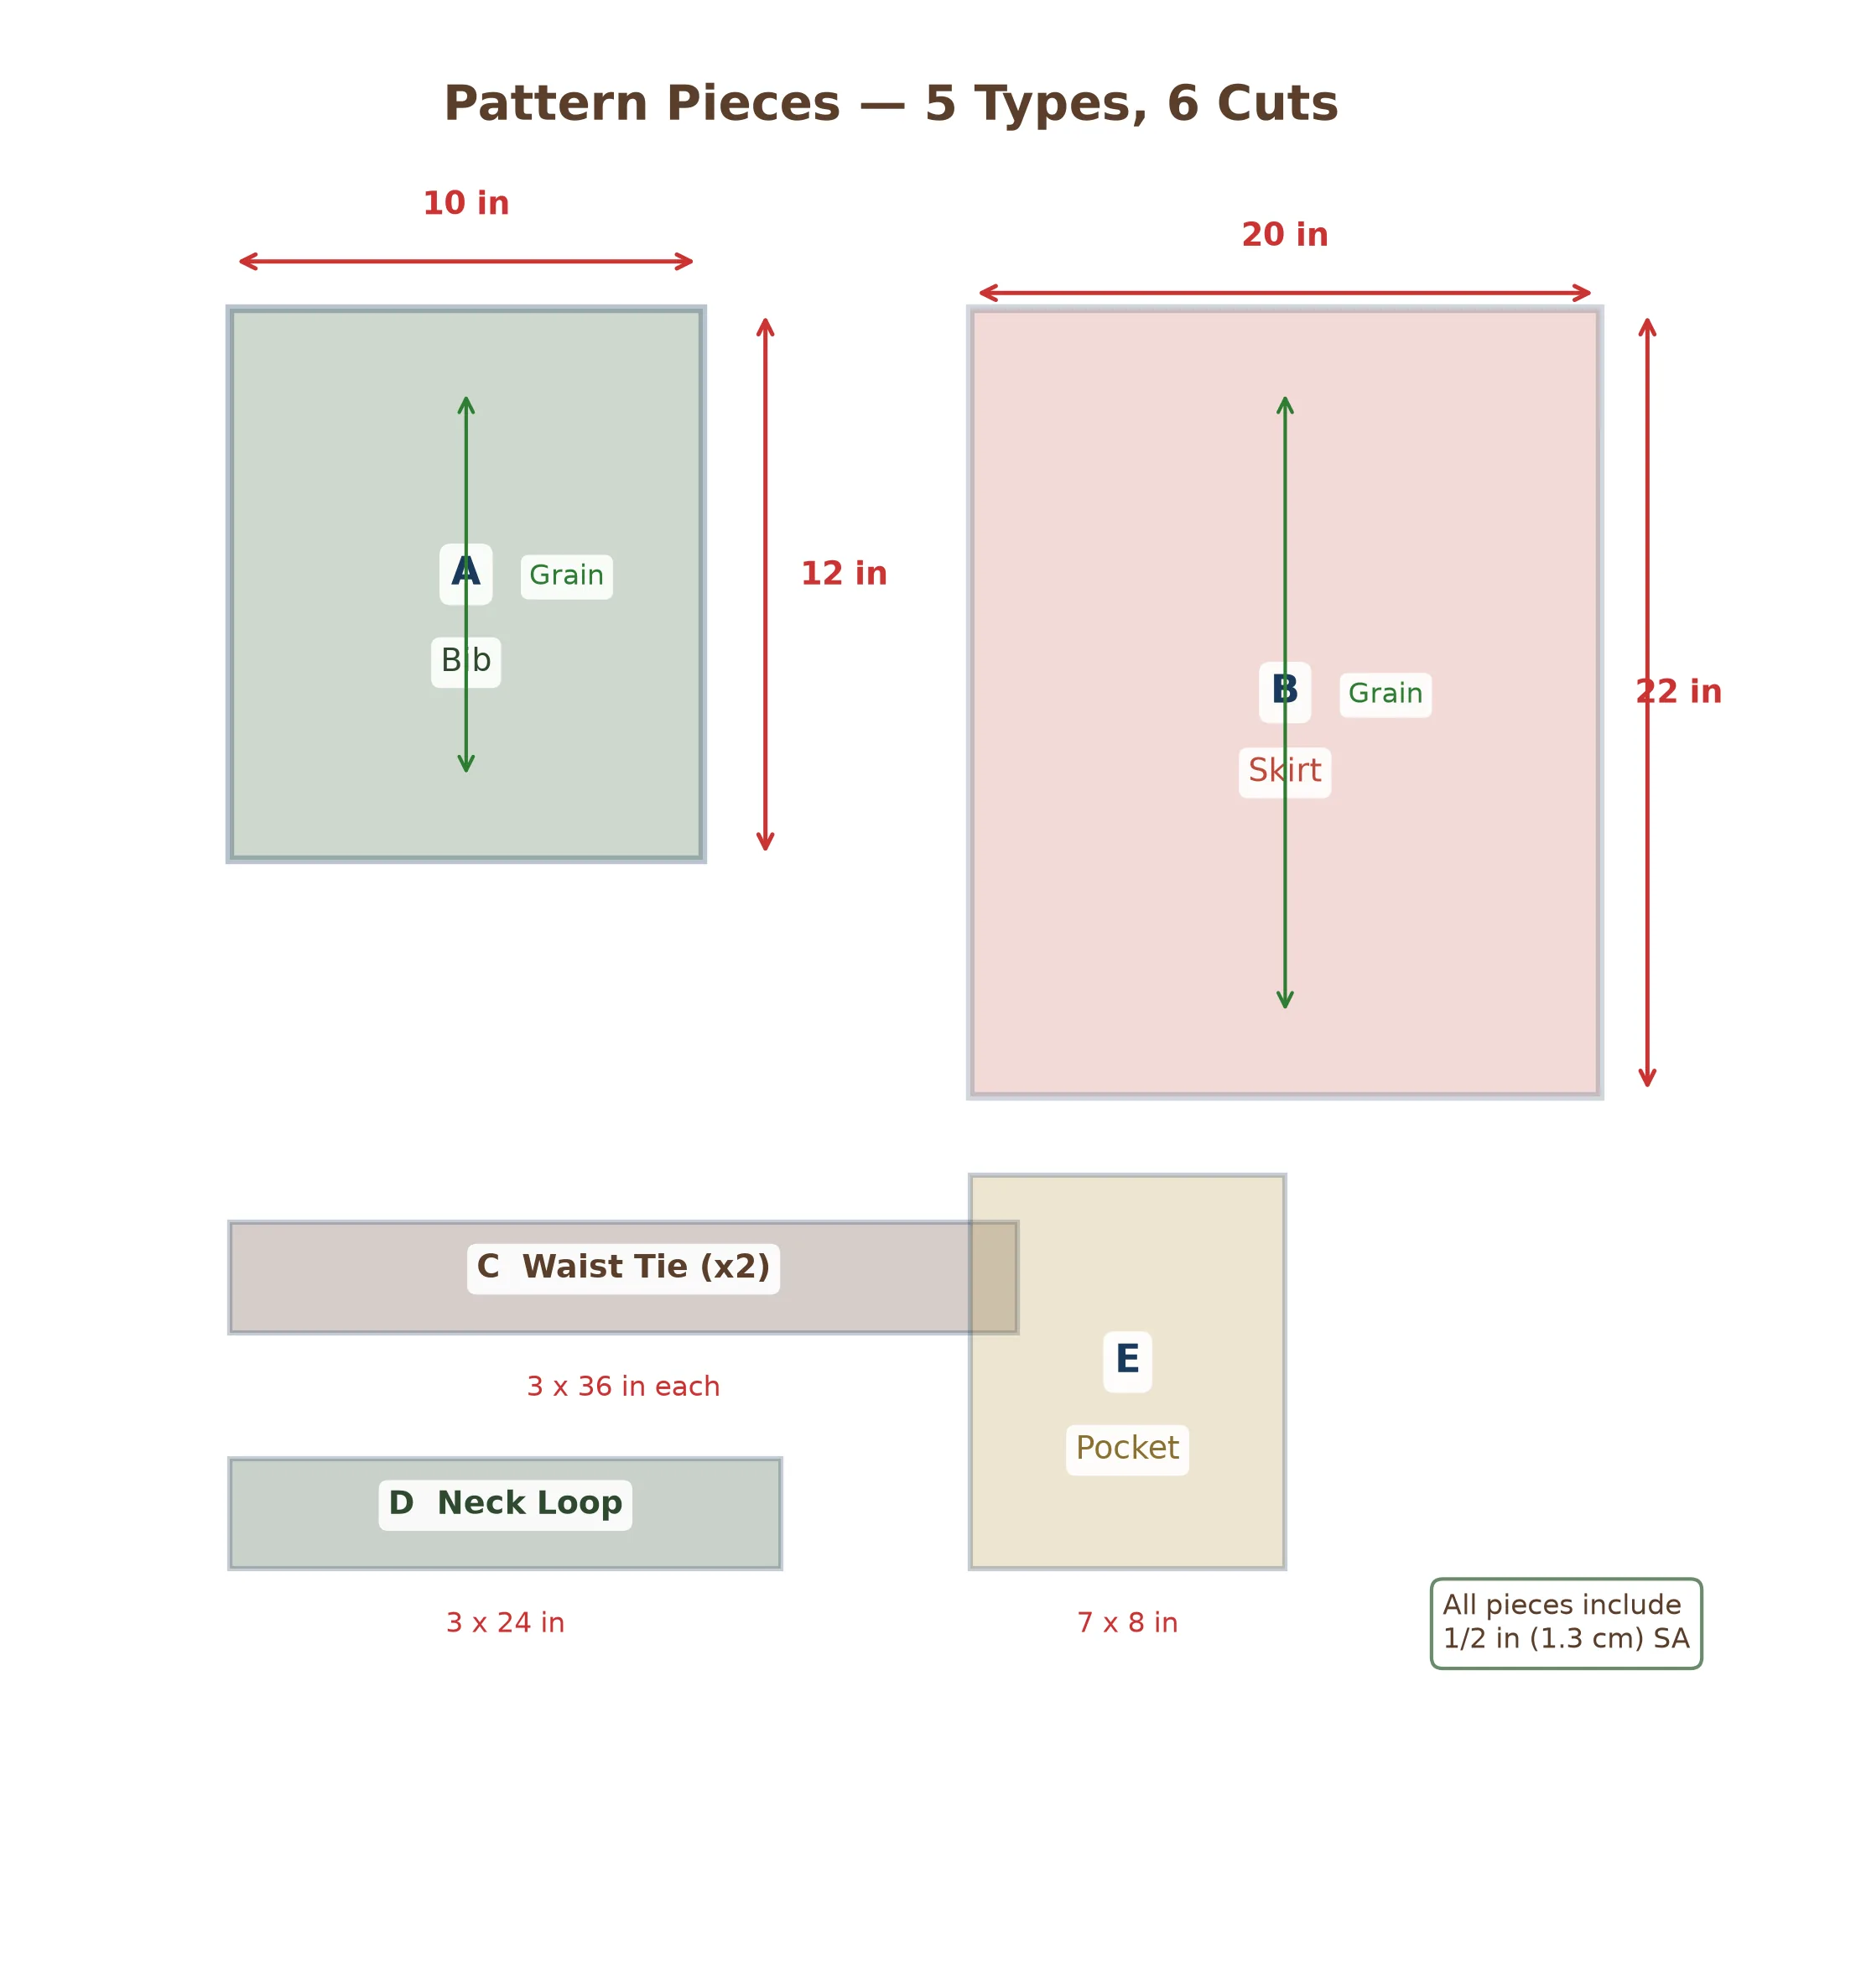
The apron is composed of simple rectangles and strips, so no complex pattern drafting is required. The bib measures 10 × 12 inches and covers the chest from the collarbone to the waist. The skirt measures 20 × 22 inches and wraps around the front of the body from hip to hip. The two waist ties are each 3 × 36 inches, which gives you plenty of length to tie a comfortable bow at the back. The neck loop is 3 × 24 inches, creating a loop that slips over the head and rests comfortably on the neck. The pocket is a single 7 × 8 inch rectangle that is folded and topstitched onto the front of the skirt. All measurements include a ½-inch seam allowance on all sides.
Step-by-Step Instructions
Cut All Six Pieces
Press your pre-washed fabric smooth and lay it flat on your cutting surface. Using your ruler and fabric marker, carefully measure and mark all six pieces according to the dimensions listed above. Cut the skirt panel first, as it is the largest piece and requires the most fabric. Then cut the bib, pocket, and tie strips from the remaining fabric. Double-check each piece against the measurements before cutting, as accuracy at this stage ensures that all the components will fit together properly during assembly. Label each piece with a small piece of masking tape or a chalk mark so you can identify them quickly during the sewing steps.
Hem the Bib Edges
Begin with the bib rectangle. You need to hem the top edge and both side edges; the bottom edge will be joined to the skirt later and does not need hemming. On the wrong side of the fabric, fold the top edge down by ¼ inch and press. Then fold it down again by ½ inch to enclose the raw edge, creating a clean double hem. Pin or clip the hem in place, then edgestitch along the inner folded edge using a straight stitch set to 2.5 mm. Repeat this double-hem process on both side edges of the bib. The result should be a bib with three neatly hemmed edges and one raw edge at the bottom. Press the hems flat with your iron to set the stitches and create crisp, clean lines.
Hem the Skirt Panel
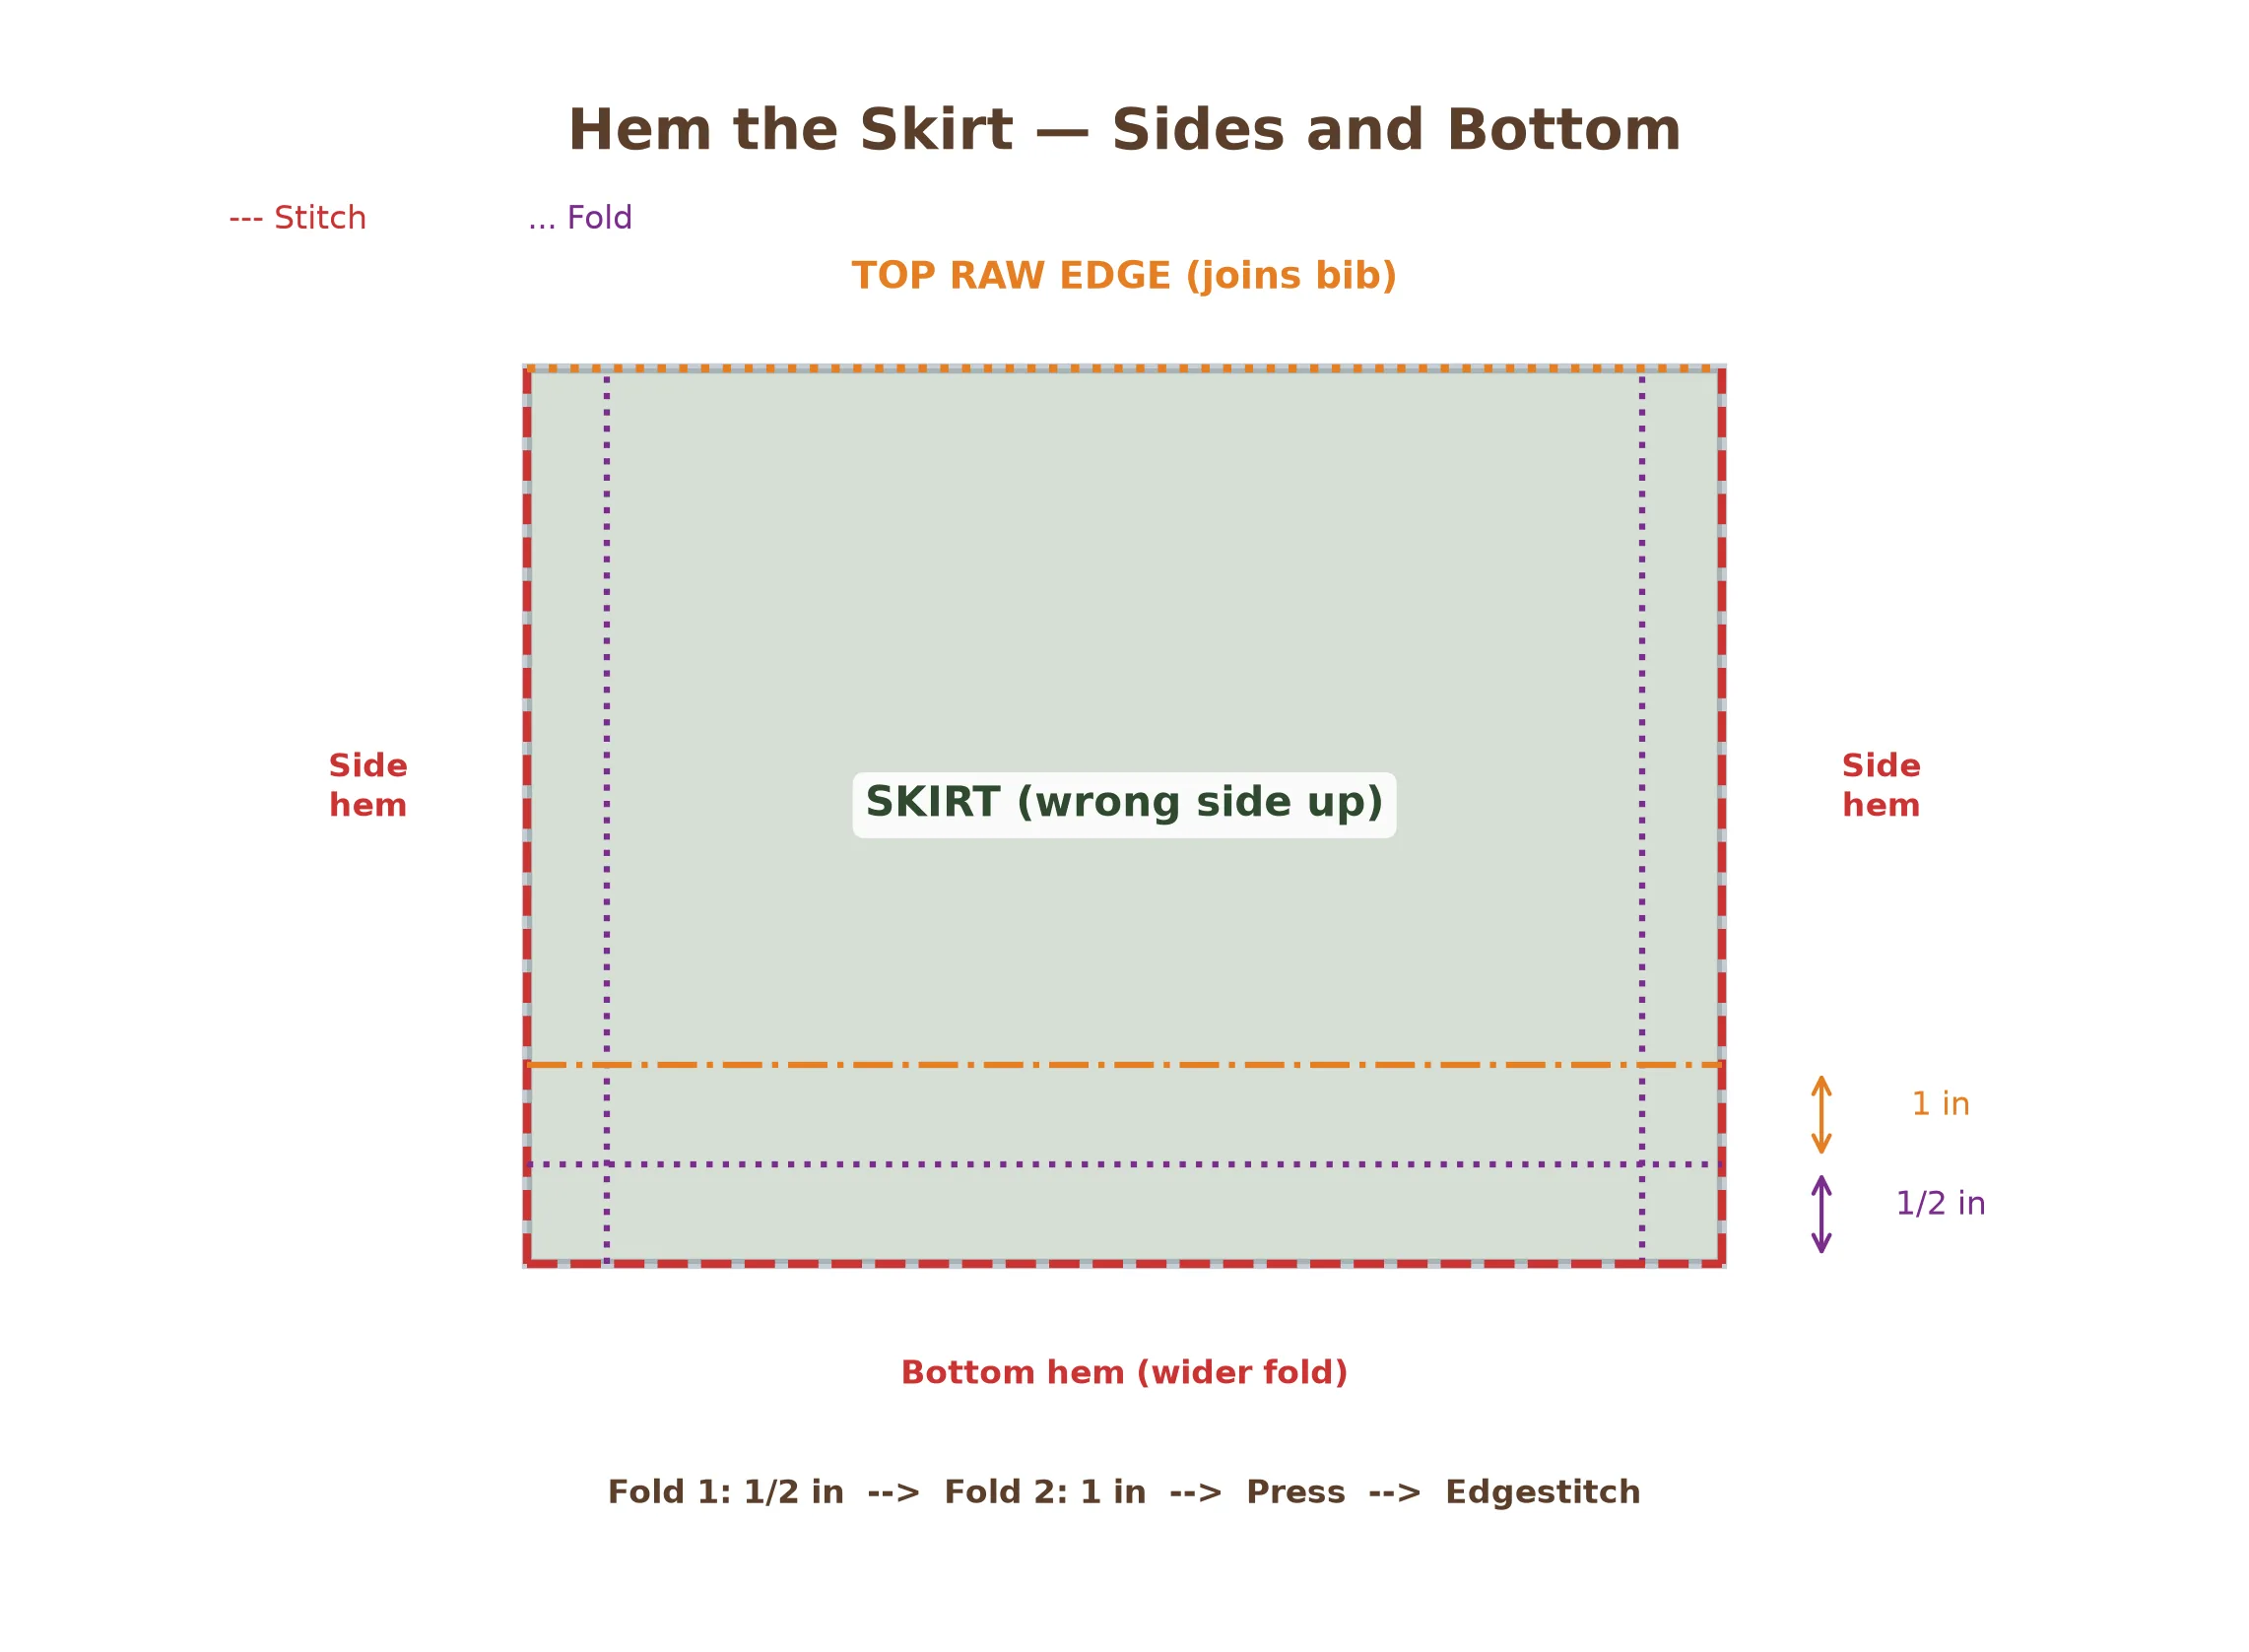
Now move on to the skirt panel. Hem the two side edges and the bottom edge using the same double-fold technique you used on the bib: ¼ inch first fold, then ½ inch second fold, press, pin, and edgestitch. The top edge of the skirt will be joined to the bib and does not need hemming. For the bottom hem, you may want to use a slightly wider fold — ½ inch first fold and 1 inch second fold — to give the apron a more substantial, weighted hem that drapes nicely and resists flipping up during use. Take your time with the bottom hem, as it is the most visible edge of the finished apron and a crooked hem will be immediately noticeable. Press all hems thoroughly when you are done.
Attach the Front Pocket
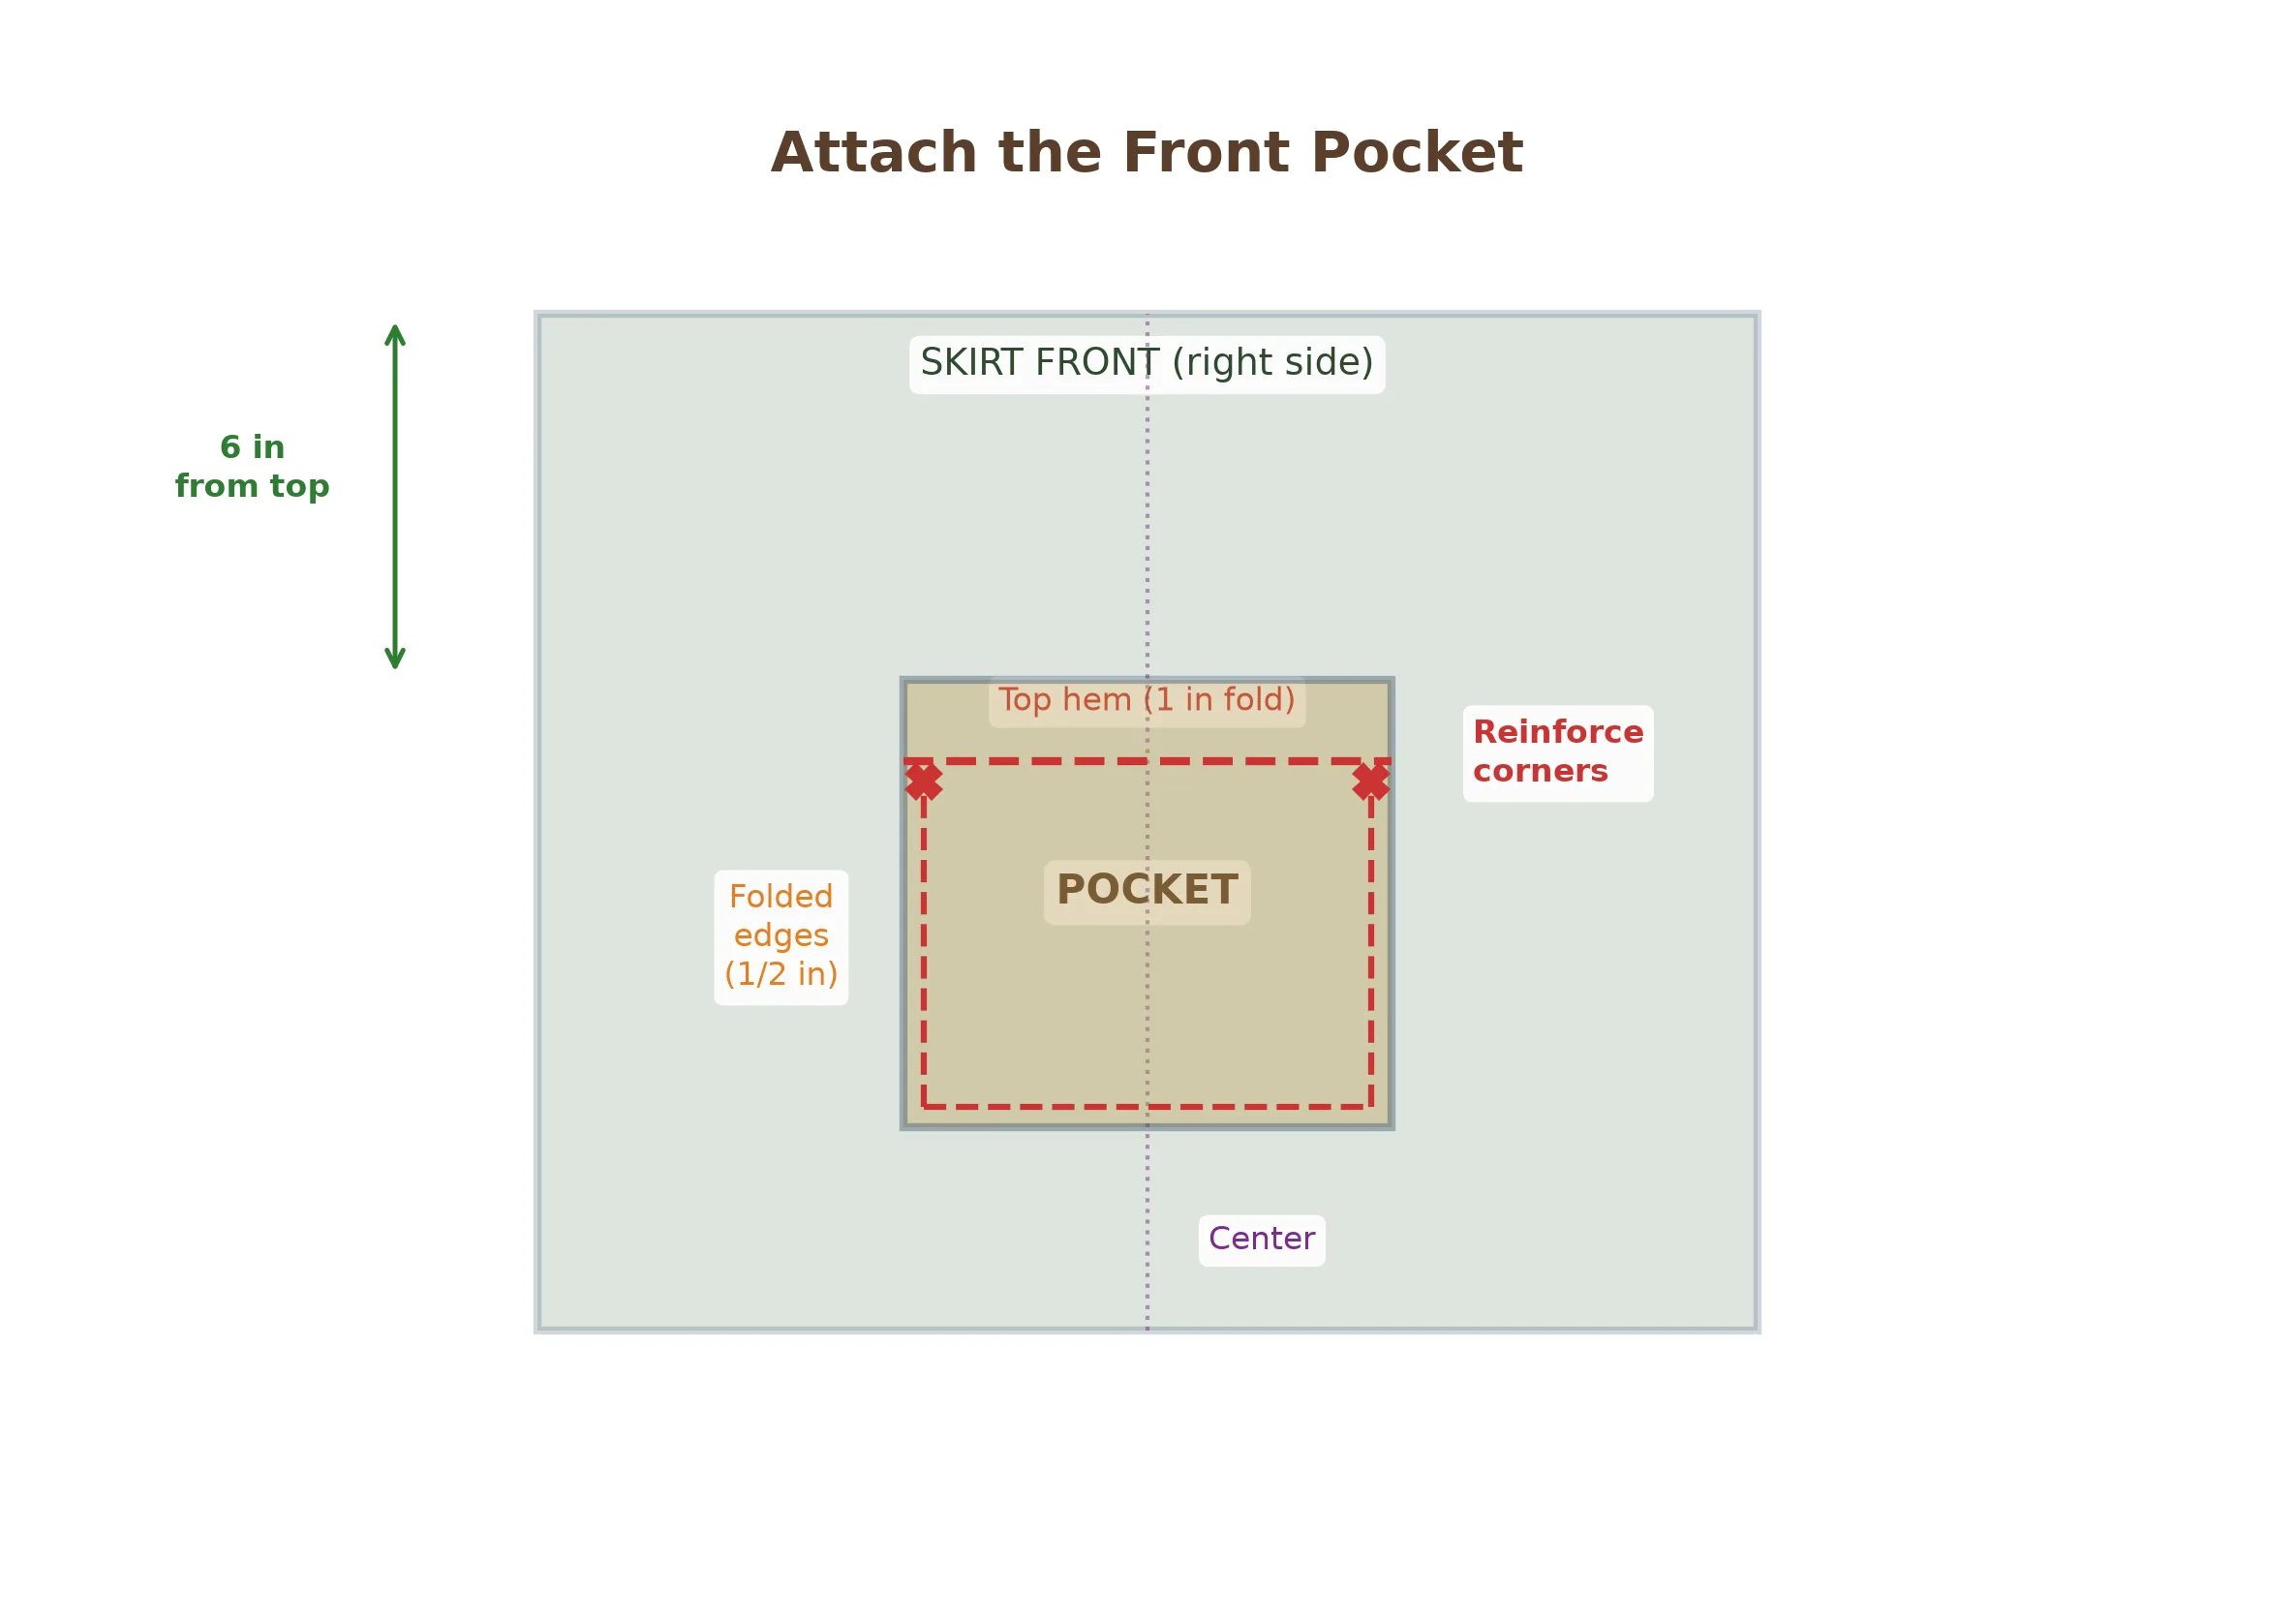
Take the pocket rectangle and fold the top edge down by ¼ inch, then by 1 inch to create a wide hem at the pocket opening. Press and edgestitch along the bottom of this hem. Then fold the remaining three raw edges (both sides and the bottom) inward by ½ inch and press. You do not need to stitch these folded edges yet — they will be secured when you attach the pocket to the skirt. Position the pocket on the right side of the skirt panel, centered horizontally and approximately 6 inches below the top raw edge. Pin the pocket in place, making sure it is straight and level. Edgestitch around the two sides and the bottom of the pocket, stitching close to the folded edge through both the pocket and the skirt fabric. Backstitch at the top corners of the pocket to reinforce these high-stress points, which will bear the weight of whatever you tuck into the pocket.
Join the Bib to the Skirt
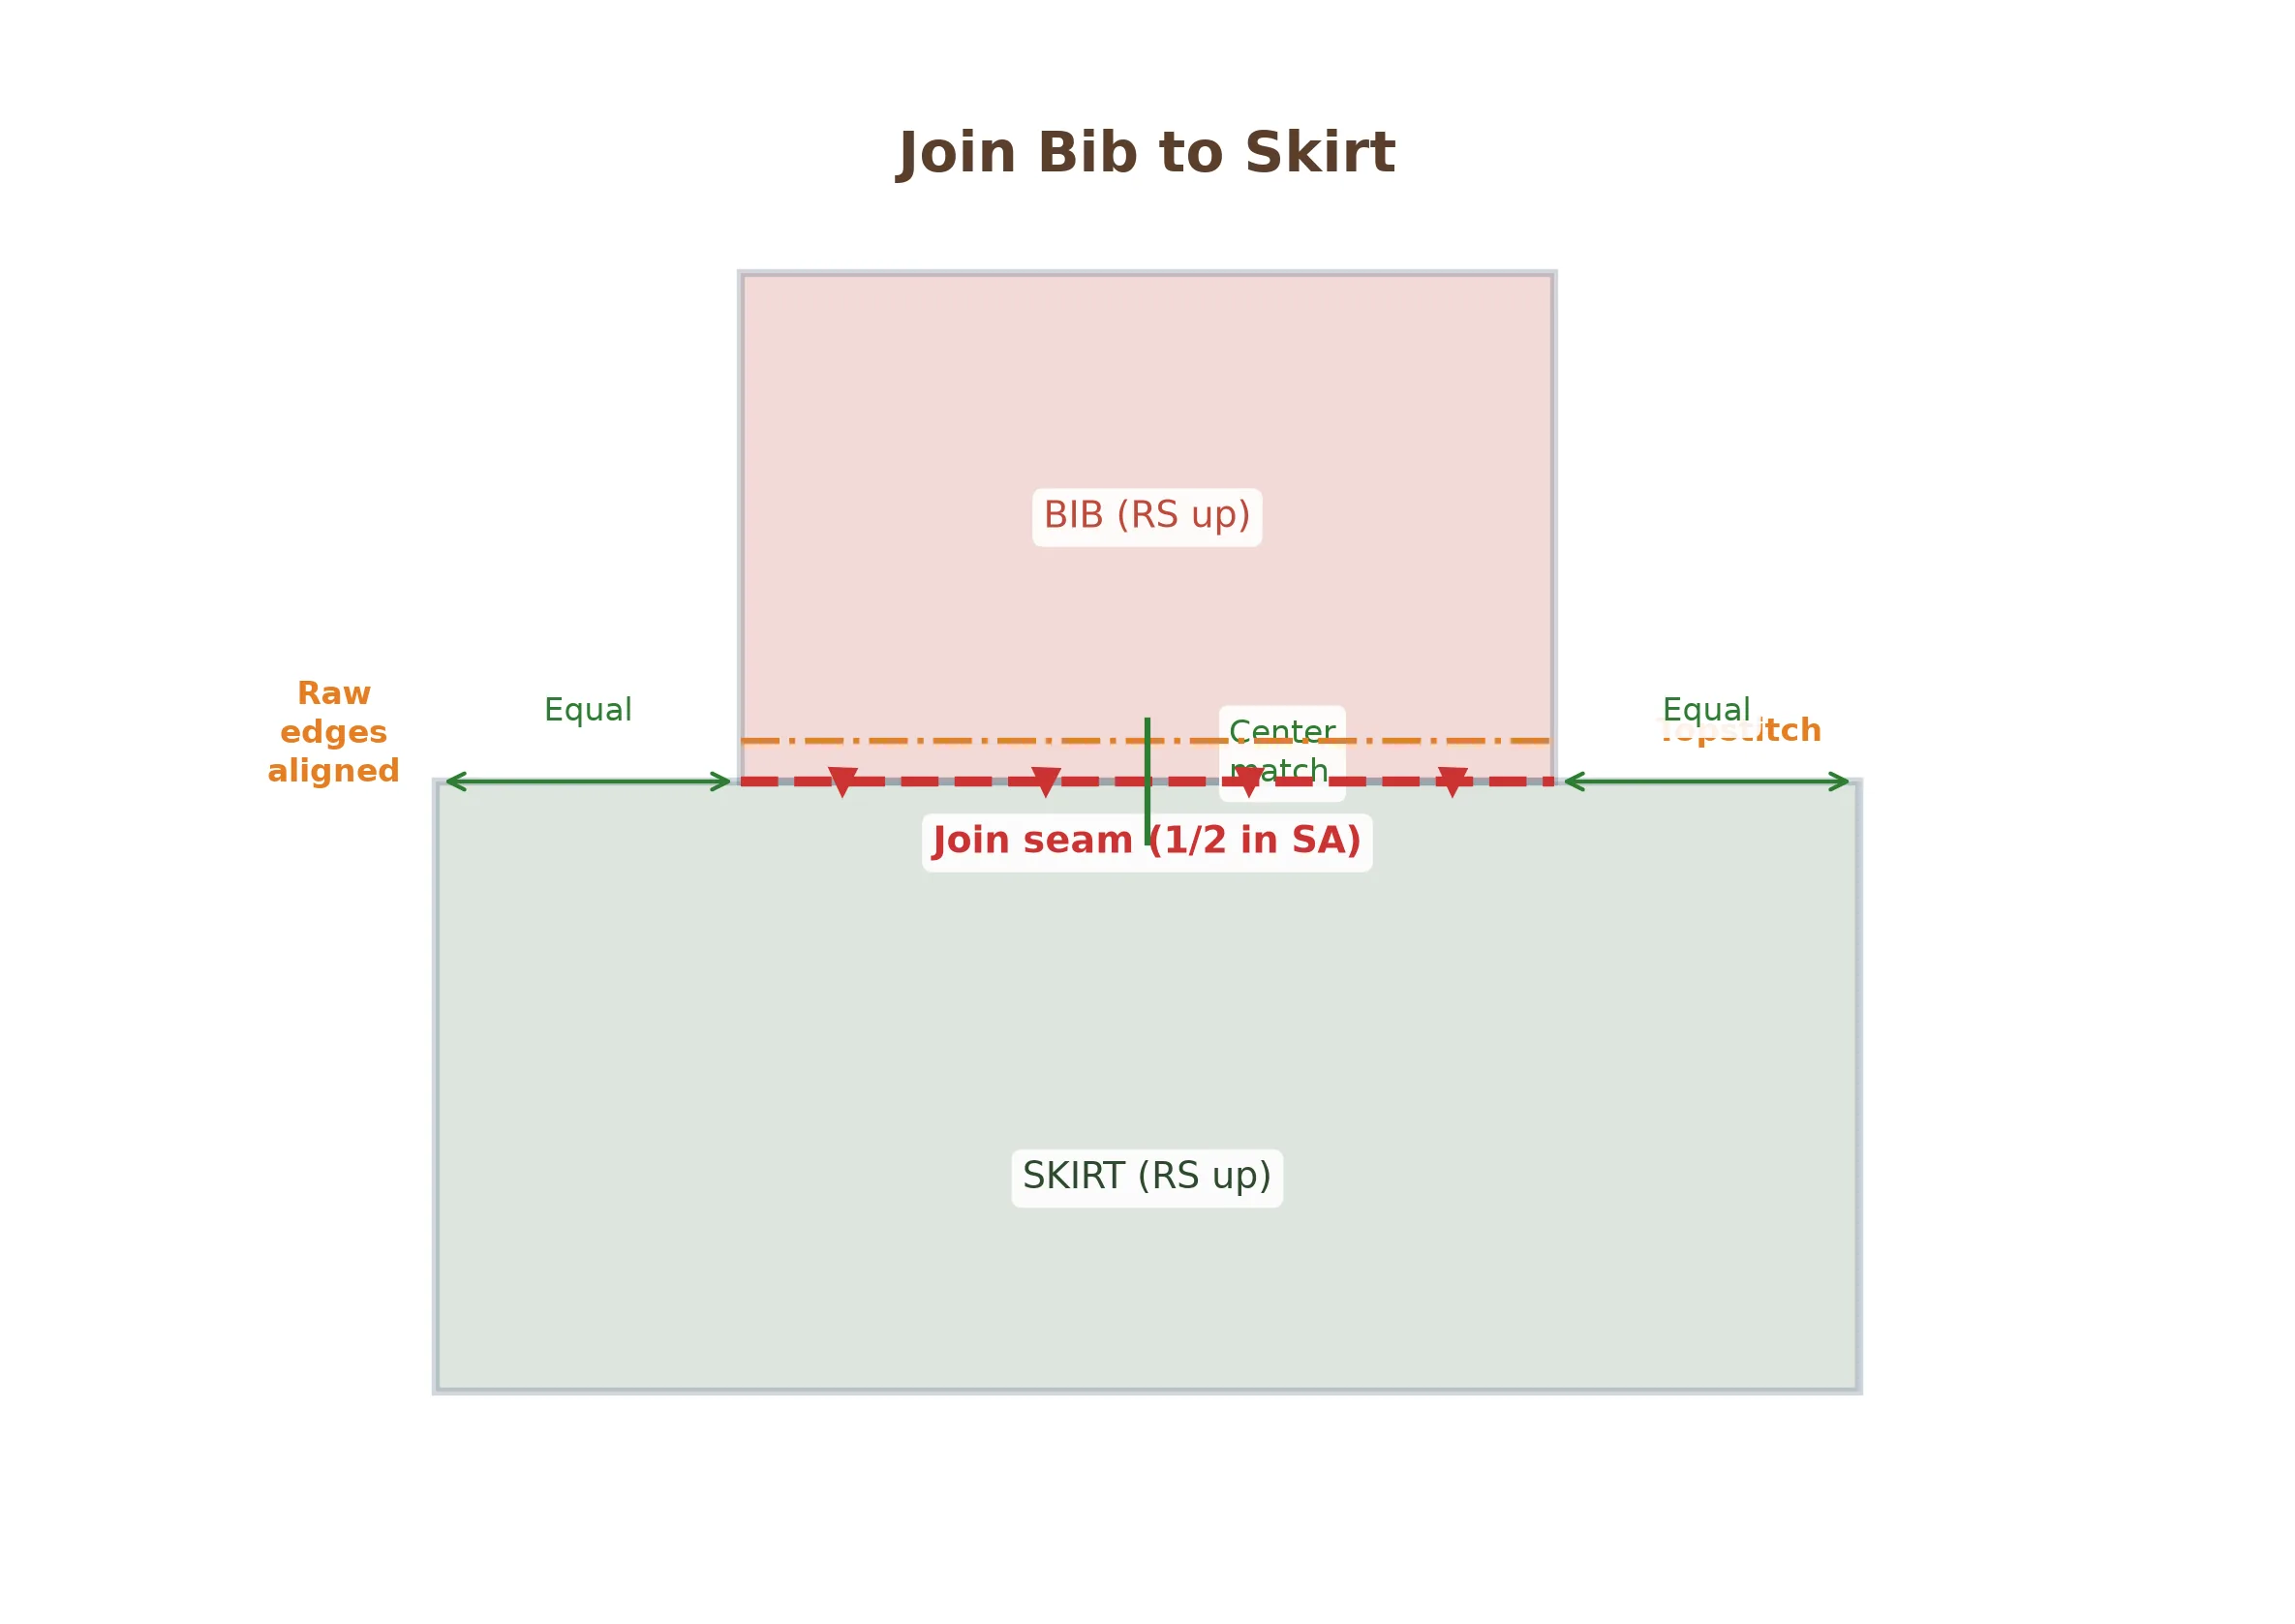
Place the skirt panel right side up on your work surface with the pocket facing up. Position the bib right side up on top of the skirt, aligning the raw bottom edge of the bib with the raw top edge of the skirt. The bib should be centered on the skirt, with an equal amount of skirt fabric extending beyond each side of the bib. Pin the two pieces together along the raw edges, making sure the layers are smooth and aligned. Sew the bib to the skirt using a ½-inch seam allowance and a straight stitch, backstitching at both ends. Press the seam allowance upward toward the bib, then topstitch along the seam line from the right side to flatten the seam and add a decorative finish. This topstitching also reinforces the join between the bib and skirt, which is the most stressed seam on the entire apron.
Make and Attach the Ties and Neck Loop
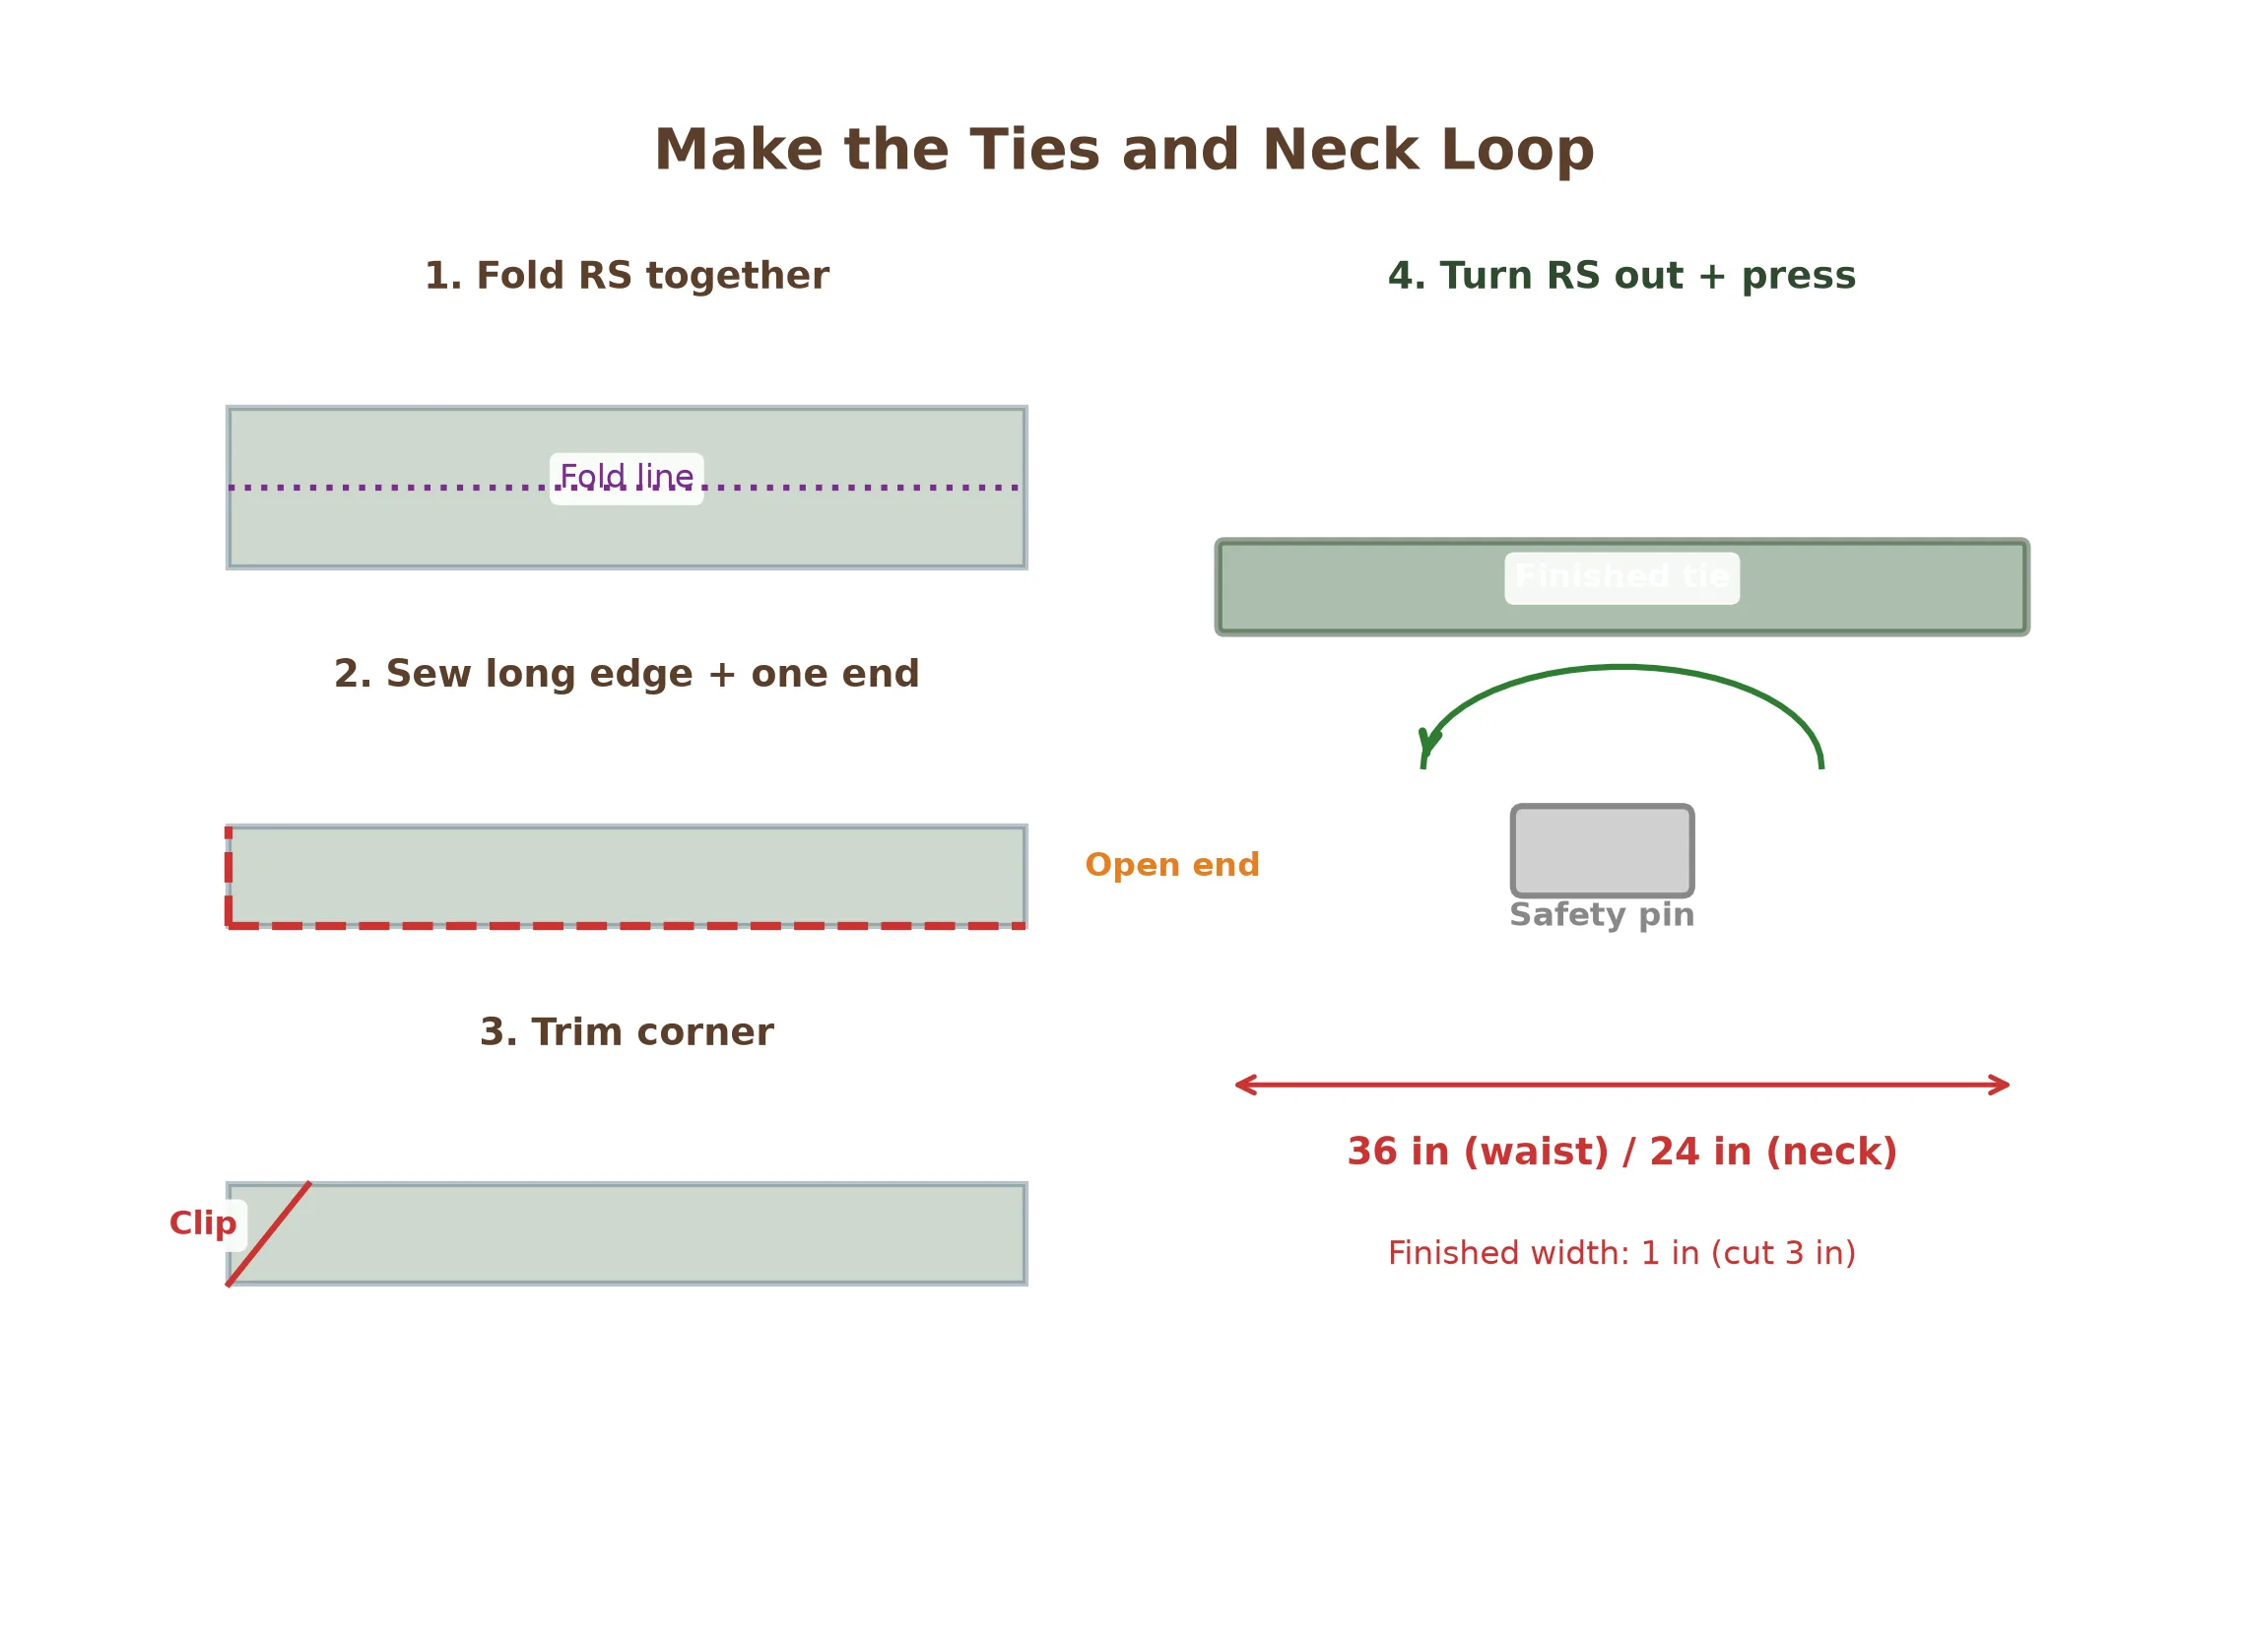
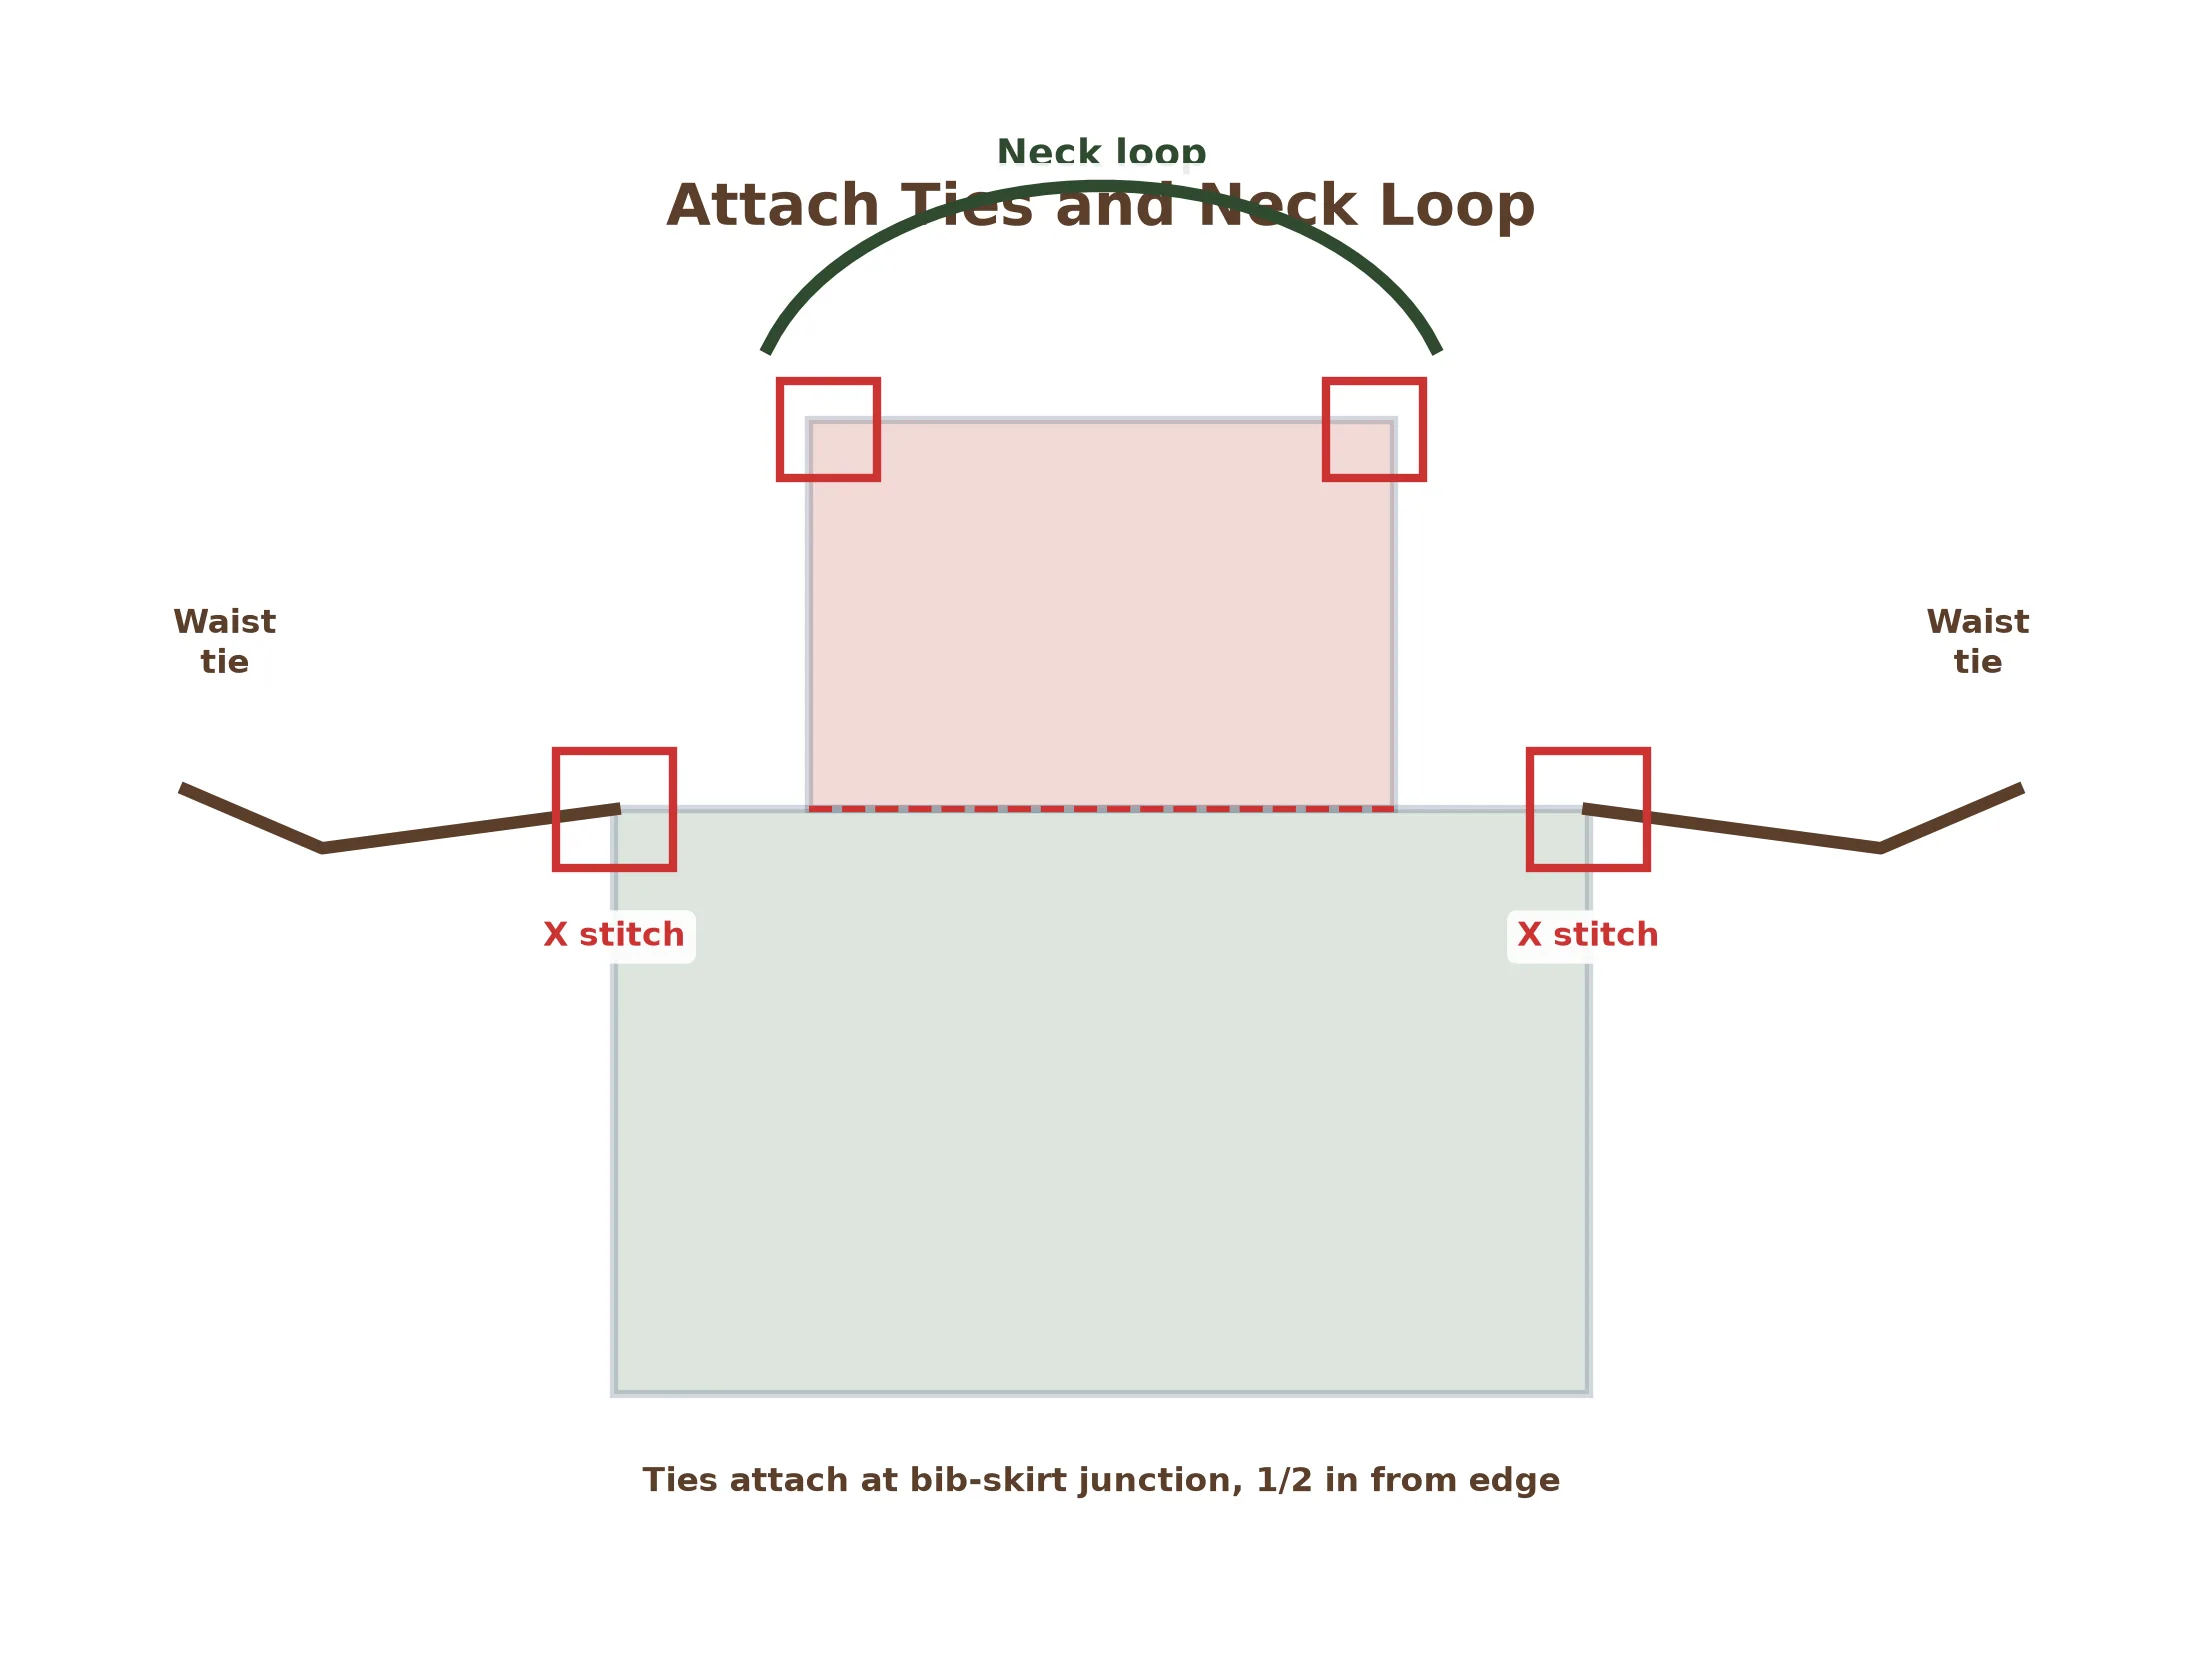
Take one of the waist tie strips and fold it in half lengthwise with right sides together. Sew along the long edge and one short end with a ¼-inch seam allowance, leaving the other short end open. Trim the corner diagonally to reduce bulk, then turn the tie right side out using a safety pin or loop turner. Press the tie flat, making sure the seam runs along one edge. Repeat for the second waist tie and the neck loop strip. Now attach the ties to the apron. Position one waist tie at each side of the apron at the point where the bib meets the skirt, aligning the raw end of the tie with the raw edge of the seam. The tie should extend outward to the side. Pin in place and sew across the end of the tie with a ½-inch seam, backstitching several times for strength. Fold the tie outward and topstitch a small rectangle or X over the attachment point for extra reinforcement. Attach the neck loop to the top corners of the bib in the same way, creating a loop that extends above the bib and will slip over the wearer's head.
Final Press and Finishing Touches
Give the entire apron a thorough press with your iron, paying special attention to the hems, the bib-skirt seam, the pocket, and the tie attachment points. Trim any loose thread tails and check all seams for security. Try the apron on to check the fit — the bib should sit comfortably on your chest, the skirt should cover your lap and upper legs, and the waist ties should be long enough to tie a secure bow at your back. If the neck loop is too long or too short, you can easily shorten it by folding the excess fabric under at the attachment point and restitching, or lengthen it by adding a small fabric extension. Your simple kitchen apron is now complete and ready for its first cooking session!