How to Sew Pajama Shorts: Your First Wearable Garment
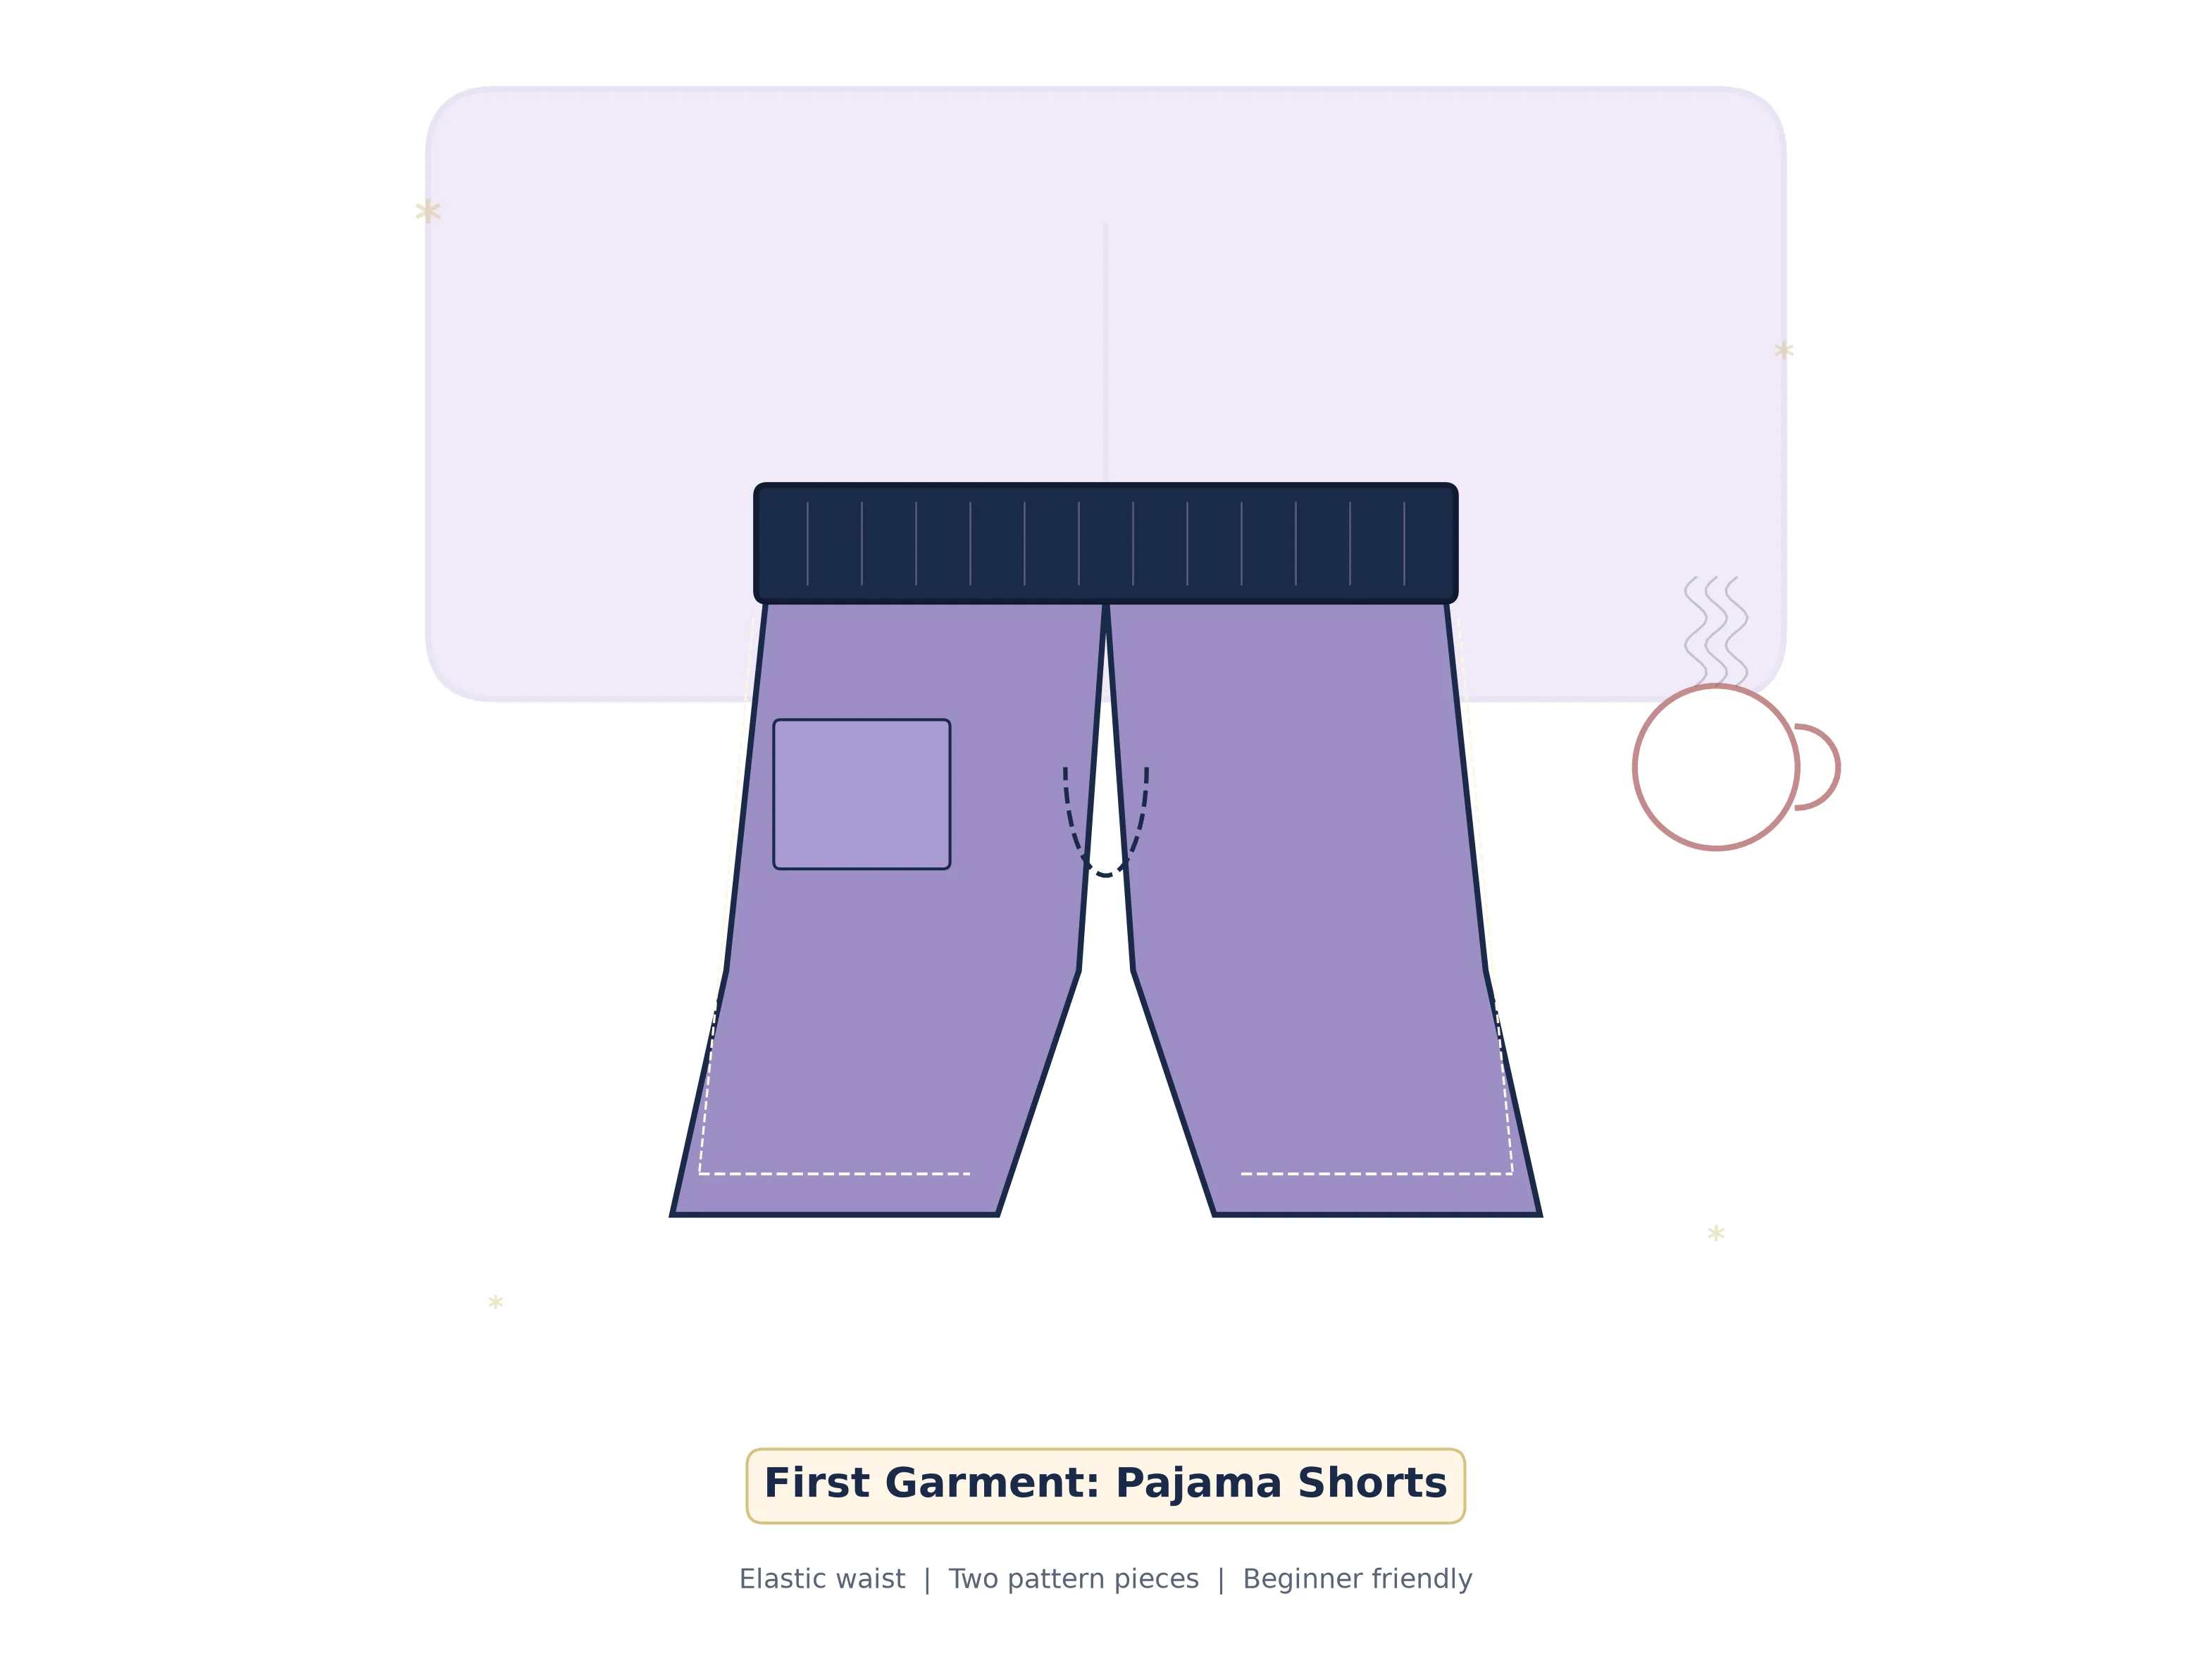
You have stitched straight seams, conquered zippers, and wrangled elastic into scrunchies. Now it is time for the milestone every new sewist dreams about: your very first garment. Pajama shorts are the perfect gateway — just two pattern pieces, no zippers, no buttonholes, and a forgiving elastic waist that fits even if your measurements are slightly off.
Why Pajama Shorts Are the Perfect First Garment
Garment sewing can feel intimidating when you are used to straight-line projects like pillowcases and tote bags. Clothing involves curves, fit, and the pressure of actually wearing what you make. Pajama shorts remove almost all of that anxiety. They are loose-fitting by design, which means a quarter-inch of imprecision will not ruin the final result. The elastic waistband eliminates the need for darts, zippers, or closures — the three features that trip up most beginners on their first garment attempt.
Construction is beautifully simple: you sew two tubes (the legs), join them at the crotch curve, fold down a casing for elastic, and hem the bottoms. That is it. Five major seams and two hems. If you can sew the straight seams you practiced on your cloth napkins and the curved seams you tackled on your round cushion cover, you already have every skill this project requires.
There is also a deeply satisfying psychological shift that happens when you put on something you made from scratch. A pillowcase lives on your bed; a tote bag hangs by the door. But a garment moves with your body, and wearing it reinforces the reality that you are now a person who makes clothes. That confidence boost is worth every pin prick and tangled bobbin thread.
Materials and Tools
What You Will Need
- 1.5 yards (1.4 m) lightweight woven cotton or cotton flannel, 44 in wide
- 1-inch (25 mm) wide braided elastic — length = waist minus 2 in
- Matching all-purpose polyester thread
- Sewing machine with universal 80/12 needle
- Fabric scissors or rotary cutter and mat
- Measuring tape (flexible, fiberglass)
- Pins or wonder clips
- Safety pin or bodkin (for threading elastic)
- Iron and ironing board
- Fabric marker or tailor's chalk
- Fabric tip: Pre-wash and dry your fabric before cutting. Cotton shrinks 3–5 % on the first wash, and you do not want your perfectly fitted shorts to become doll clothes after laundry day.
- Elastic tip: Braided elastic narrows when stretched, making it easier to thread through a casing. Knit elastic works too but is slightly wider and can bunch inside narrow casings.
Taking Your Measurements
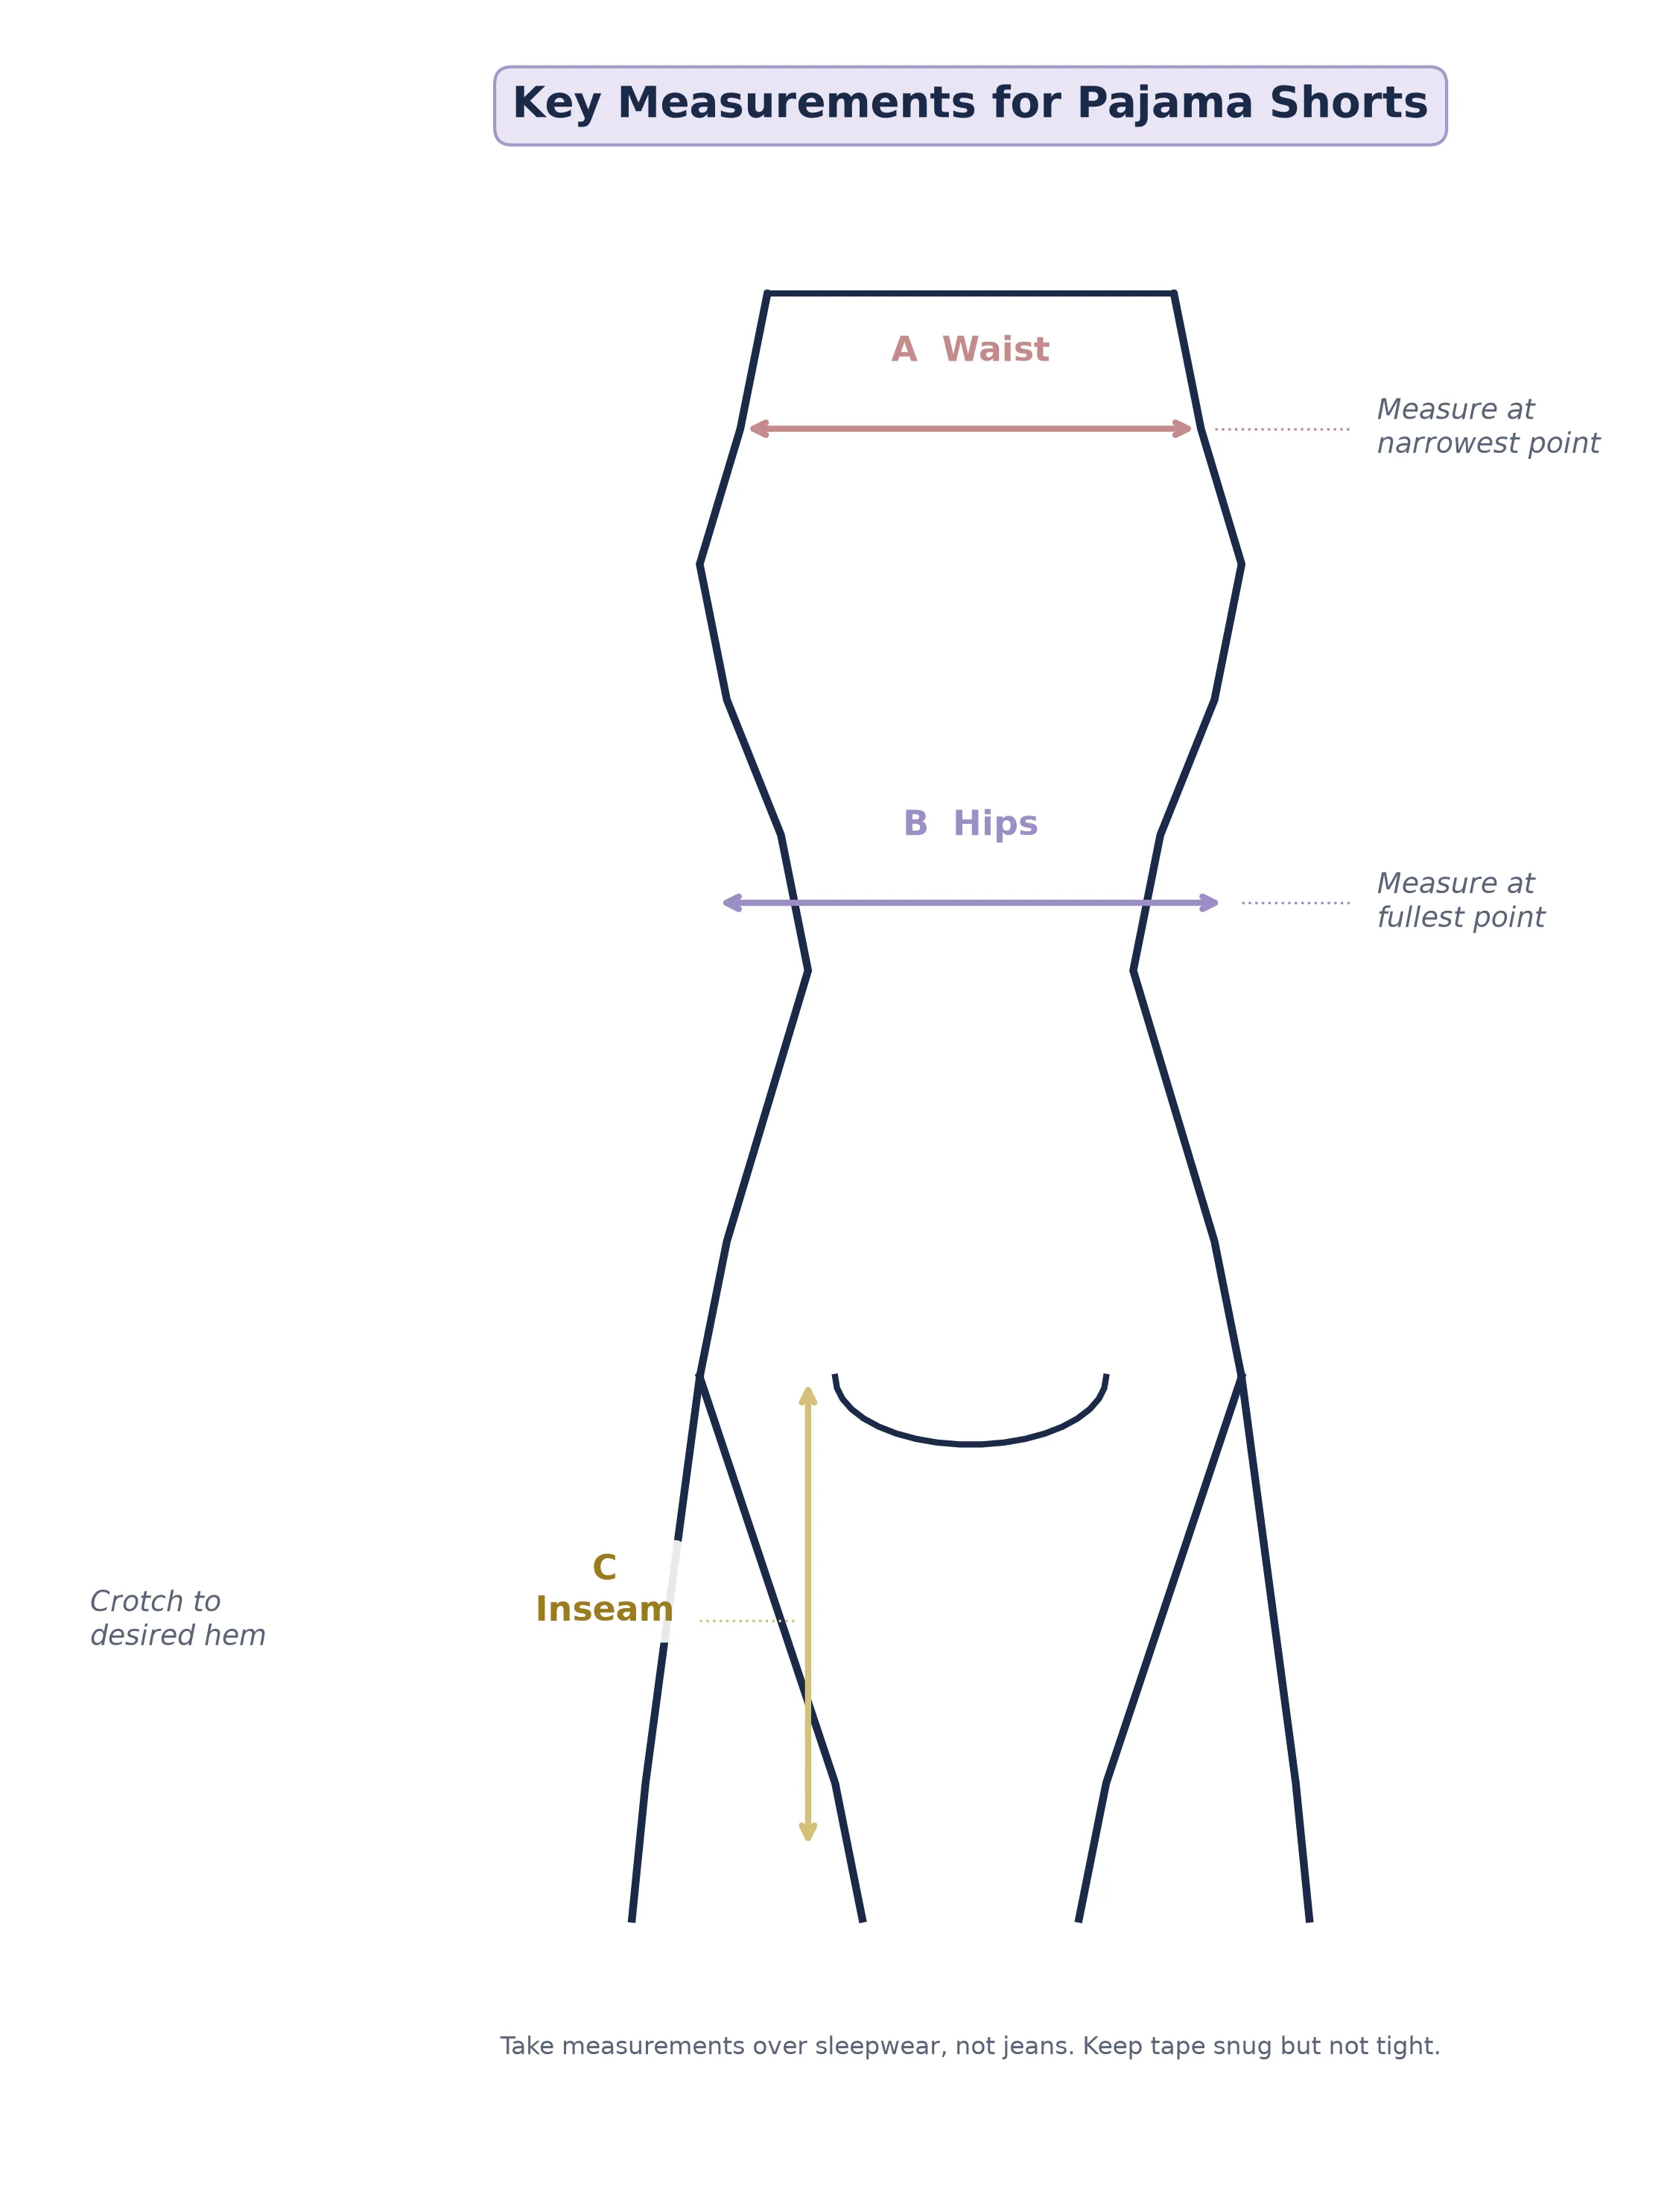
Accurate measurements are the foundation of any garment, even a loose-fitting one like pajama shorts. You need three numbers, and you should take them while wearing the undergarments you would normally sleep in — not over jeans or thick leggings.
Waist: Tie a piece of string or elastic around your natural waist (the narrowest part of your torso, usually just above the belly button). Let it settle, then measure the circumference. For pajama shorts the waistband will sit slightly lower, but we use the natural waist as a starting point and add ease later.
Hips: Measure around the fullest part of your hips and buttocks. Keep the tape parallel to the floor and snug but not tight. This is the most critical measurement because the shorts must pass over your hips to pull on and off.
Inseam: Measure from the crotch point down the inner leg to your desired hemline. For classic pajama shorts, 4–6 inches is standard. If you prefer a longer "Bermuda" style, go to 8–10 inches. Remember that you will add 1 inch for the hem and 1.5 inches for the waistband casing, so your cut inseam will be longer than the finished inseam.
| Size Reference | Waist | Hips | Cut Inseam | Elastic Length |
|---|---|---|---|---|
| XS (0–2) | 25–27 in | 34–36 in | 7 in | 24 in |
| S (4–6) | 27–29 in | 36–38 in | 7 in | 26 in |
| M (8–10) | 29–32 in | 38–41 in | 7 in | 29 in |
| L (12–14) | 32–35 in | 41–44 in | 7.5 in | 32 in |
| XL (16–18) | 35–39 in | 44–48 in | 8 in | 36 in |
Cutting Layout and Pattern Pieces
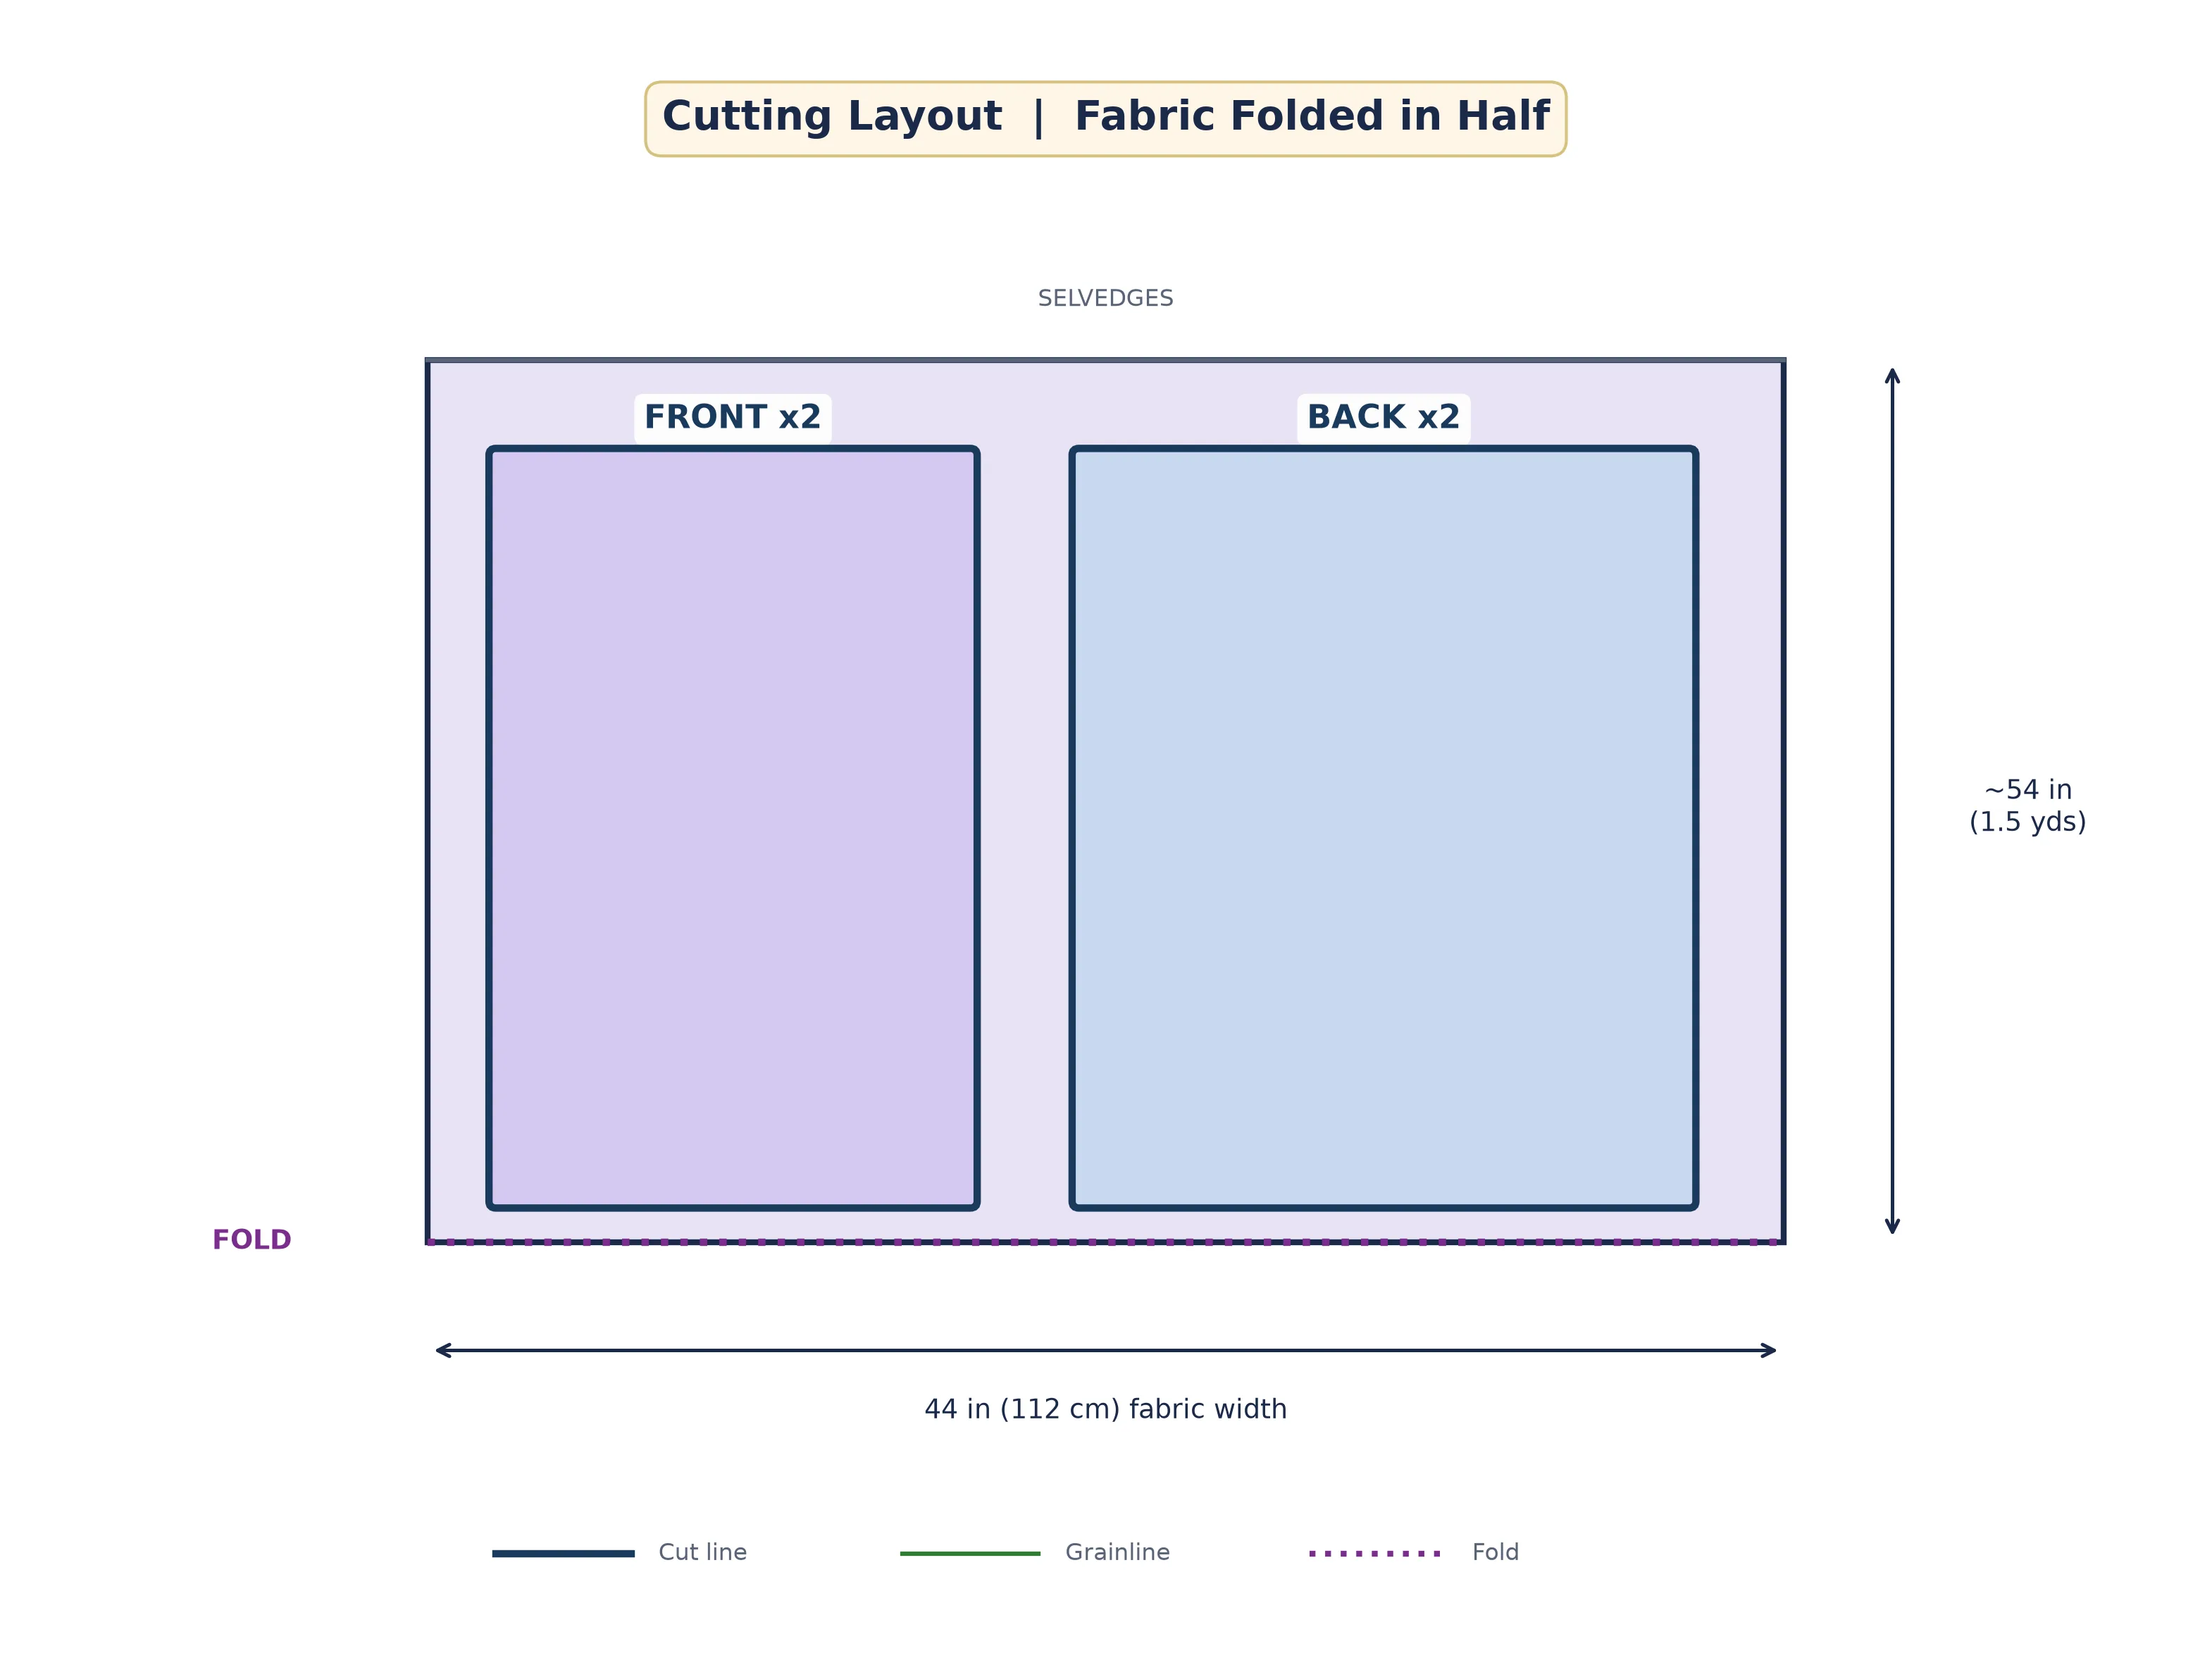
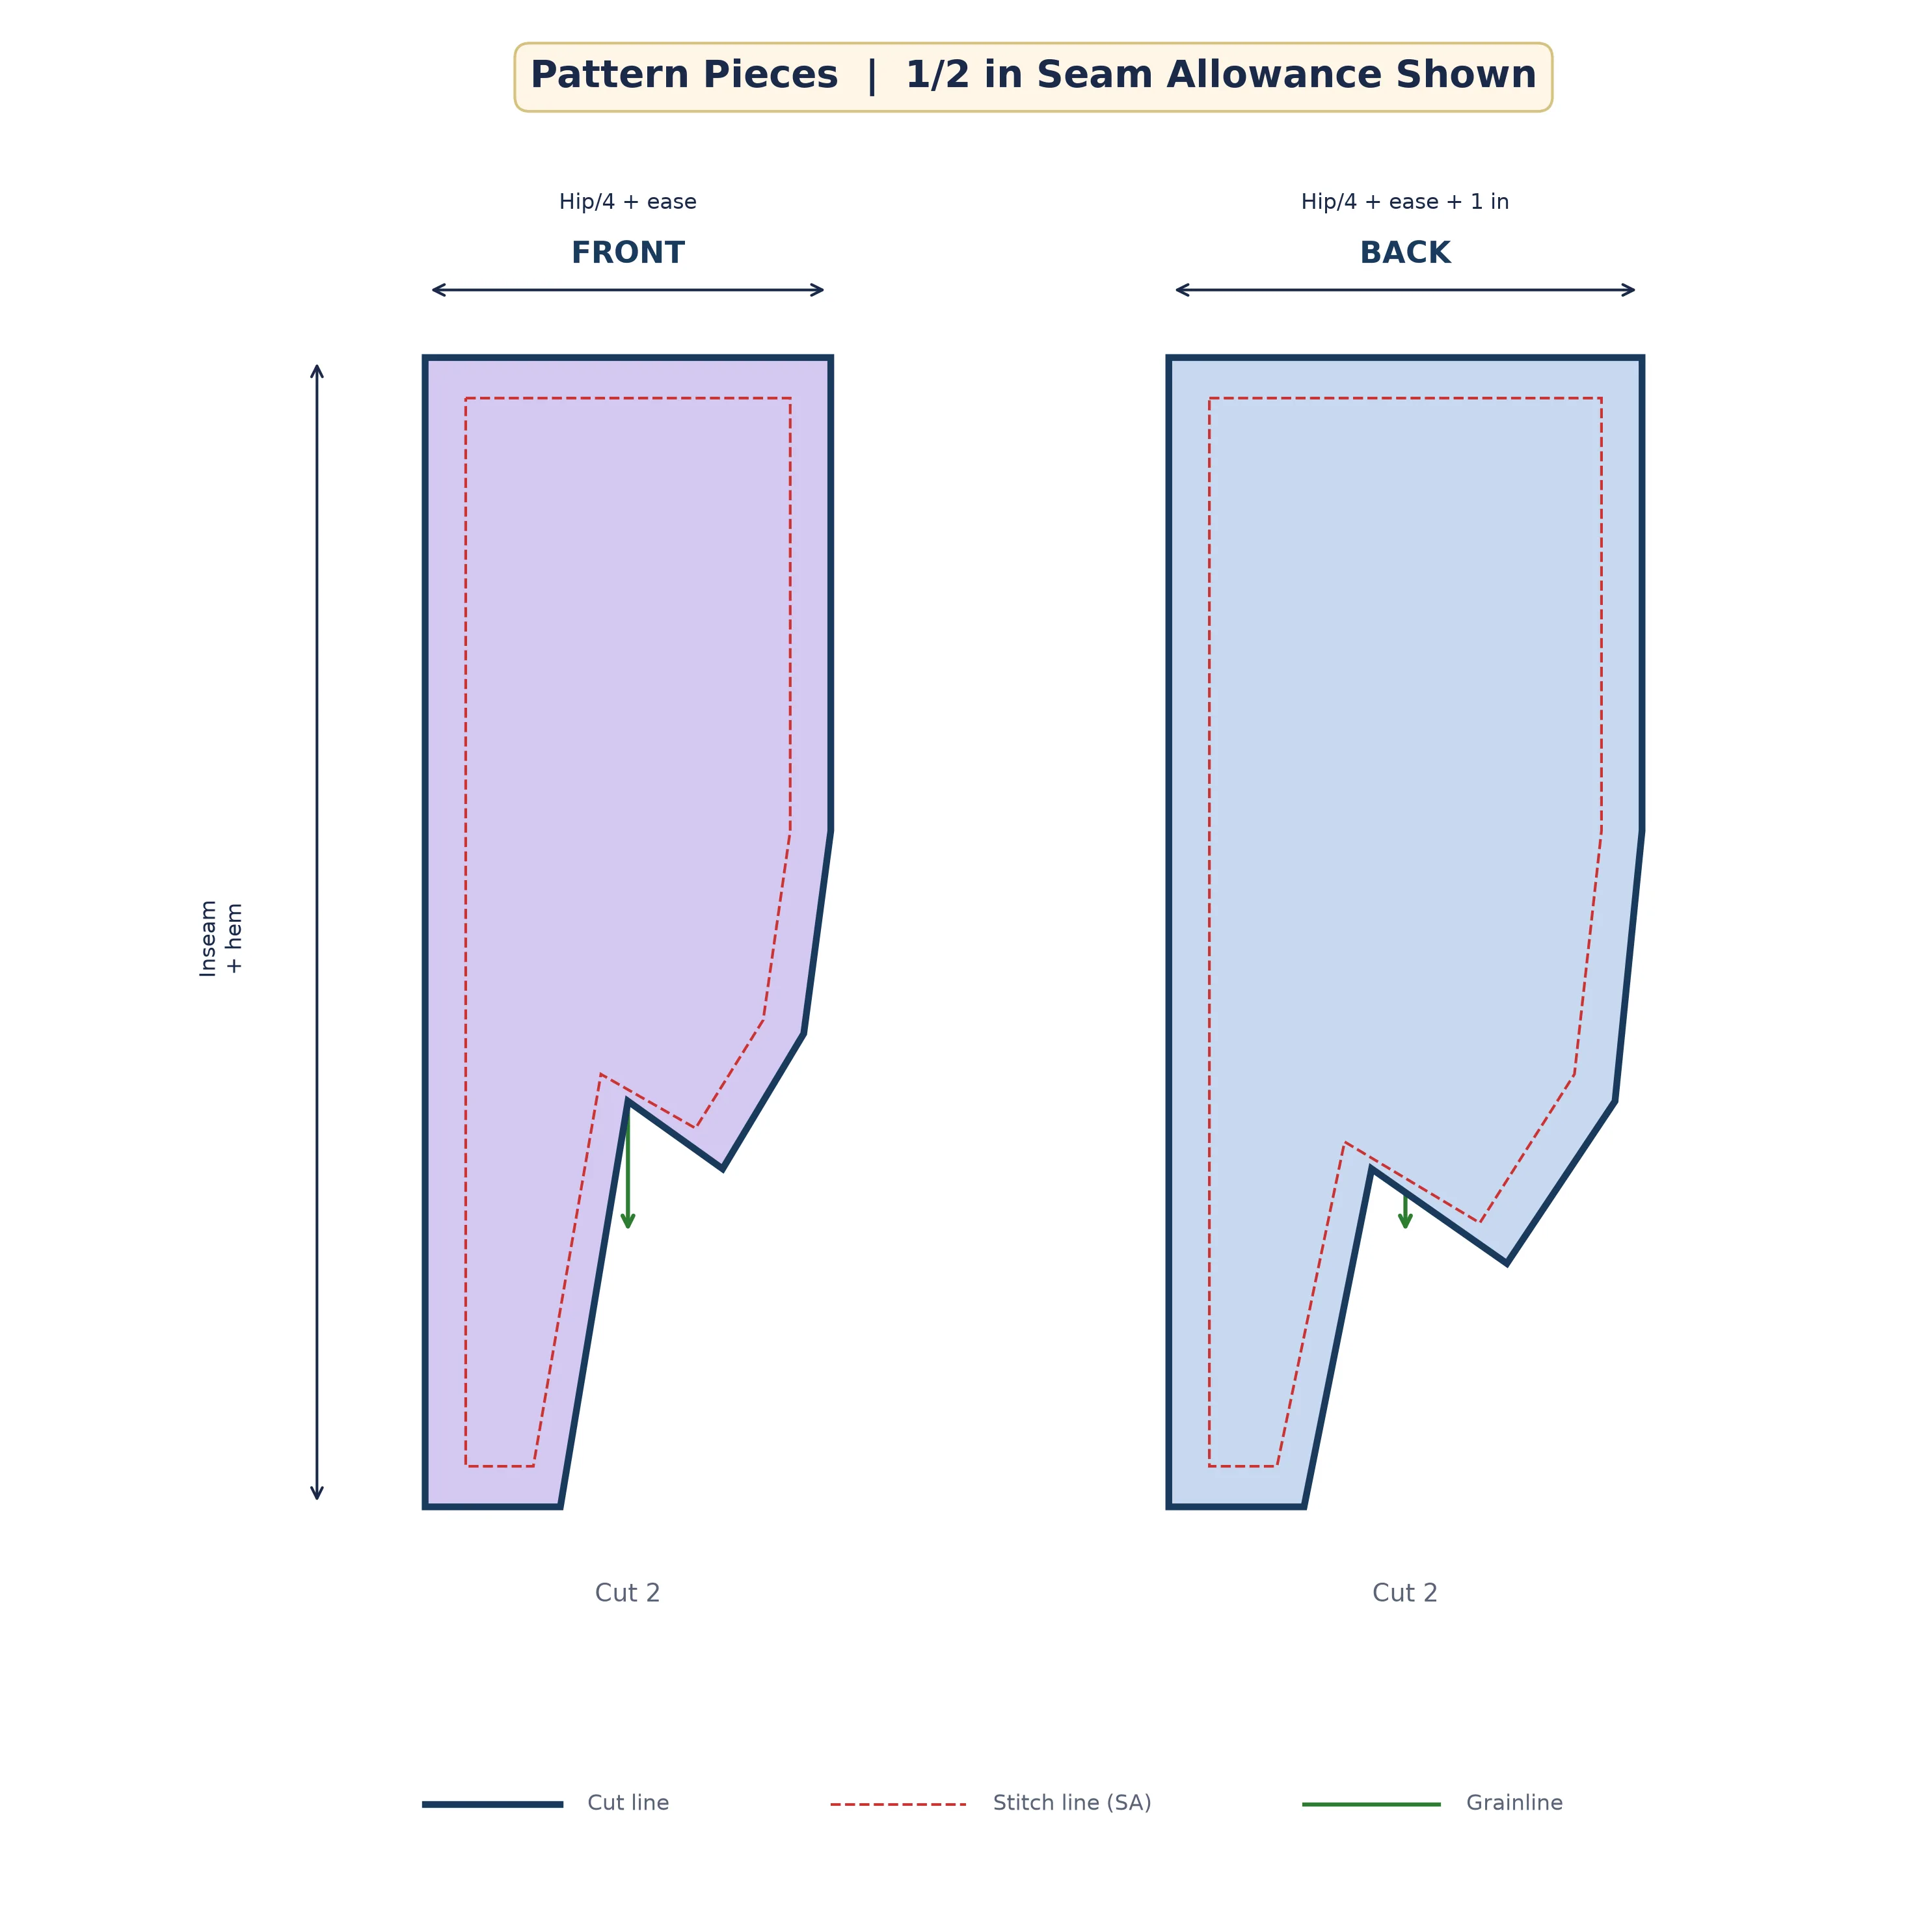
Pajama shorts require only two pattern pieces — a front and a back — each cut twice from your fabric (four pieces total). The back piece is slightly wider and has a deeper crotch curve than the front to accommodate the shape of your body. If you are drafting directly onto fabric (no paper pattern), use the measurements above and add half an inch of seam allowance on every edge.
Fold your pre-washed fabric in half lengthwise, right sides together, aligning the selvedges. Lay the pieces along the fold as shown in the cutting diagram below. The grainline should run parallel to the selvedge on every piece — this ensures the shorts hang straight and do not twist on your legs after washing.
Step-by-Step Construction
Cut Your Fabric
Using your measurements and the cutting layout above, mark and cut two front pieces and two back pieces. Transfer any notch marks or fold lines with tailor's chalk or a fabric marker. Double-check that you have four pieces total and that the grainline runs parallel to the selvedge on each one. Set the scraps aside — you may want them later for patch pockets or matching scrunchies.
Sew the Inseams
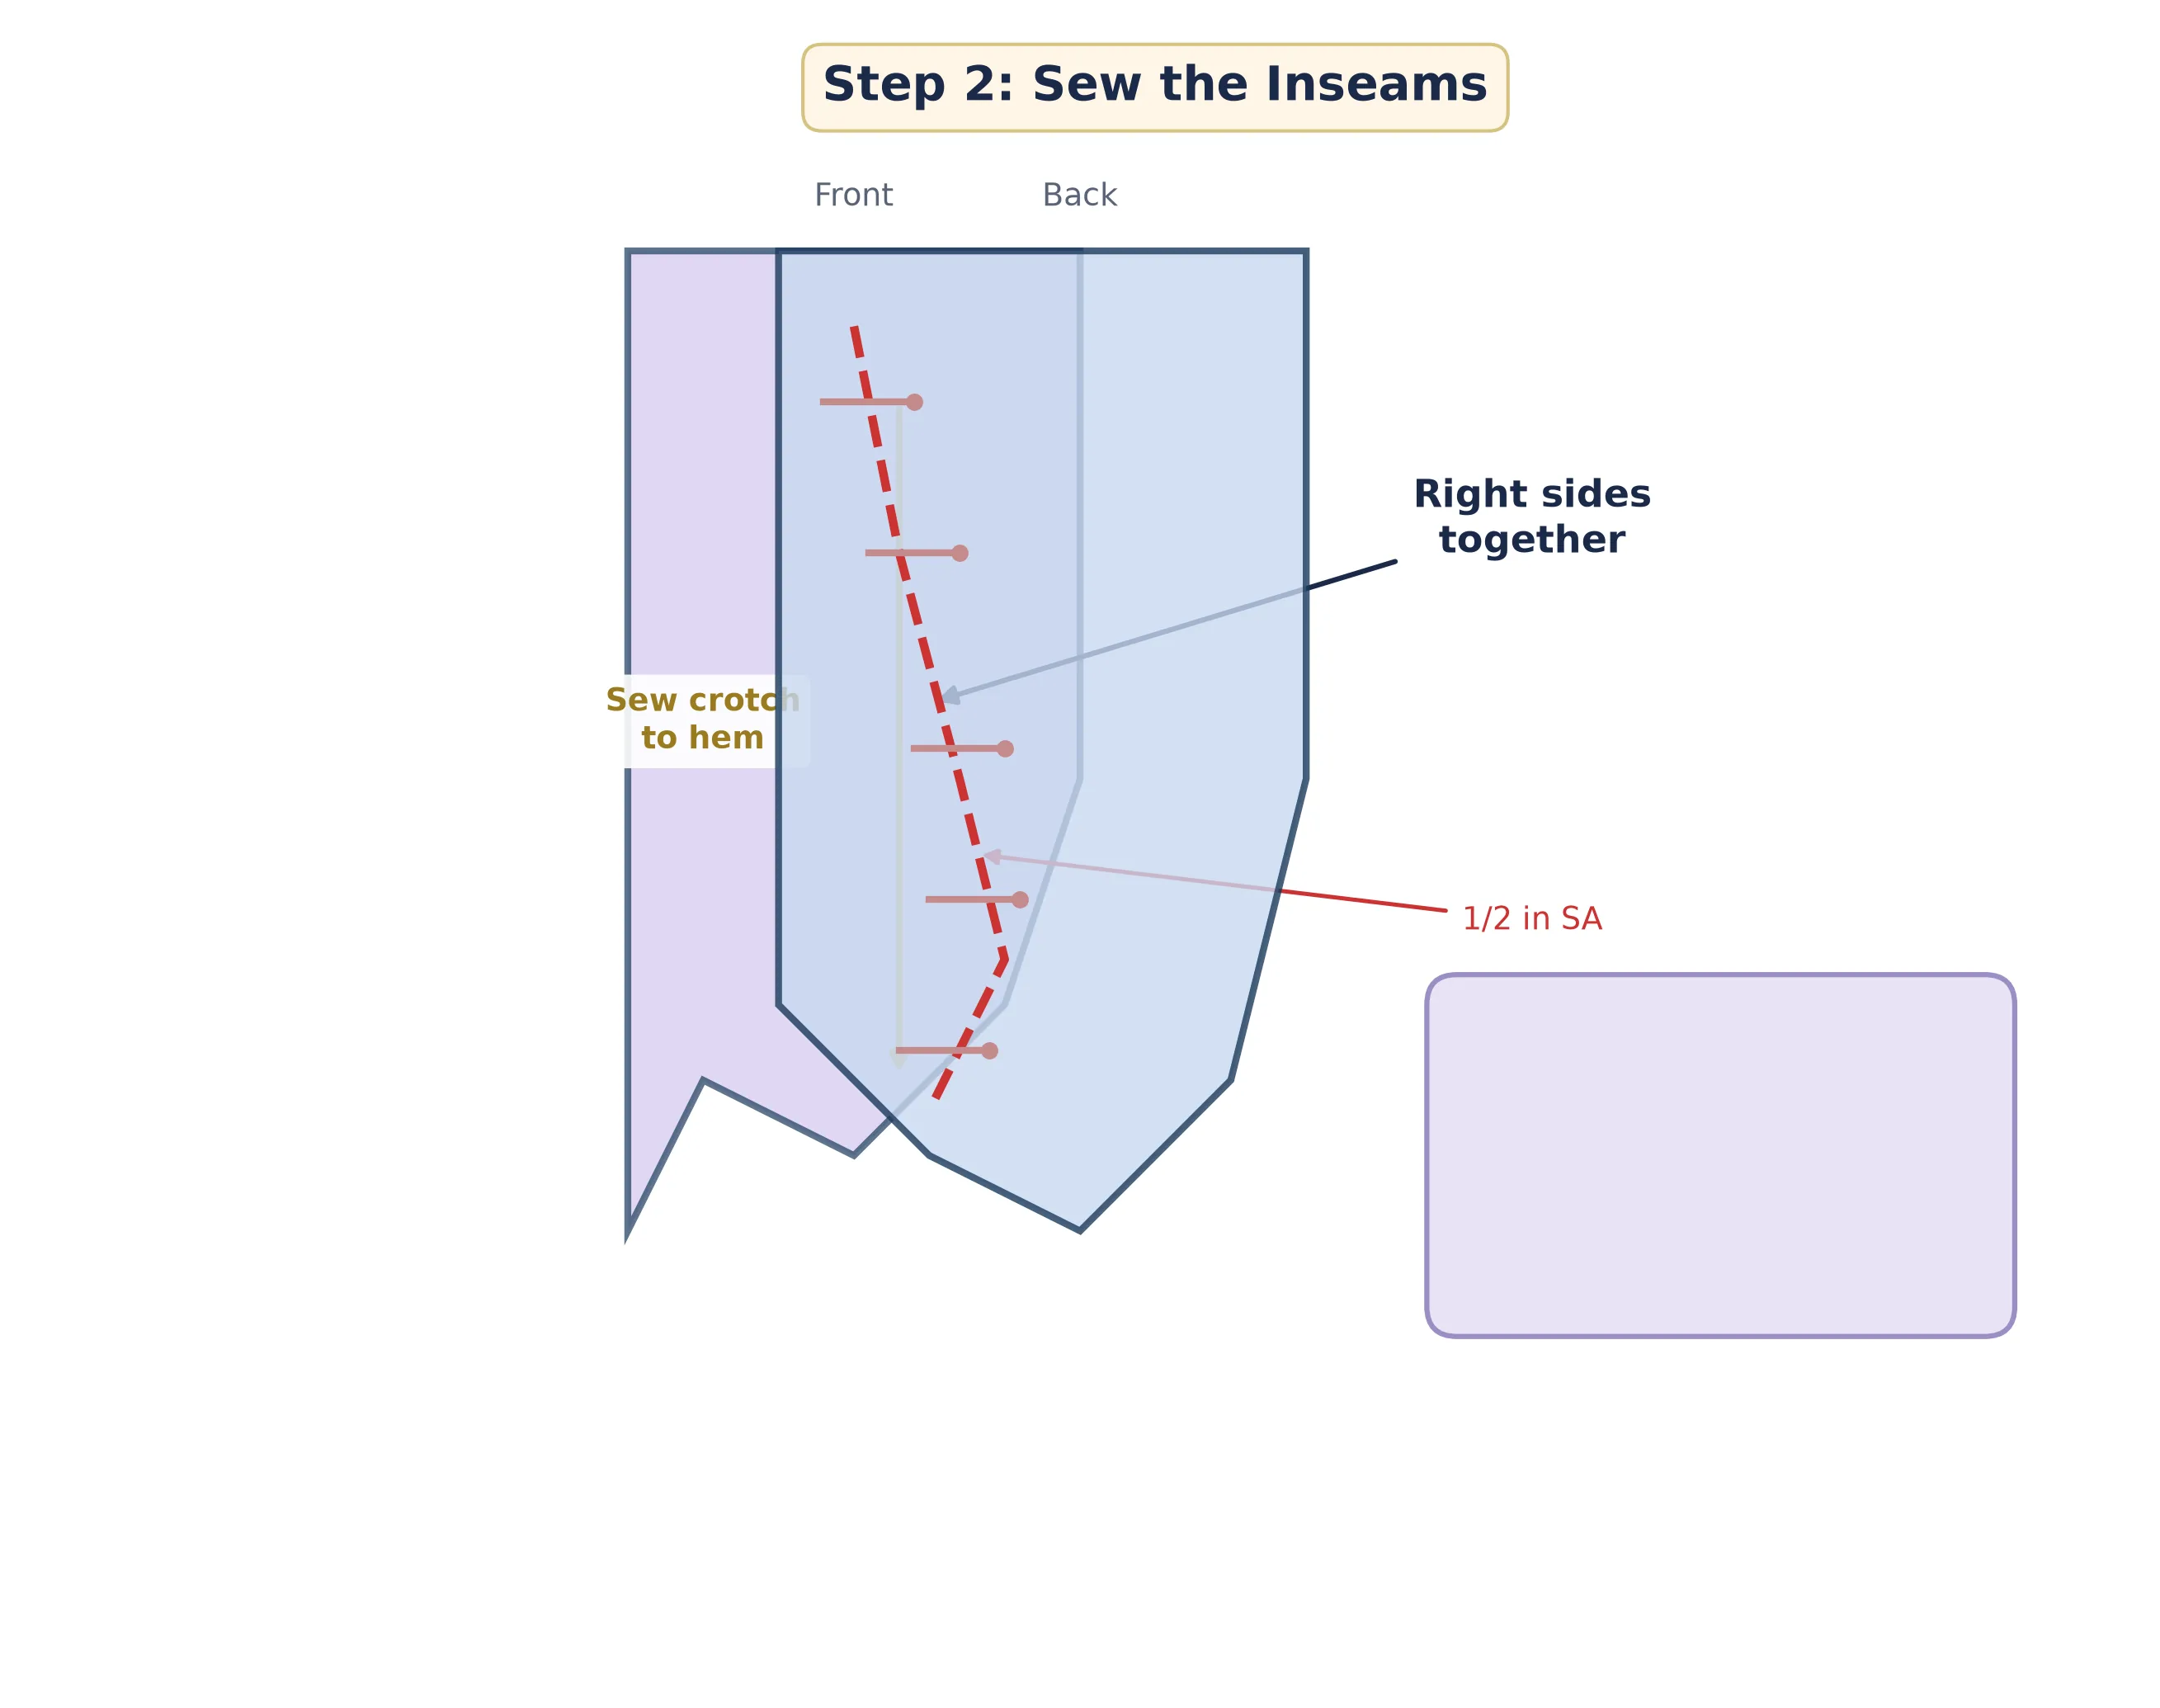
Take one front piece and one back piece and place them right sides together, matching the inner leg edges (the curved edges that will become the inseam). Pin from the crotch point down to the hem. Sew with a half-inch seam allowance using a straight stitch at a medium length (2.5 mm). Repeat for the second leg. Press both inseams open with your iron for a flat, professional finish. If your fabric frays heavily, finish the raw edges with a zigzag stitch or pinking shears before pressing.
At this stage you should have two separate fabric tubes — these are your two legs. Hold them up and admire the fact that they already look vaguely like shorts. The finish line is closer than you think.
Join the Two Legs Together
This is the step that transforms two tubes into actual shorts, and it is the one that confuses most beginners. Here is the trick: turn one leg right side out and leave the other leg inside out. Nest the right-side-out leg inside the wrong-side-out leg so that the two crotch curves are aligned, right sides facing each other. Pin the entire crotch seam from the front waist, through the crotch point, to the back waist.
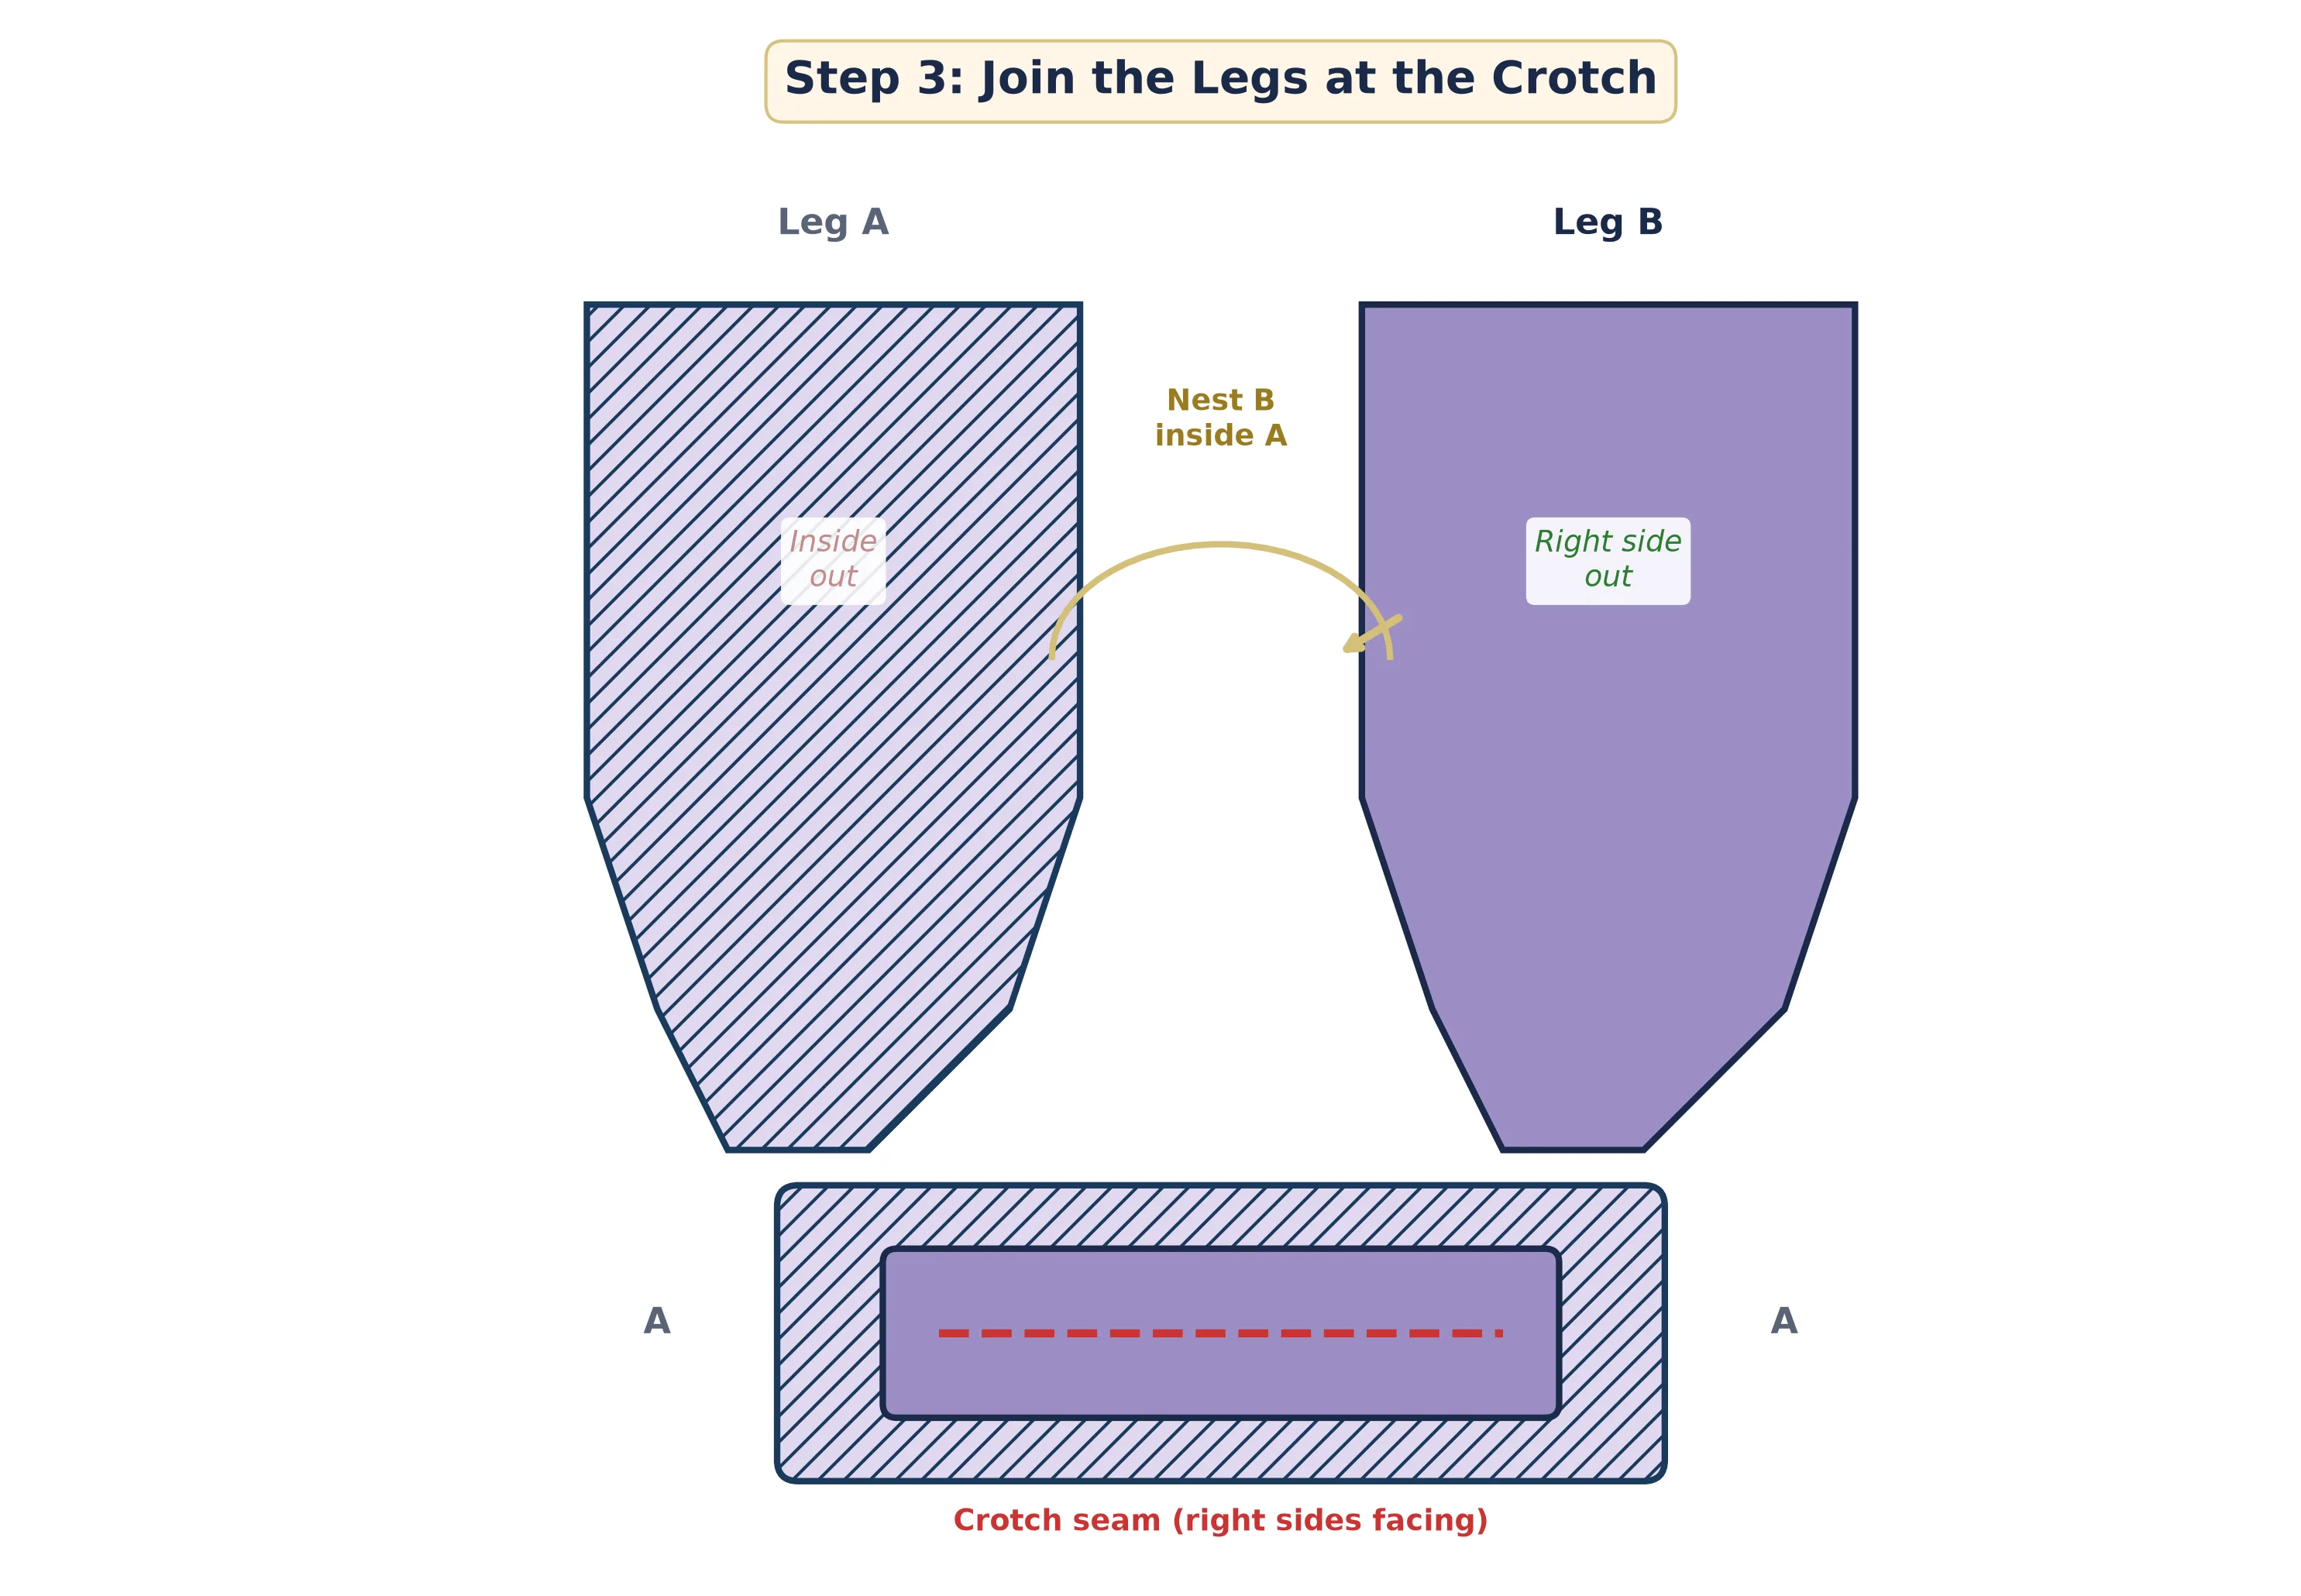
Sew the crotch seam in one continuous pass from front waist to back waist using a half-inch seam allowance. Go slowly around the curve and pivot as needed. For extra durability on a stress point, backstitch at the crotch point and consider sewing a second row of stitching one-eighth inch from the first. Turn the shorts right side out and press the crotch seam to one side.
Create the Waistband Casing
Try the shorts on (they will fall down without elastic, so hold them up at the waist). Check the length and the overall fit. If the waist is dramatically too large, you can take in the side seams slightly before creating the casing. If the fit looks reasonable, proceed.
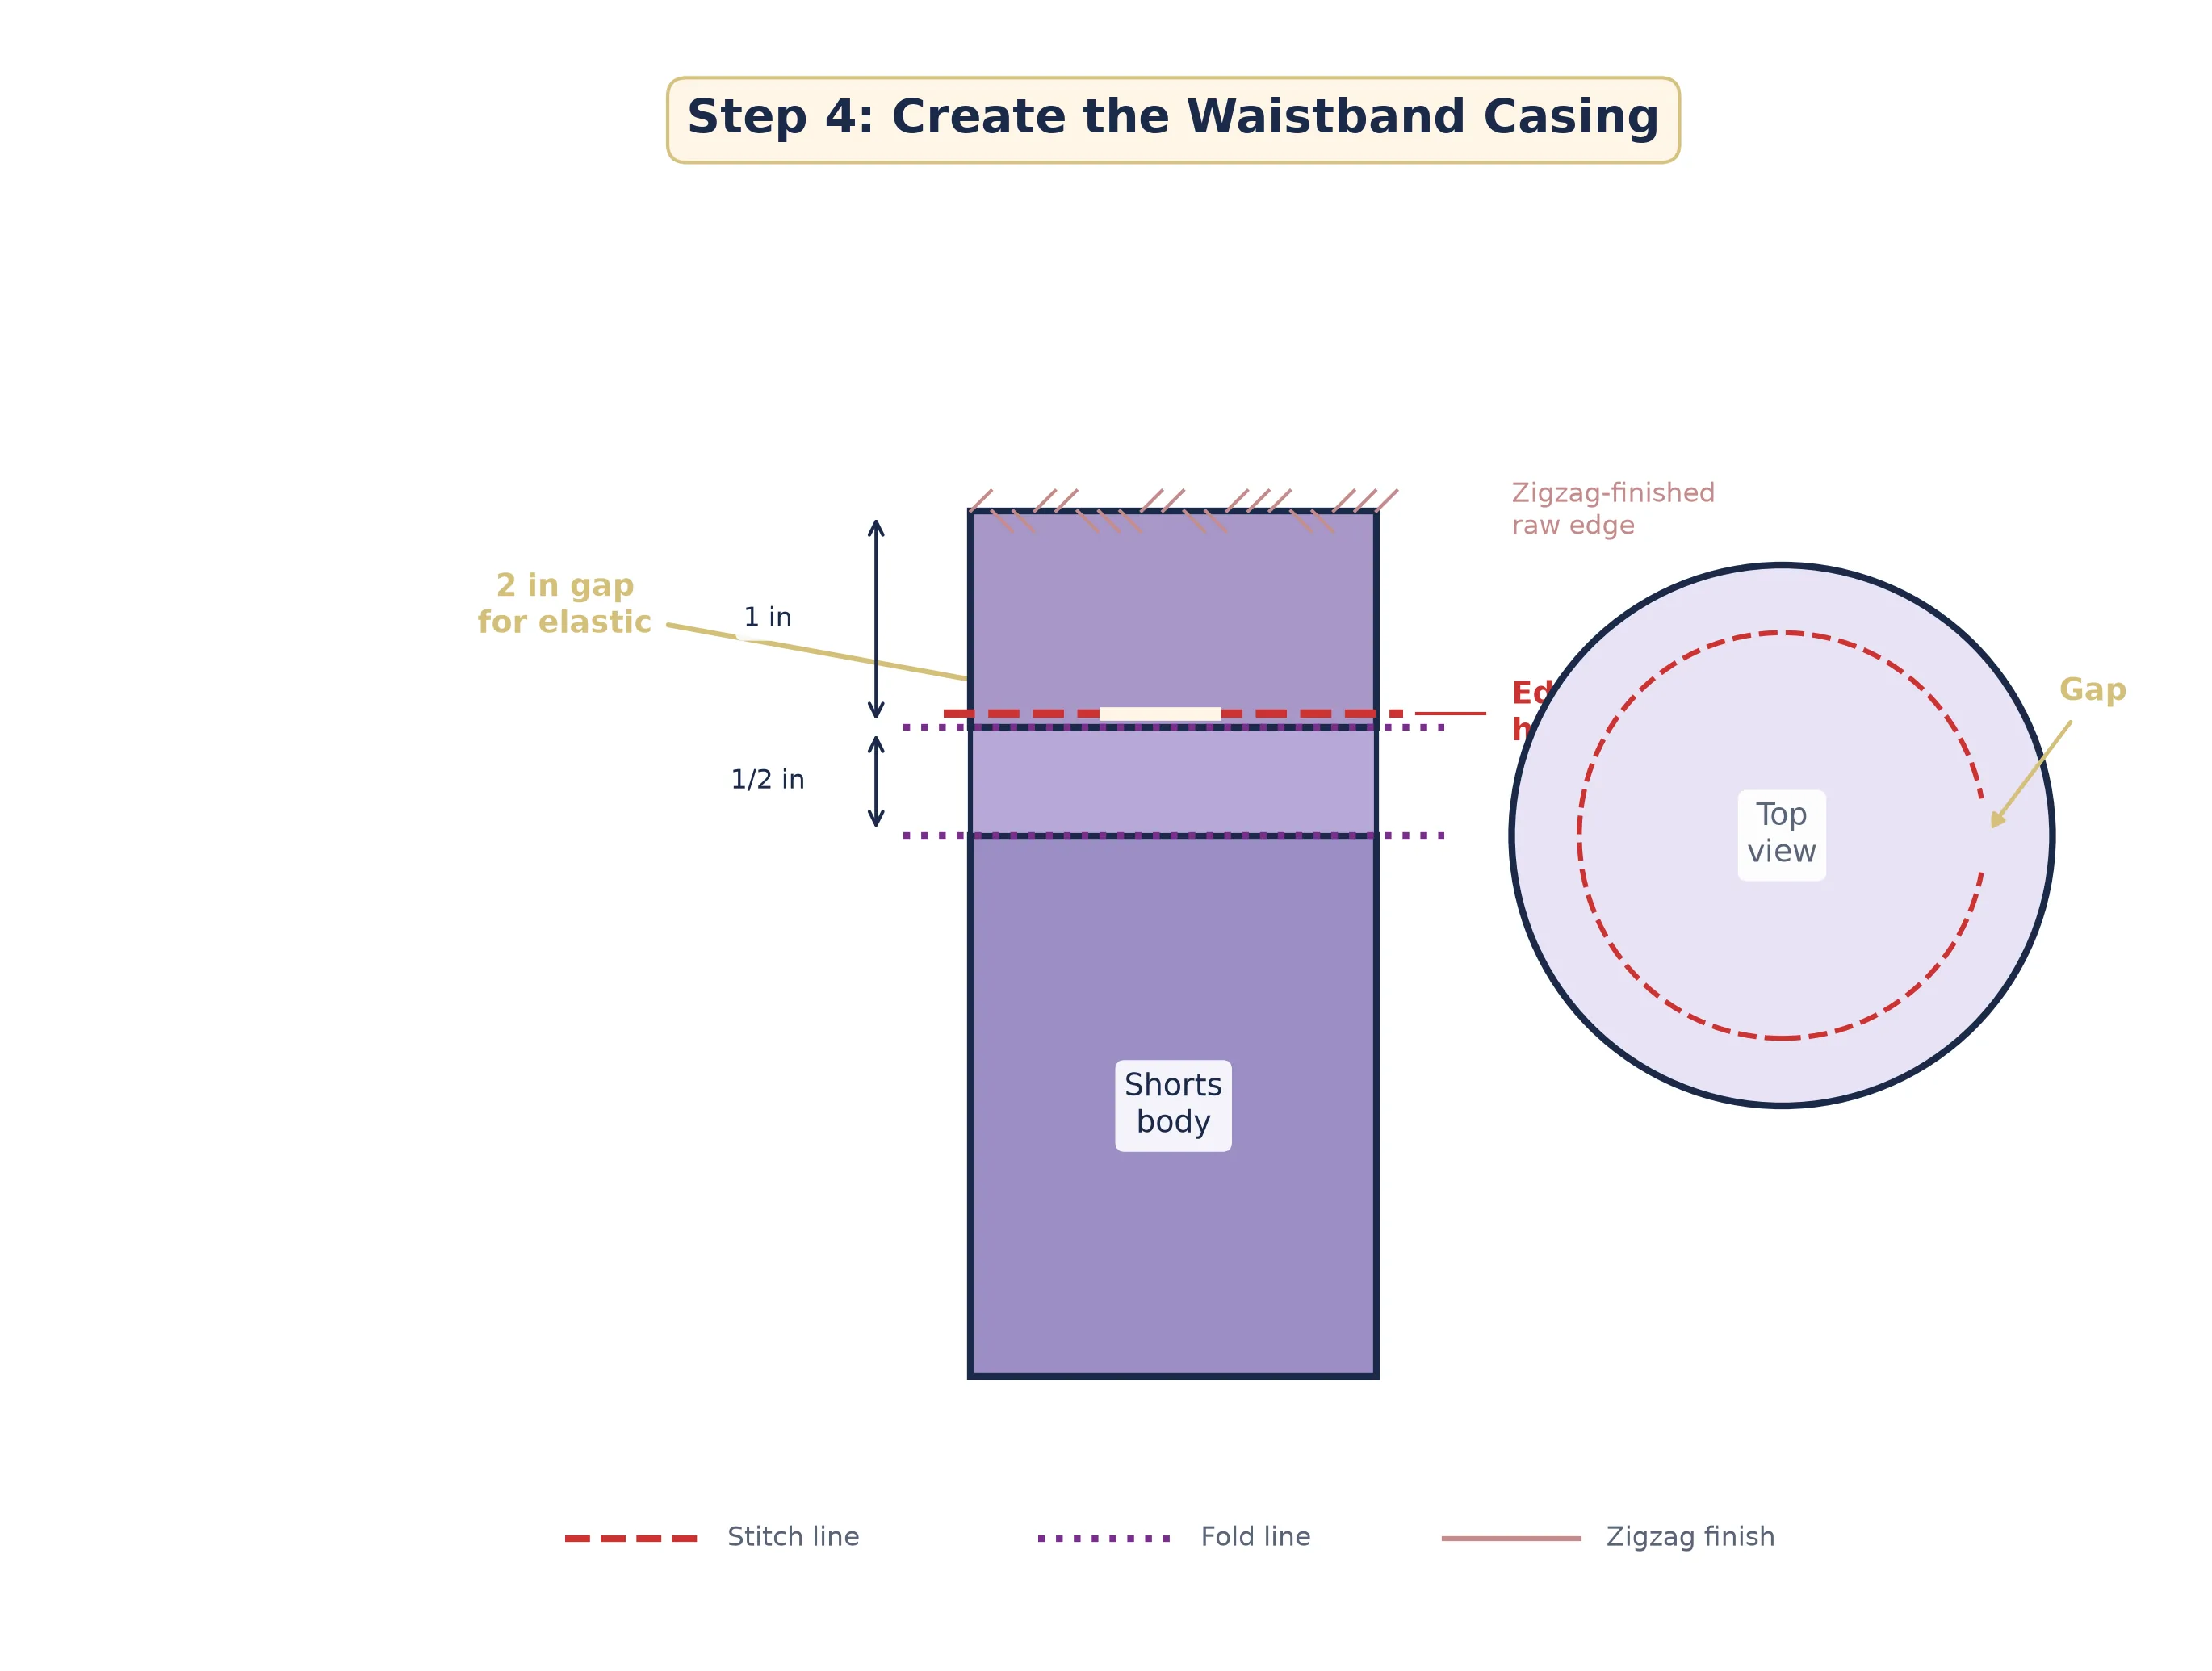
Finish the raw top edge with a zigzag stitch to prevent fraying. Then fold the top edge down by half an inch and press. Fold it down again by one full inch and press, creating a clean casing channel that is one inch wide. Pin all the way around, making sure the casing width is even. Edgestitch along the bottom fold of the casing, but leave a two-inch gap near one of the side seams for inserting the elastic.
Insert the Elastic
Cut your elastic to the length specified in the measurement chart (your waist minus two inches). Attach a large safety pin to one end of the elastic and feed it into the casing through the gap you left. Use your fingers to guide the safety pin through the channel, gathering the fabric as you go. Be very careful not to let the trailing end of the elastic disappear into the casing — pin it to the fabric at the opening if necessary.
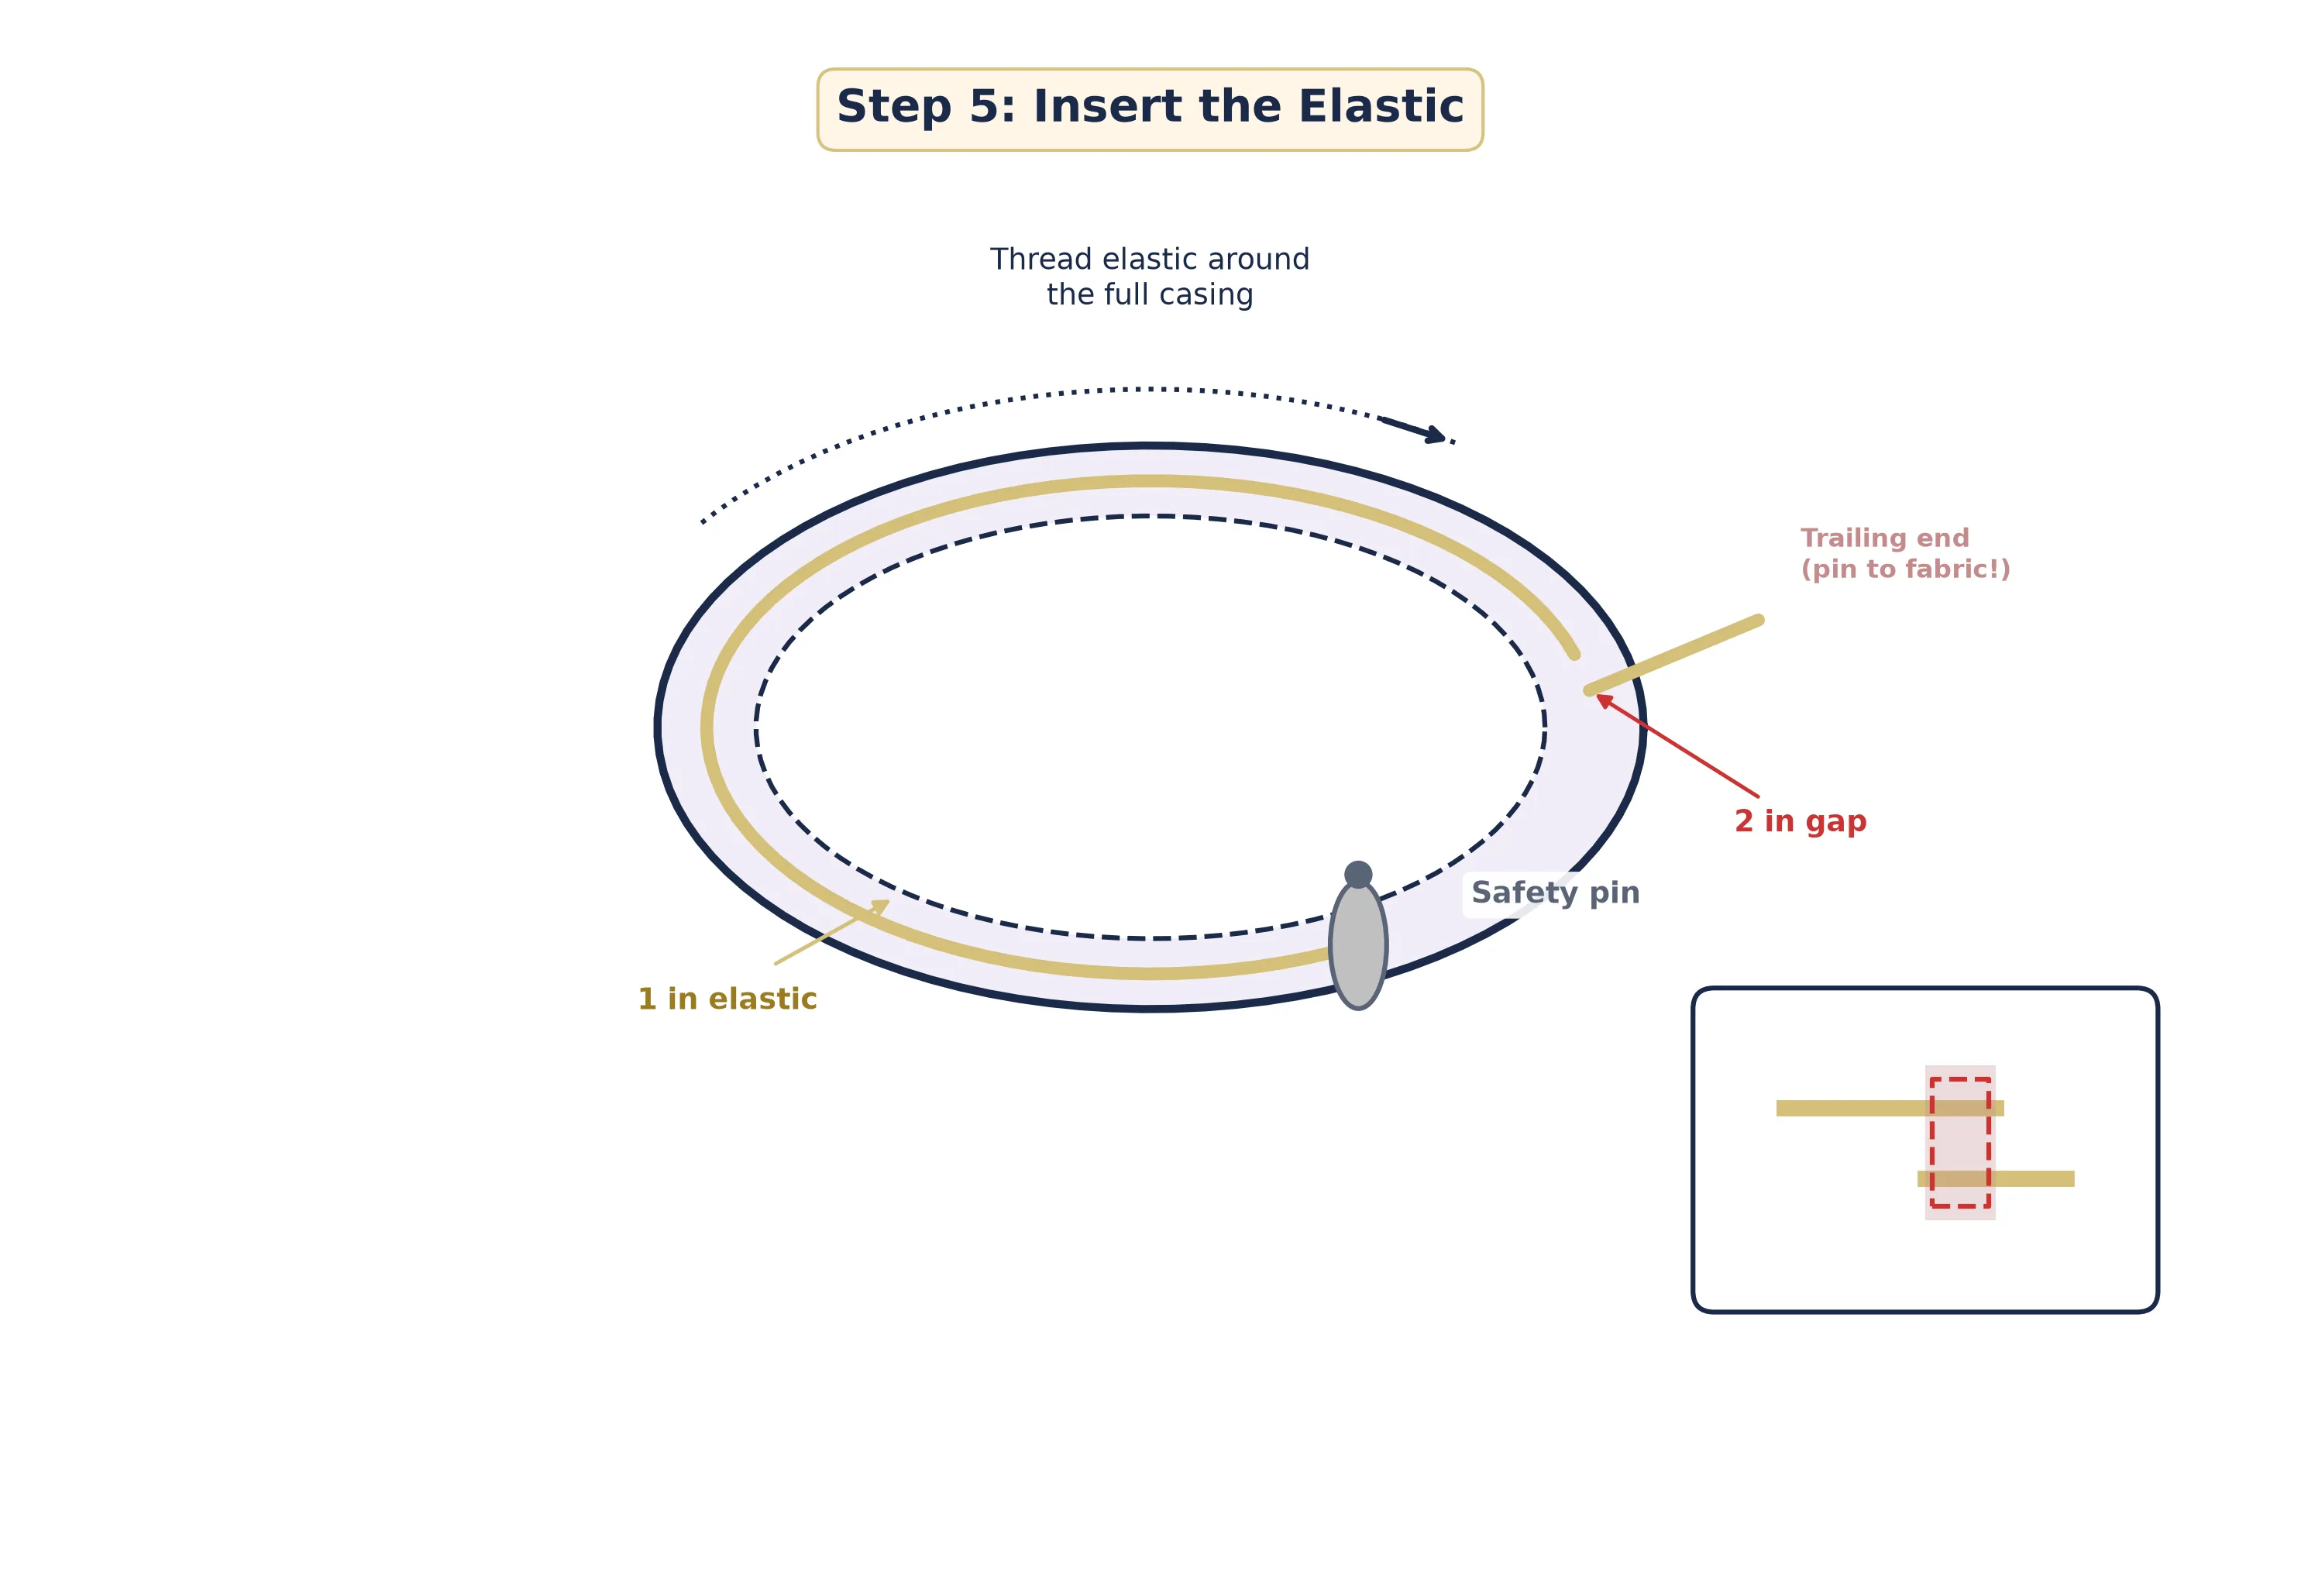
Once the elastic has traveled all the way around and both ends are poking out of the gap, overlap them by one inch and stitch a secure rectangle (or several rows of zigzag) to join them. Release the elastic into the casing, distribute the gathers evenly, and stitch the gap closed. Stitch in the ditch at the side seams to prevent the elastic from rolling inside the casing during wear and washing.
Hem the Leg Openings
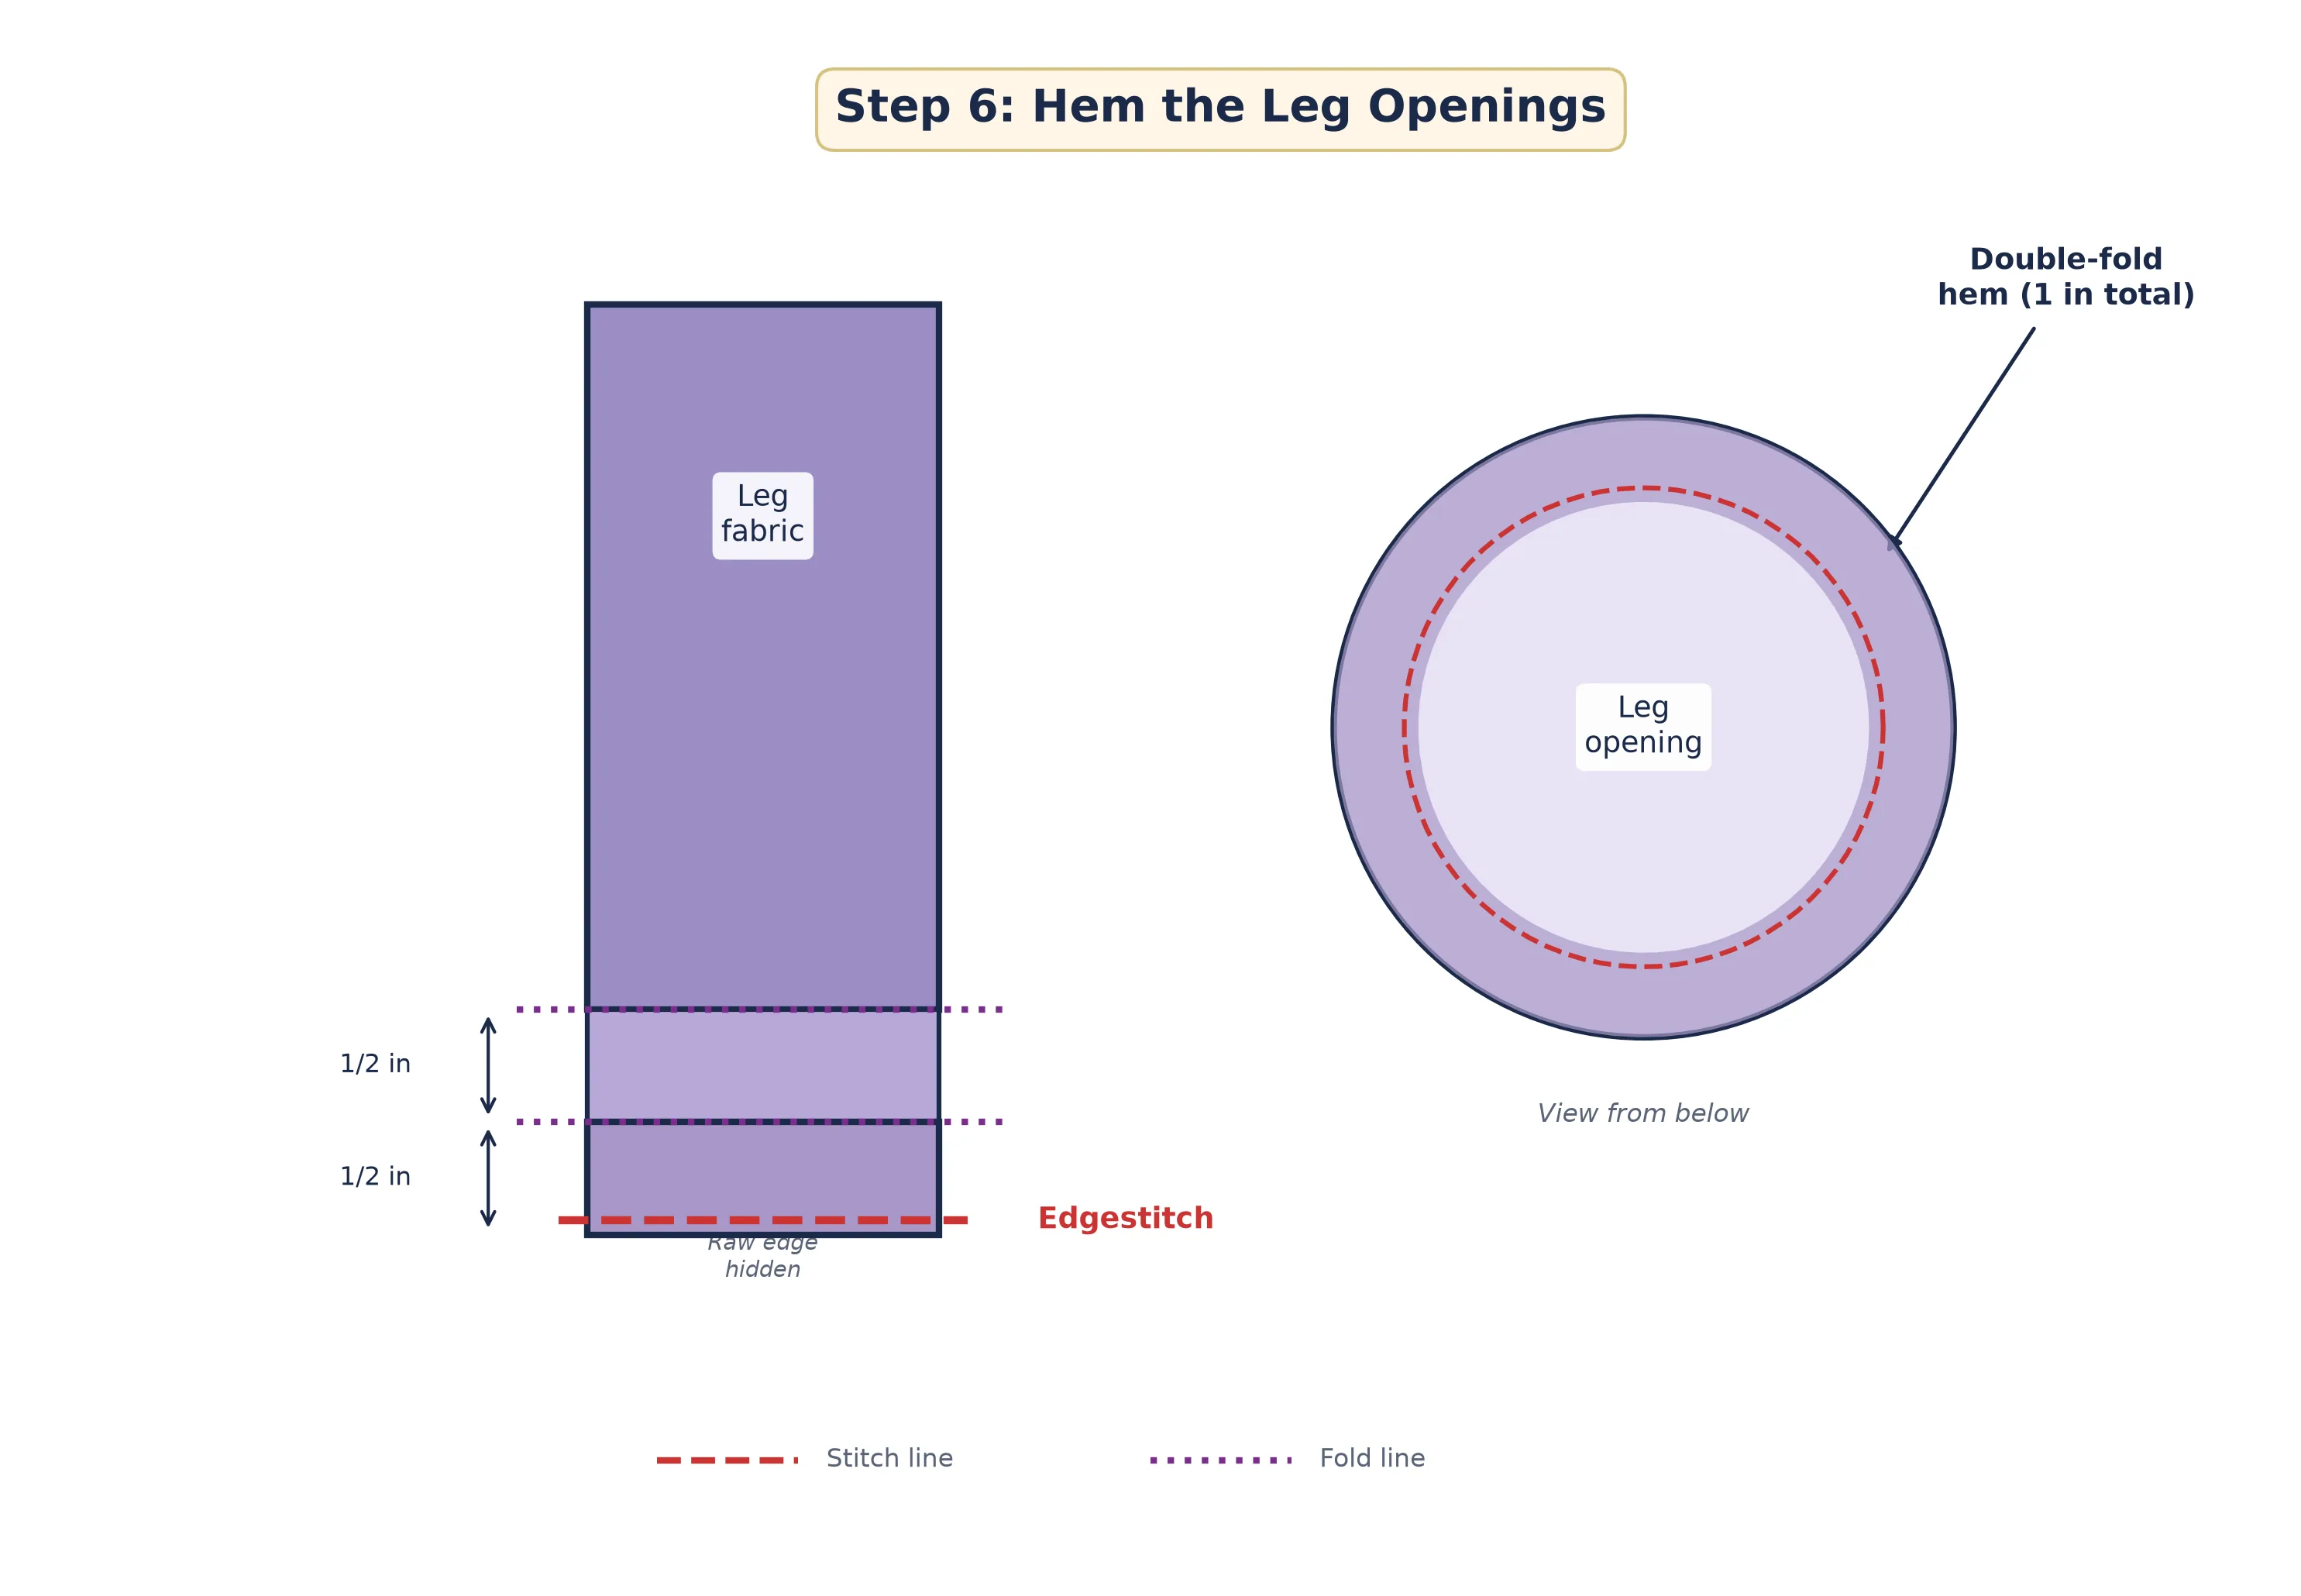
Try the shorts on one final time and mark your desired hemline with chalk. For a standard pajama short, fold the bottom edge of each leg up by half an inch and press, then fold up another half inch and press again to enclose the raw edge. Pin or clip in place and edgestitch around each leg opening. The double-fold hem gives a clean finish and adds a little weight to the hem so the legs hang nicely.
Give the entire pair of shorts a final press with your iron, paying special attention to the waistband casing and the crotch seam. Trim any stray threads. Step back and look at what you have made.
Final Fit Check and First Wear
Put on your finished pajama shorts and do a quick movement test: sit down, stand up, walk around the room, and do a deep squat. The shorts should feel comfortable in every position without riding up excessively or digging into your waist. If the elastic twists inside the casing after movement, add a few more "stitch in the ditch" anchors at the quarter points of the waistband.
Wash the shorts on a gentle cycle and tumble dry low (or hang dry) to set the stitches and remove any chalk marks. After the first wash, check the seams for any puckering or loose threads and trim as needed. Your pajama shorts will only get softer and more comfortable with each wash.
Customization Ideas
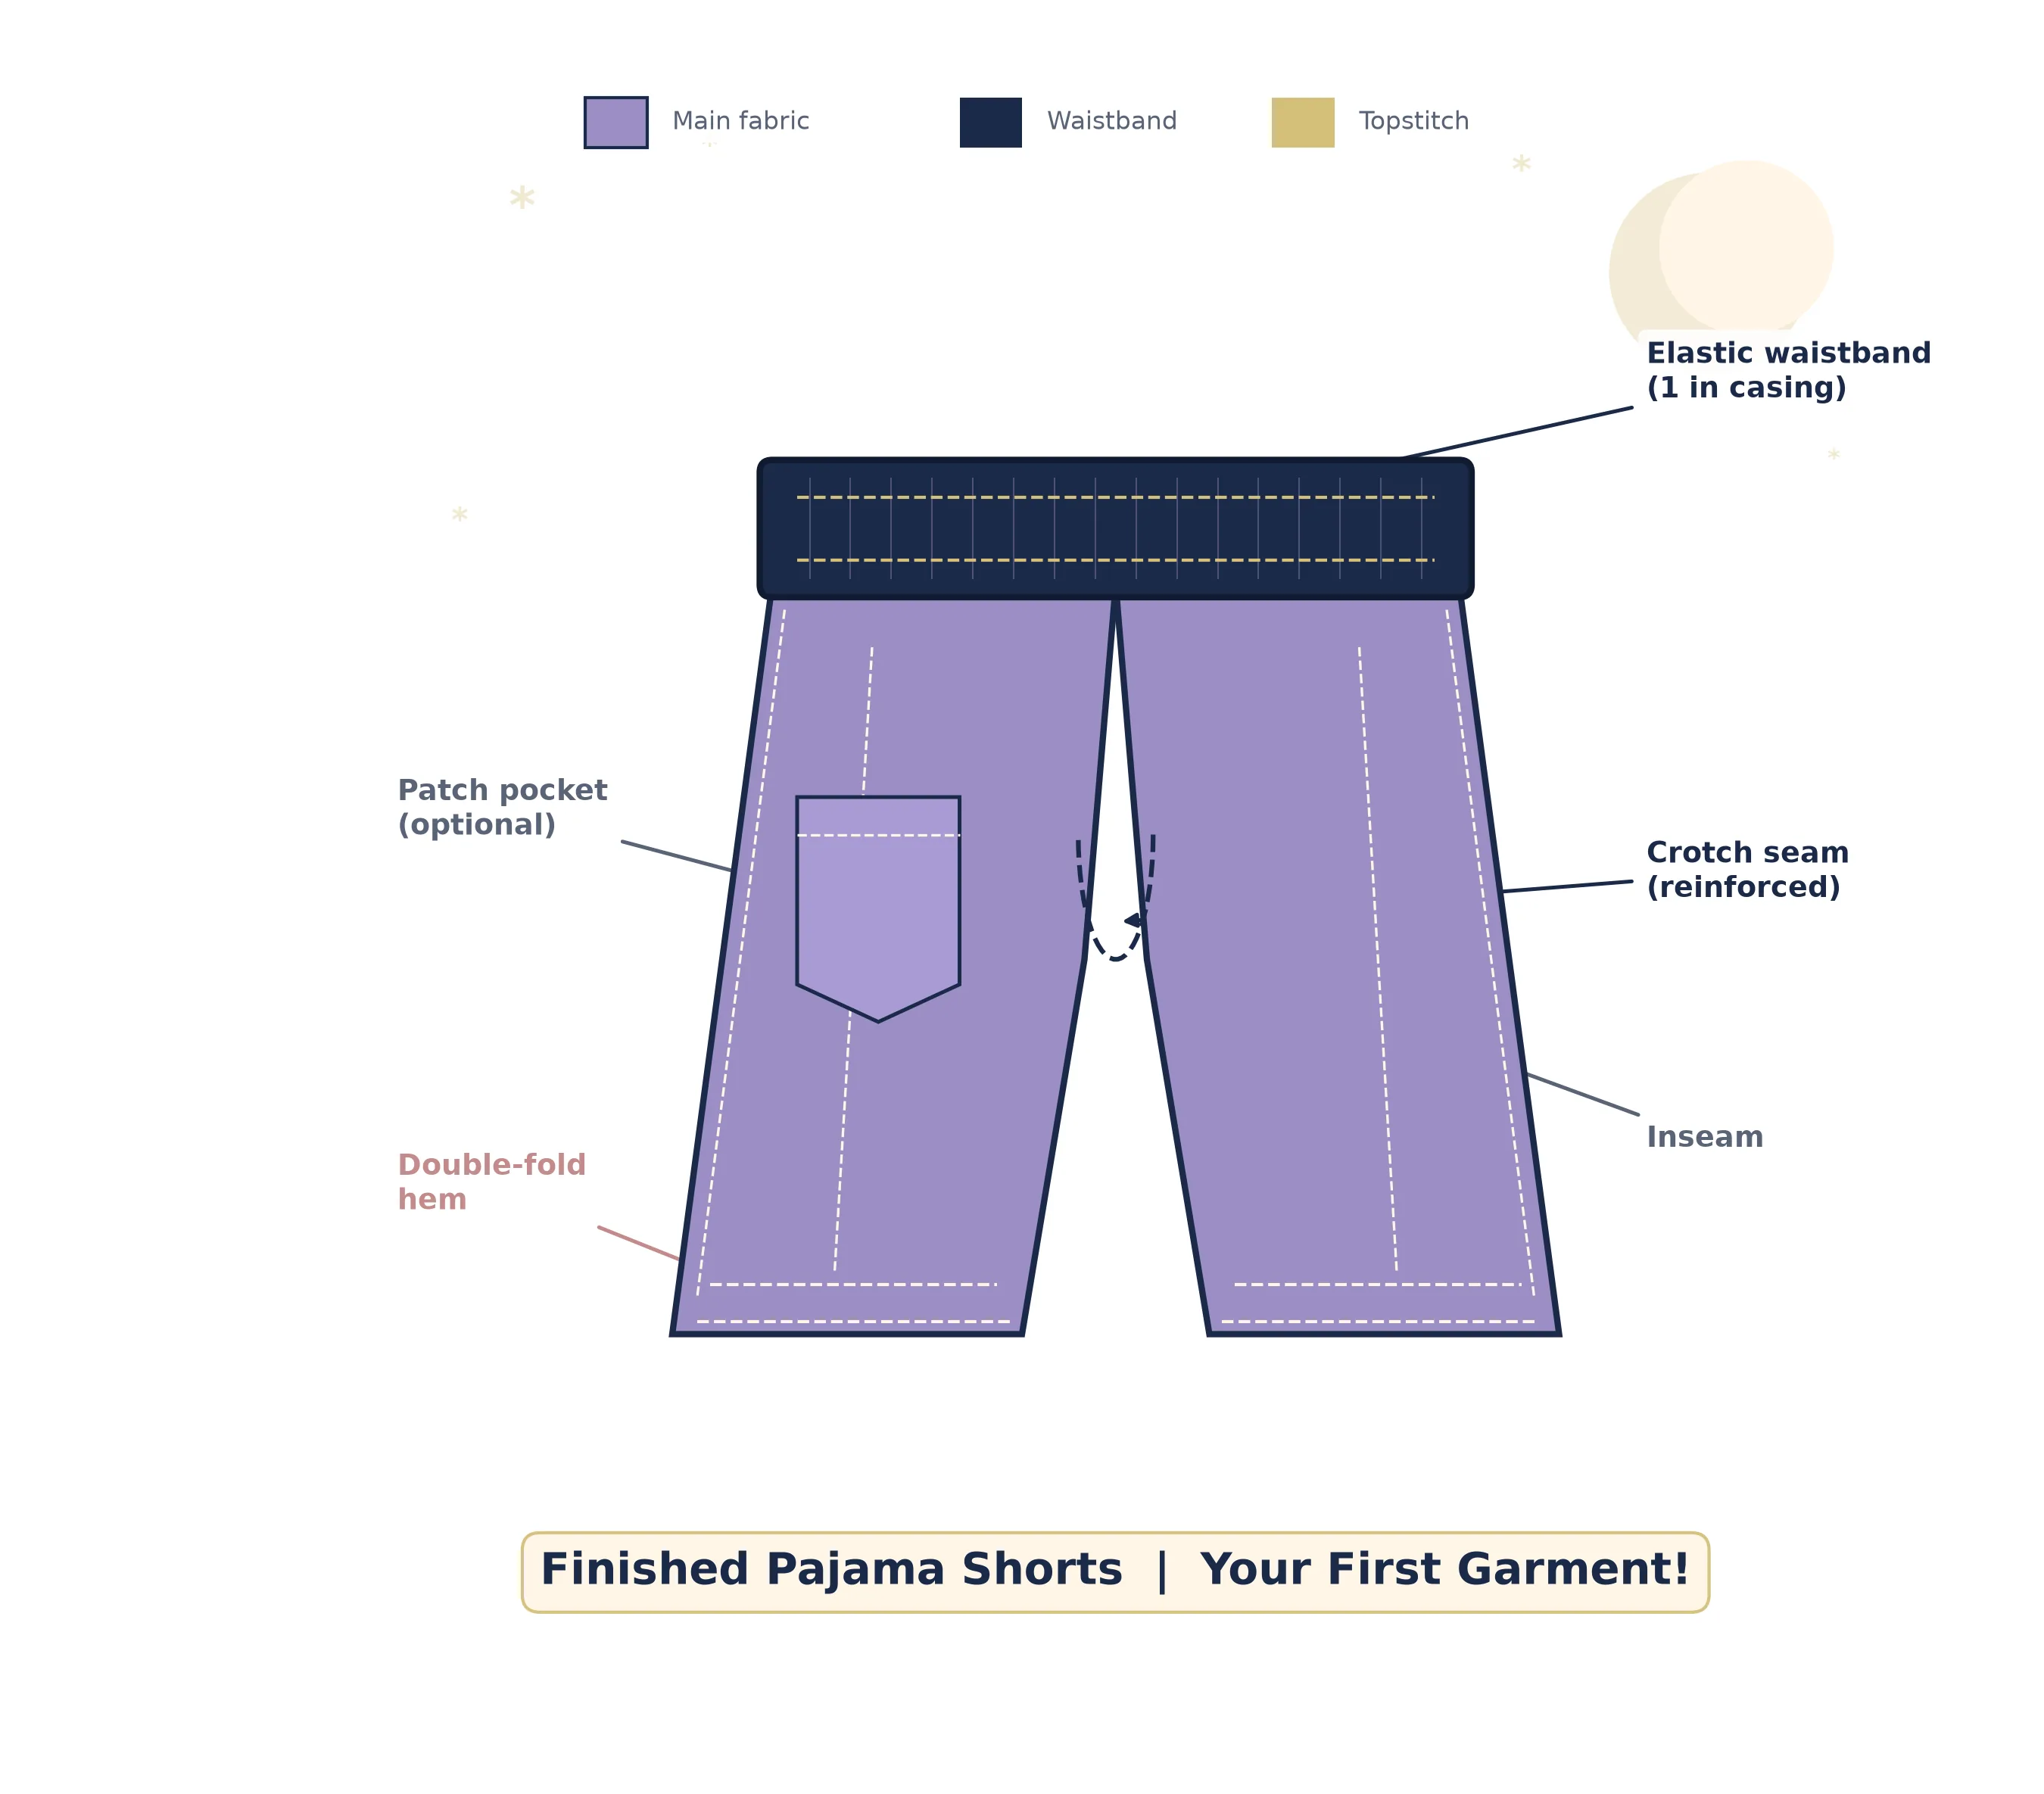
Once you have mastered the basic construction, pajama shorts become a blank canvas for personal expression. Here are six easy variations you can try with your second or third pair:
Patch Pockets
Add a square or heart-shaped pocket to one or both front legs. Use a contrasting fabric for a playful touch.
Drawstring Waist
Replace the elastic with a fabric drawstring, or add a drawstring over the elastic for an adjustable fit and sporty look.
Longer Inseam
Extend the inseam to 8–10 inches for Bermuda-style lounge shorts that double as casual summer wear.
Contrast Cuffs
Sew a band of ribbing or contrasting cotton to the leg openings instead of a traditional hem for a jogger-inspired look.
Fabric Paint
Use fabric paint or iron-on transfers to add monograms, stars, or whimsical motifs to plain cotton shorts.
Kids' Sizes
Scale the pattern down for children using their measurements. Kids love wearing pajamas made by a family member.
Common Mistakes to Avoid
Even the simplest garment can go sideways if you rush. Here are the pitfalls we see most often from beginners sewing their first pair of shorts, along with how to sidestep each one.
Skipping the pre-wash. Cotton and flannel shrink significantly on their first trip through the washer and dryer. If you cut and sew before washing, your finished shorts may shrink a full size after the first laundry cycle. Always pre-wash and dry your fabric using the same method you plan to use for the finished garment.
Cutting the elastic too short. It is tempting to pull the elastic taut and think "snug is good," but elastic that is too tight will dig into your skin and create uncomfortable red marks. Start with waist-minus-two-inches and adjust from there. You can always shorten elastic later, but you cannot lengthen it without unpicking the entire casing.
Twisting the elastic inside the casing. If the elastic flips or rolls as you thread it through the channel, the waistband will bunch unevenly and feel lumpy against your skin. Keep the elastic flat as you feed it and use your fingers to smooth it through the fabric. Stitching in the ditch at the side seams anchors the elastic and prevents future twisting.
Ignoring the grainline. Cutting pieces off-grain causes the legs to twist around your thighs after washing, which is both uncomfortable and visually distracting. Take the extra minute to align your pattern pieces parallel to the selvedge before cutting.
Rushing the crotch curve. The crotch seam bears a lot of stress during movement. Sewing it too quickly with long stitches can lead to popped seams after a few wears. Use a shorter stitch length (2.0 mm) around the curve and consider a second reinforcing row of stitching.
Frequently Asked Questions
How much fabric do I need to sew pajama shorts?
What is the best fabric for beginner pajama shorts?
Can I sew pajama shorts without a commercial pattern?
How do I know what length of elastic to use?
Can I make pajama shorts for kids using this method?
How do I fix twisted legs on my finished shorts?
Congratulations, Graduate!
You have completed all ten projects in the First Stitches series. From your very first straight seam on an envelope pillowcase to your first wearable garment, you have built a real foundation of sewing skills. You can cut accurately, sew straight and curved seams, insert zippers, thread elastic, and now construct a simple garment from scratch.
What comes next? The world of garment sewing is wide open to you.
Continue to Series 2: Weekend Sewing