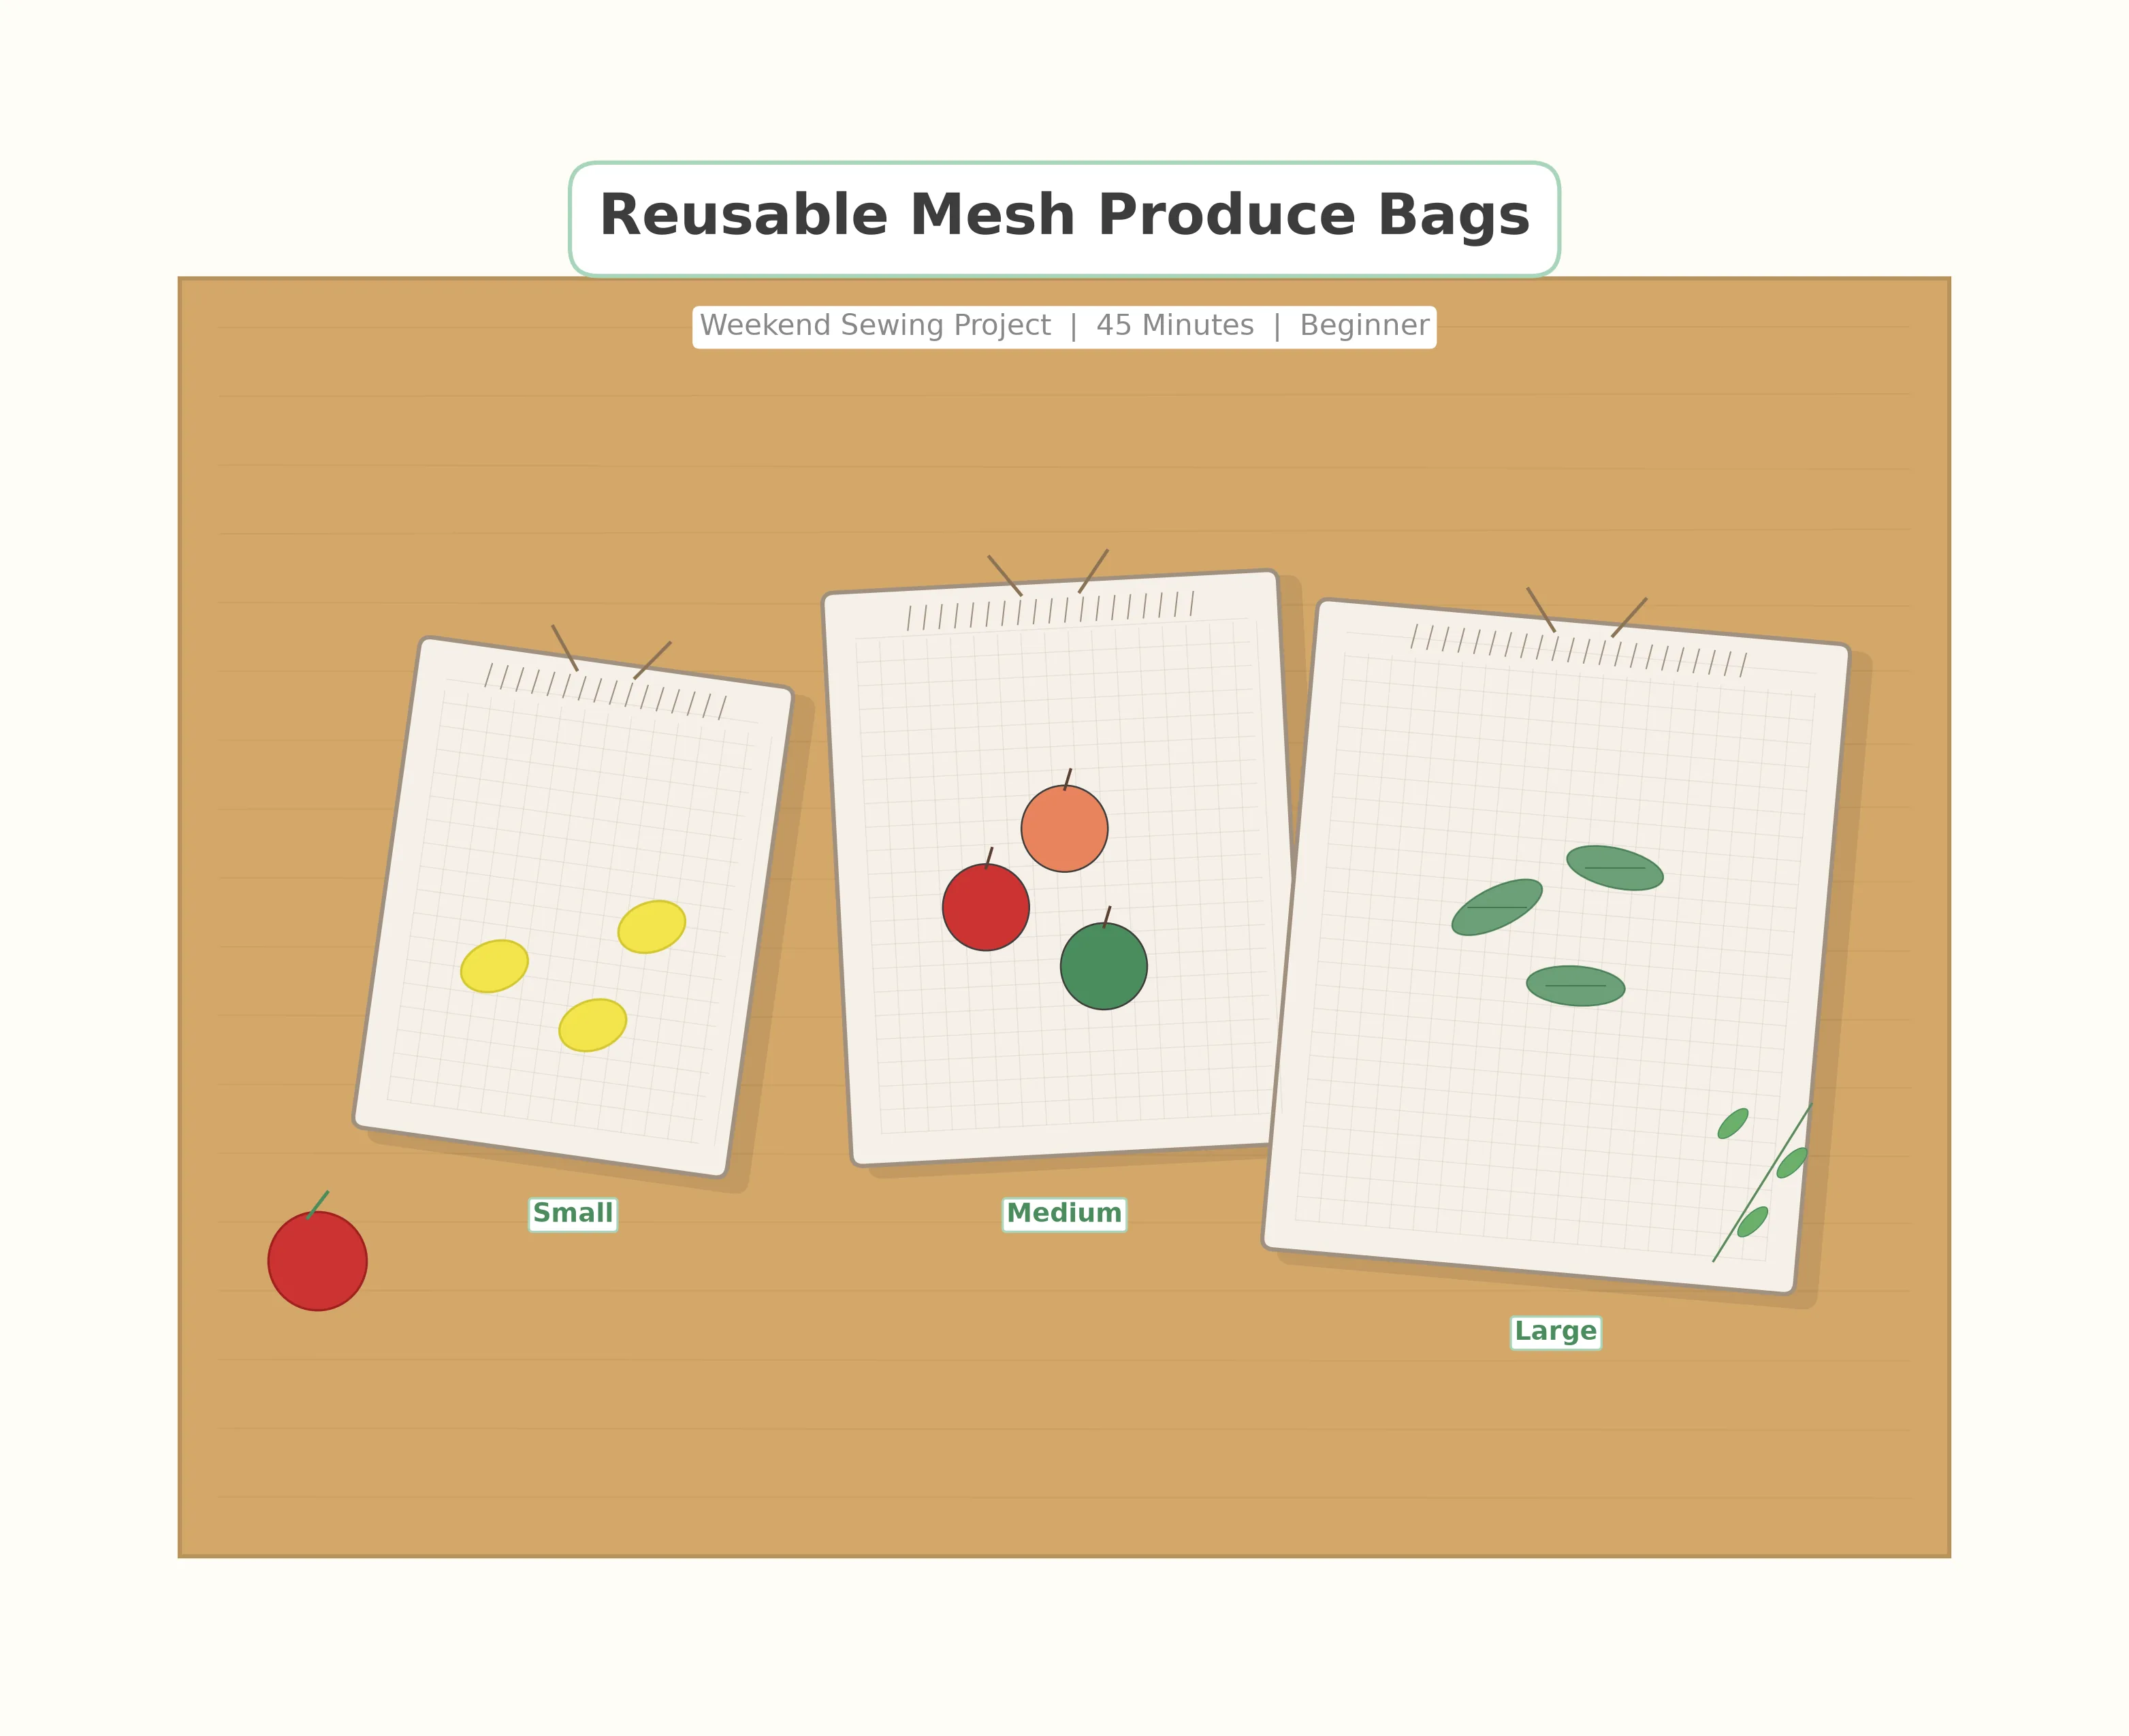
 Eco Project
Reusable Produce Bag Sewing Pattern
Ditch single-use plastic and sew a set of washable mesh bags for your weekly market haul — in just 45 minutes.
Every year, the average household brings home over 500 single-use plastic produce bags from the grocery store — the thin, filmy ones you tear off the roll to hold apples, broccoli, and green beans. Most of them are used for exactly one trip before ending up in a landfill, where they will outlive us all by several centuries.
The good news? Sewing your own reusable mesh produce bags is one of the fastest, most satisfying weekend projects you can tackle. In about 45 minutes, you can stitch a full set of three bags — small, medium, and large — that will last for years, wash beautifully, and actually let your fruits and vegetables breathe (unlike plastic, which traps moisture and accelerates spoilage).
This pattern uses cotton mesh or muslin fabric with a simple drawstring closure. The construction is straightforward: one main rectangle, one casing strip, and a length of cotton cord. If you can sew a straight line, you can make these bags. The mesh fabric adds a slight learning curve because it is lightweight and can shift under the presser foot, but the tips below will walk you through every tricky moment.
By the end of this tutorial, you will have a set of beautiful, functional produce bags that make grocery shopping feel a little more intentional — and a lot less wasteful. Let's get sewing.
Materials & Tools
Look for cotton mesh or produce bag mesh at fabric stores or online. It has a loose, open weave that lets air circulate around produce. Avoid polyester tulle for food storage — it is not breathable enough and can trap ethylene gas, which speeds up ripening. Check the Mood Fabrics mesh guide for a full breakdown of mesh types.
Size Chart
Cut one main rectangle and one casing strip per bag. The drawstring cord length equals the bag width plus 8" (20 cm) for tying.
| Size | Best For | Bag Body (W × L) | Casing Strip | Cord Length |
|---|---|---|---|---|
| Small | Garlic, lemons, herbs, chilies | 8 × 10 in (20 × 25 cm) | 2 × 18 in (5 × 46 cm) | 16 in (40 cm) |
| Medium | Apples, tomatoes, peppers, onions | 12 × 14 in (30 × 36 cm) | 2 × 26 in (5 × 66 cm) | 20 in (50 cm) |
| Large | Leafy greens, broccoli, bulk grains | 14 × 18 in (36 × 46 cm) | 2 × 30 in (5 × 76 cm) | 22 in (56 cm) |
Cutting Layout
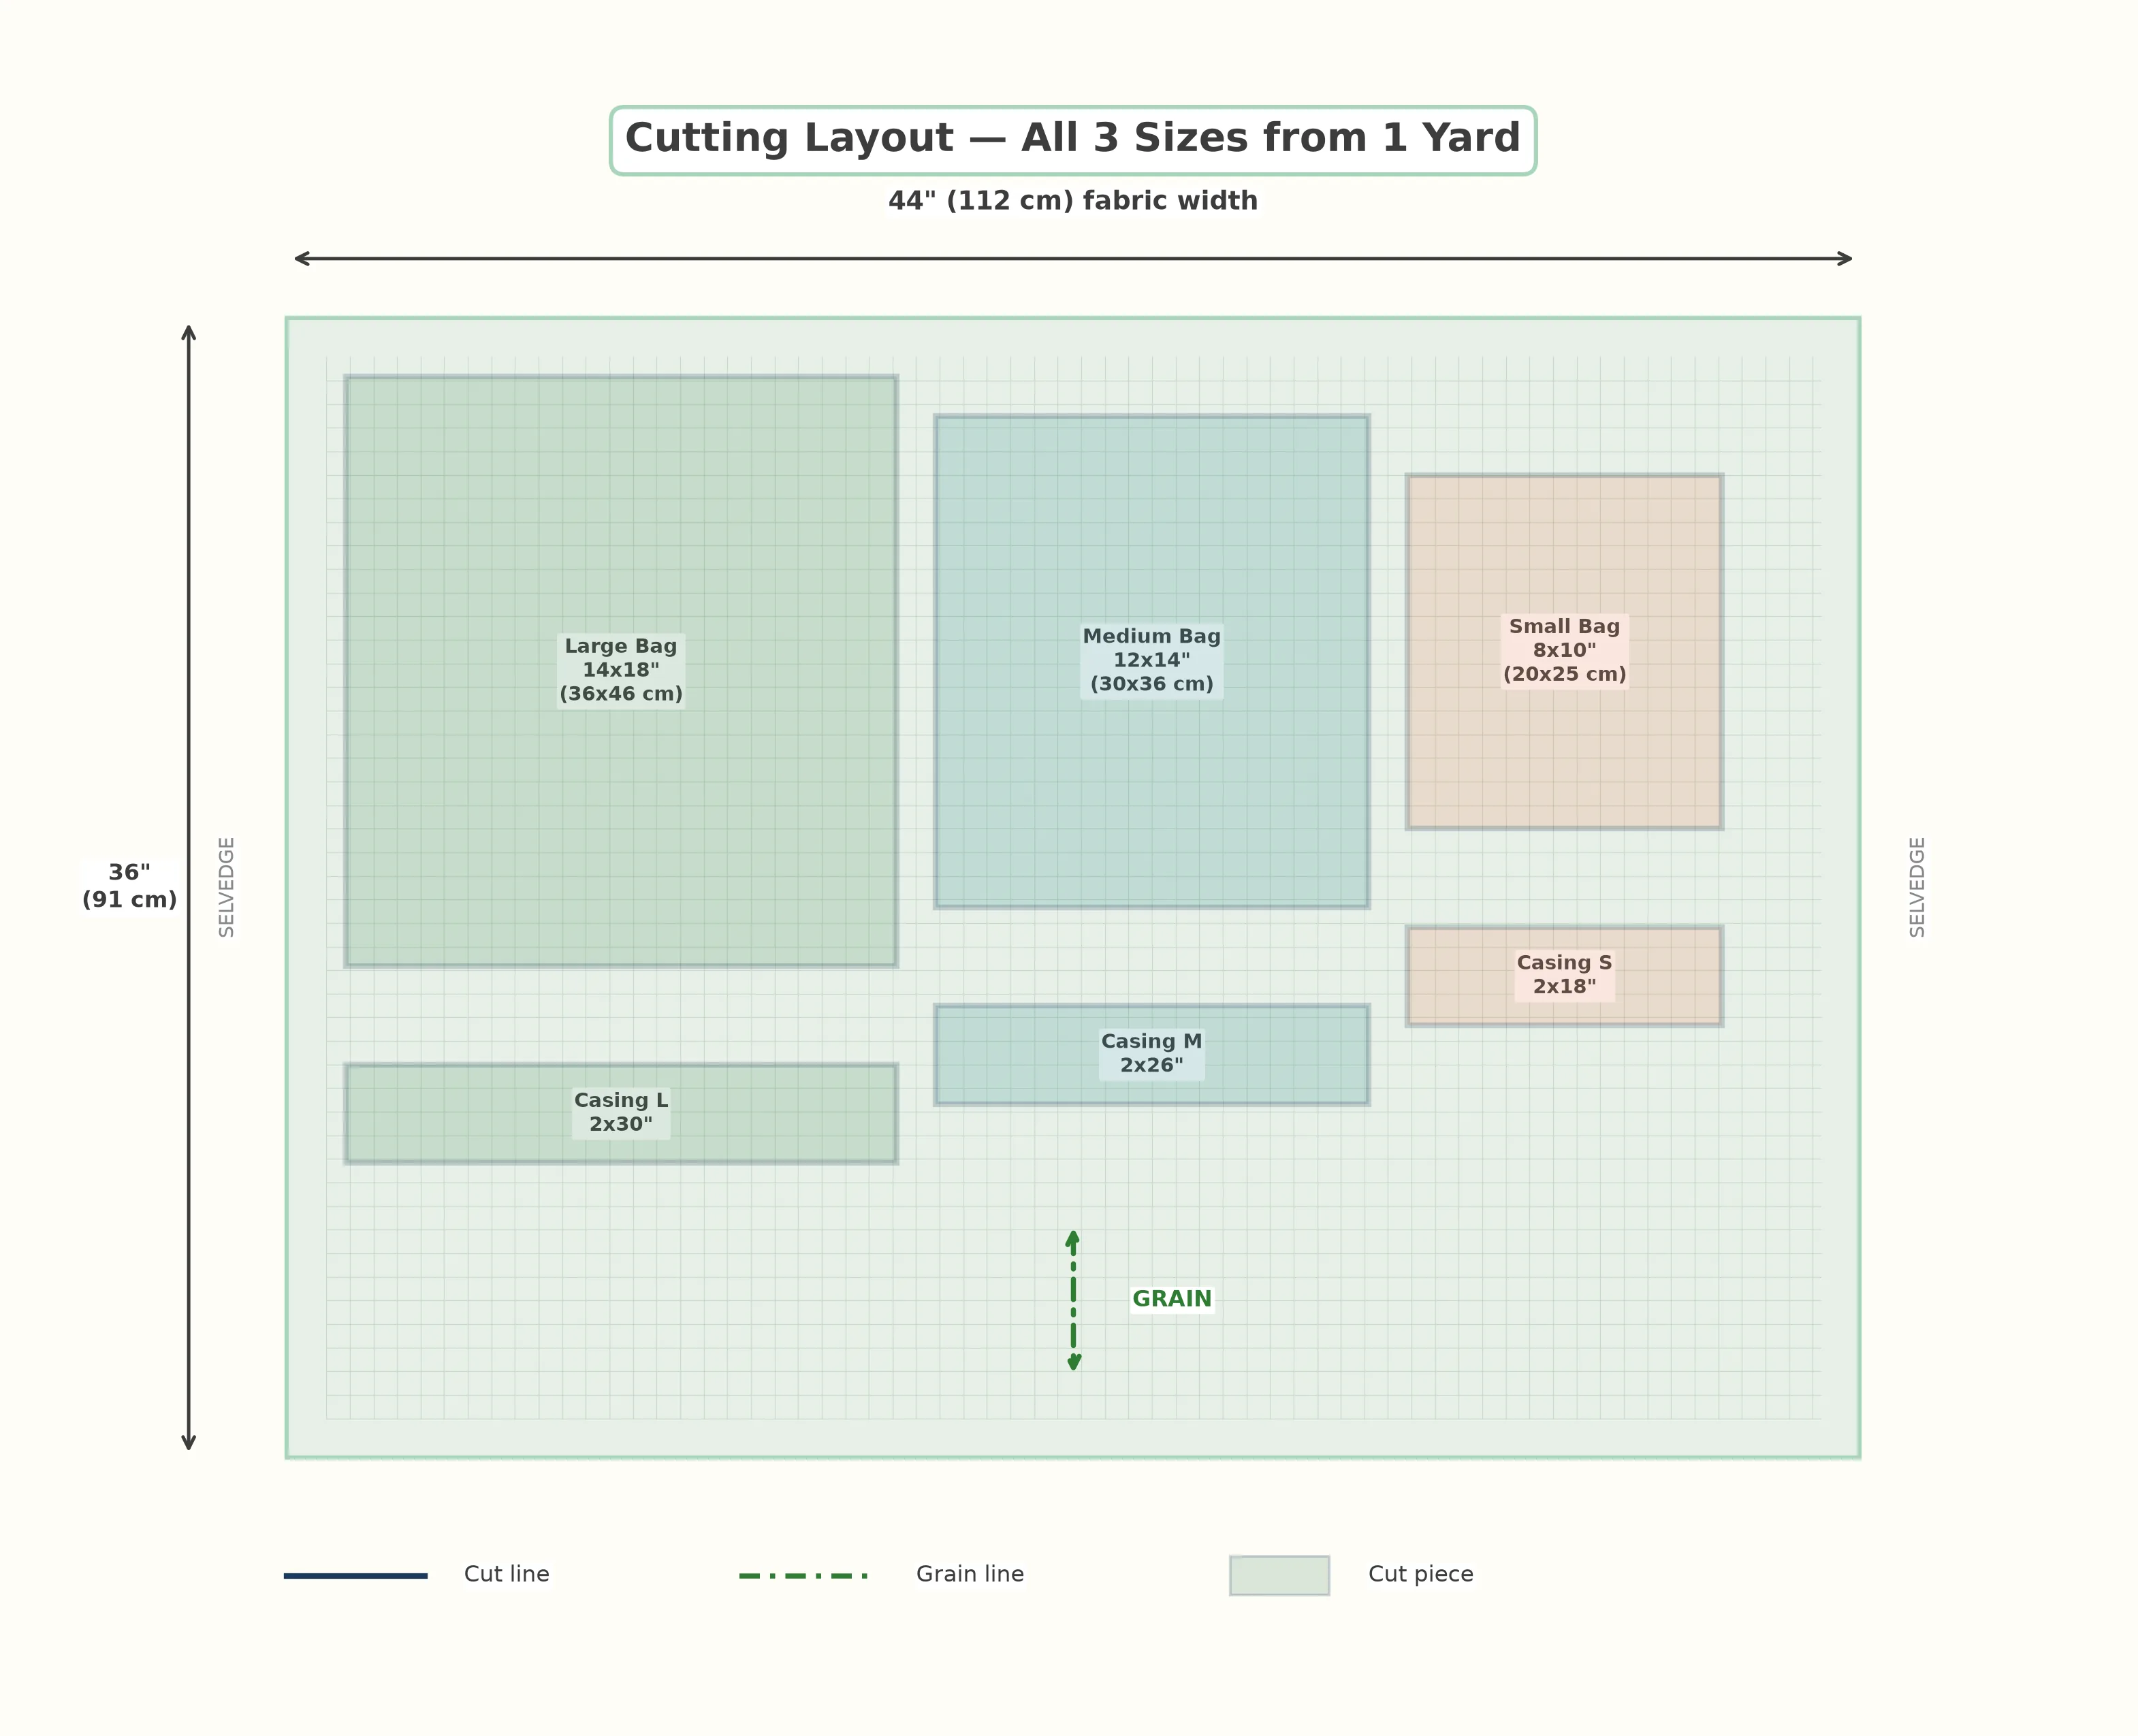
From your 1 yard (91 cm) of mesh fabric, you can comfortably cut all three bag sizes plus their casing strips. Arrange the rectangles along the lengthwise grain (parallel to the selvedge) so the bags hang properly when filled. The mesh weave may look the same in both directions, but the lengthwise grain has less stretch and will hold the weight of produce better.
Use a rotary cutter and ruler for the cleanest edges. Mesh fabric tends to shift and stretch when cut with scissors, so a rotary cutter on a self-healing mat gives you much more accurate rectangles. If you only have scissors, pin the mesh to a layer of tissue paper first — the paper stabilizes the fabric and tears away easily after cutting.
Pattern Breakdown
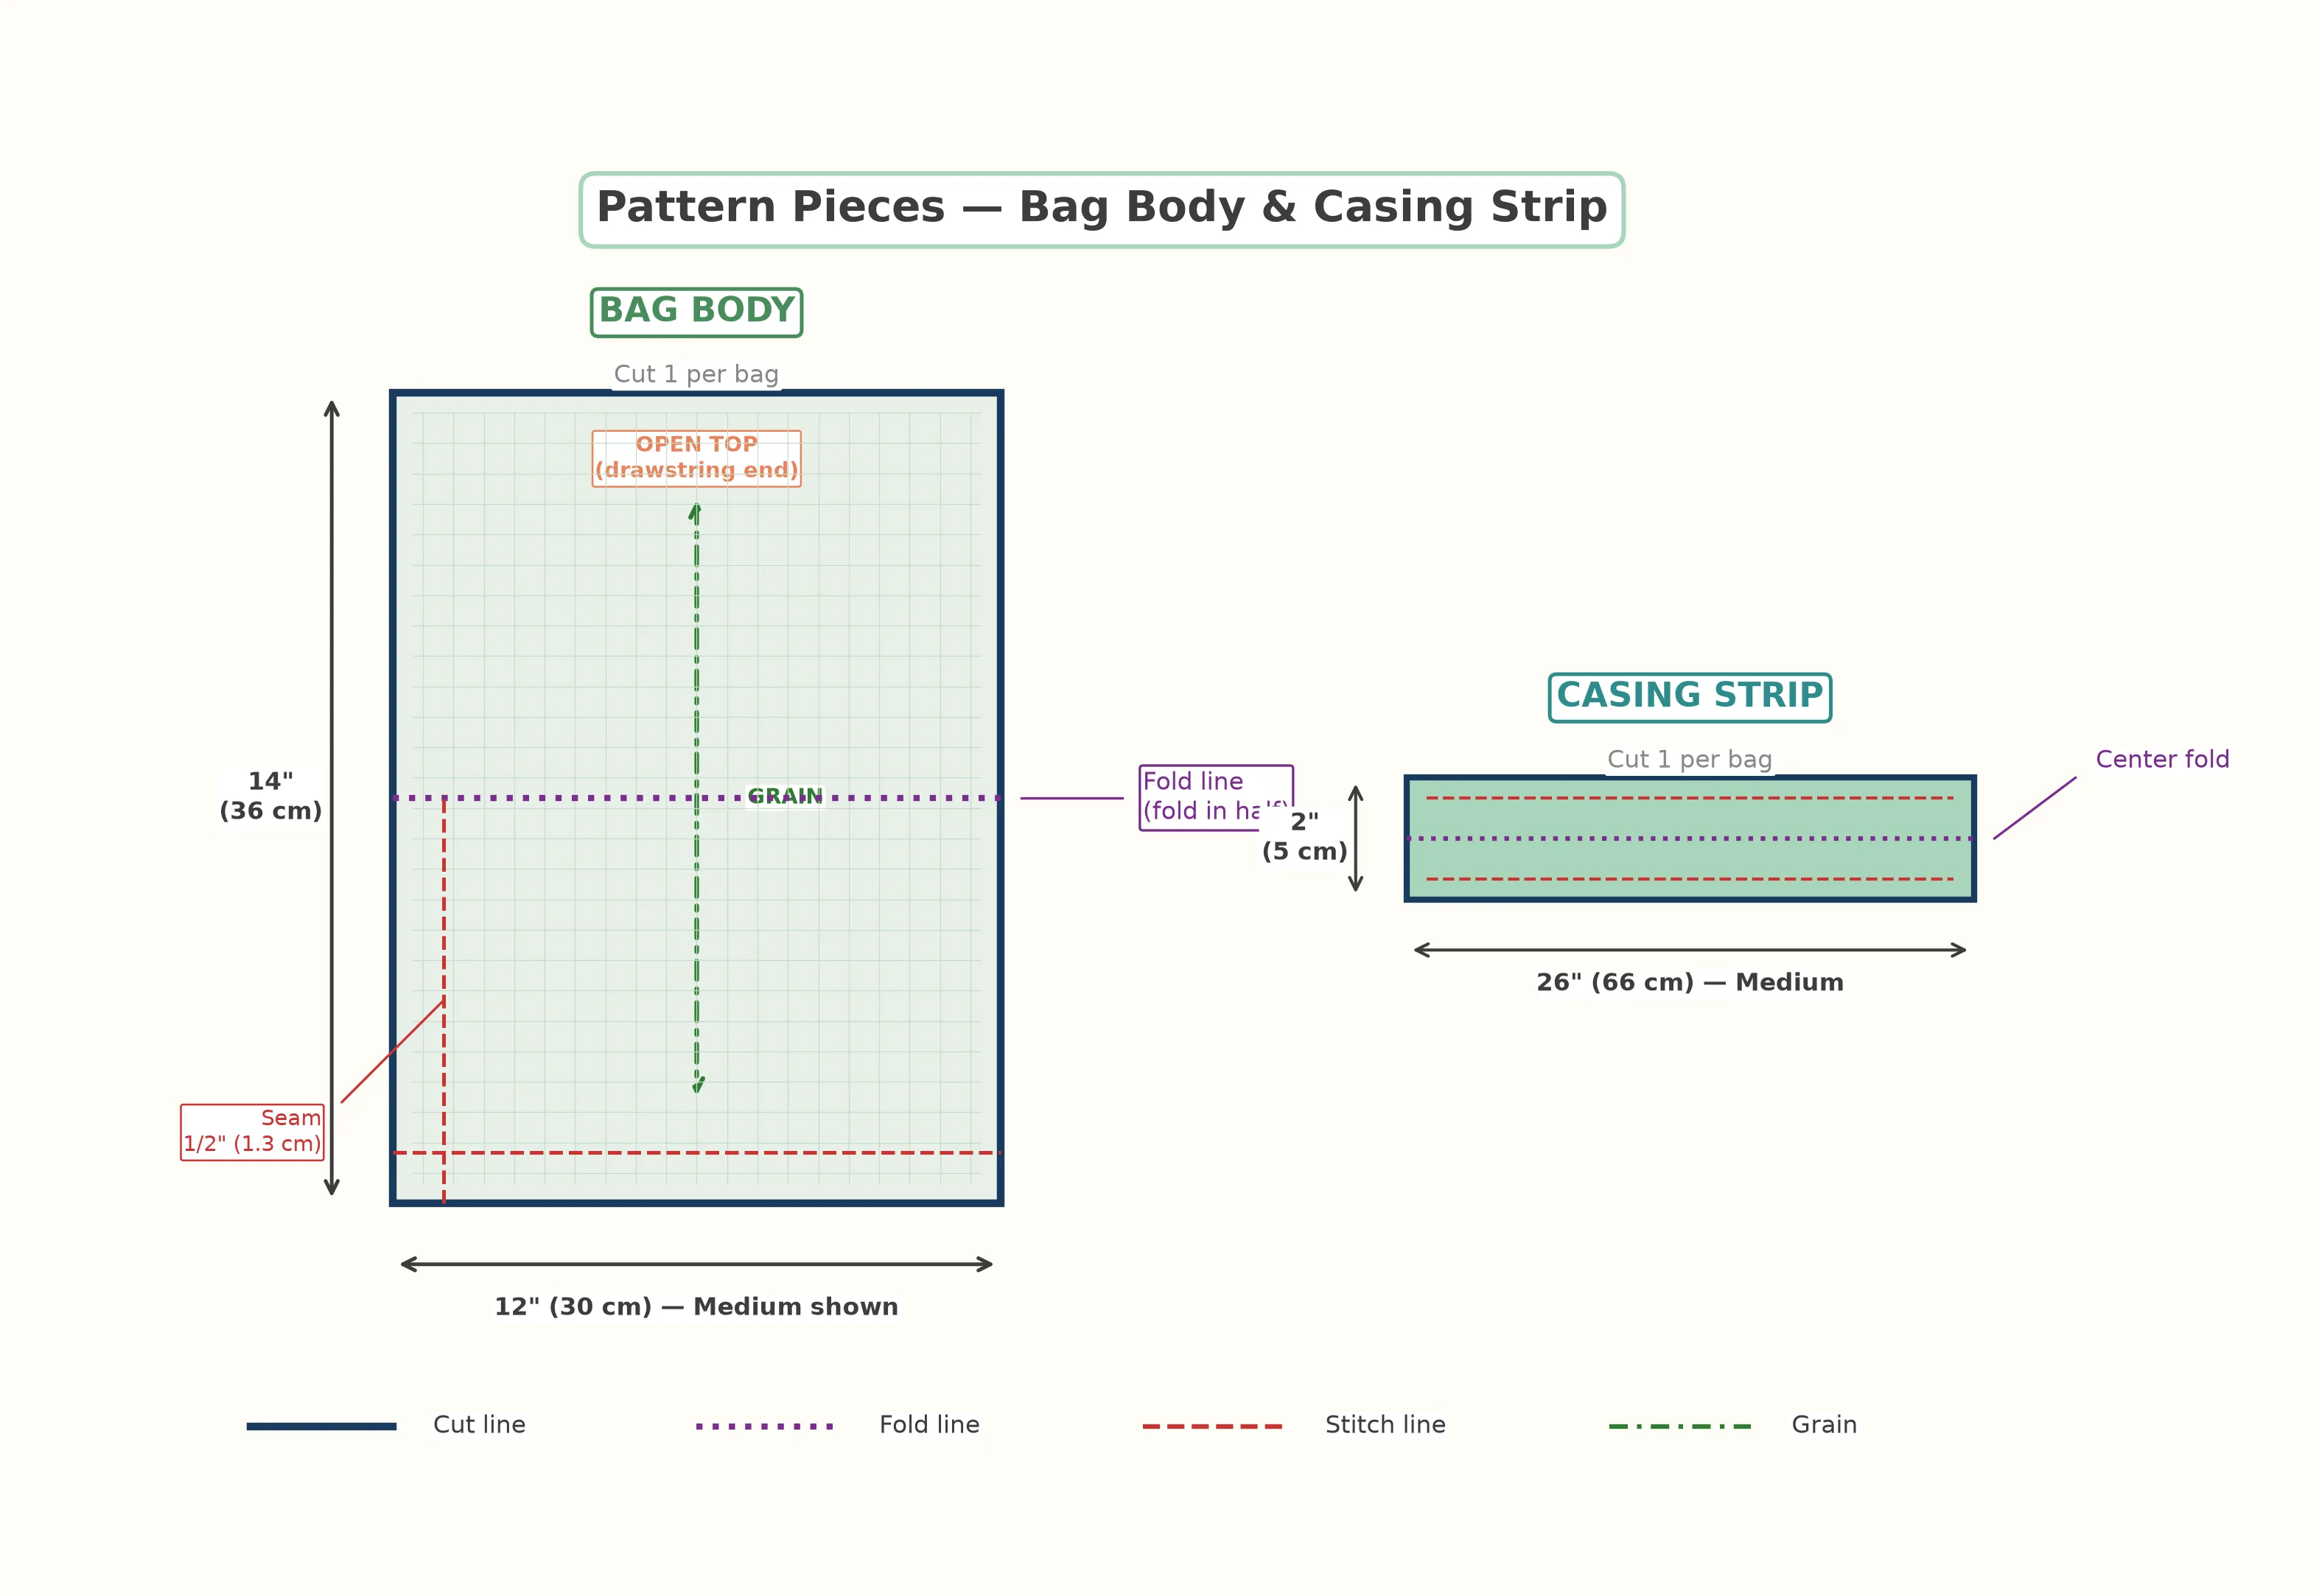
The beauty of this pattern is its simplicity. Each bag requires exactly two pieces:
1. Bag Body — A single rectangle that will be folded in half and sewn along one side seam and the bottom. The top edge remains open for the drawstring channel. All seam allowances are 1/2 in (1.3 cm) unless noted otherwise.
2. Casing Strip — A narrow strip that folds around the top edge of the bag to create a clean channel for the drawstring cord. The strip is cut twice the finished casing width plus seam allowances, and its length matches the bag width plus 1 in (2.5 cm) for overlap.
No curved seams, no gussets, no zippers. This is the kind of project that lets you sit down at the machine and finish something useful before your coffee gets cold.
Step-by-Step Instructions
Cut the Mesh Fabric
Using the size chart above, cut your mesh rectangles for all three bags plus their casing strips. Mark each piece with a small chalk dot in the corner so you can tell the right side from the wrong side — mesh can be tricky because both sides look nearly identical. If your mesh has a slightly smoother side, treat that as the right side.
Prepare the Casing Strips
Fold each casing strip in half lengthwise, wrong sides together, and press with a low-heat iron. Mesh and lightweight cotton can scorch or melt under high heat, so start low and increase only if needed. The finished fold should measure approximately 1 in (2.5 cm) wide. Set the strips aside.
Sew the Side and Bottom Seams
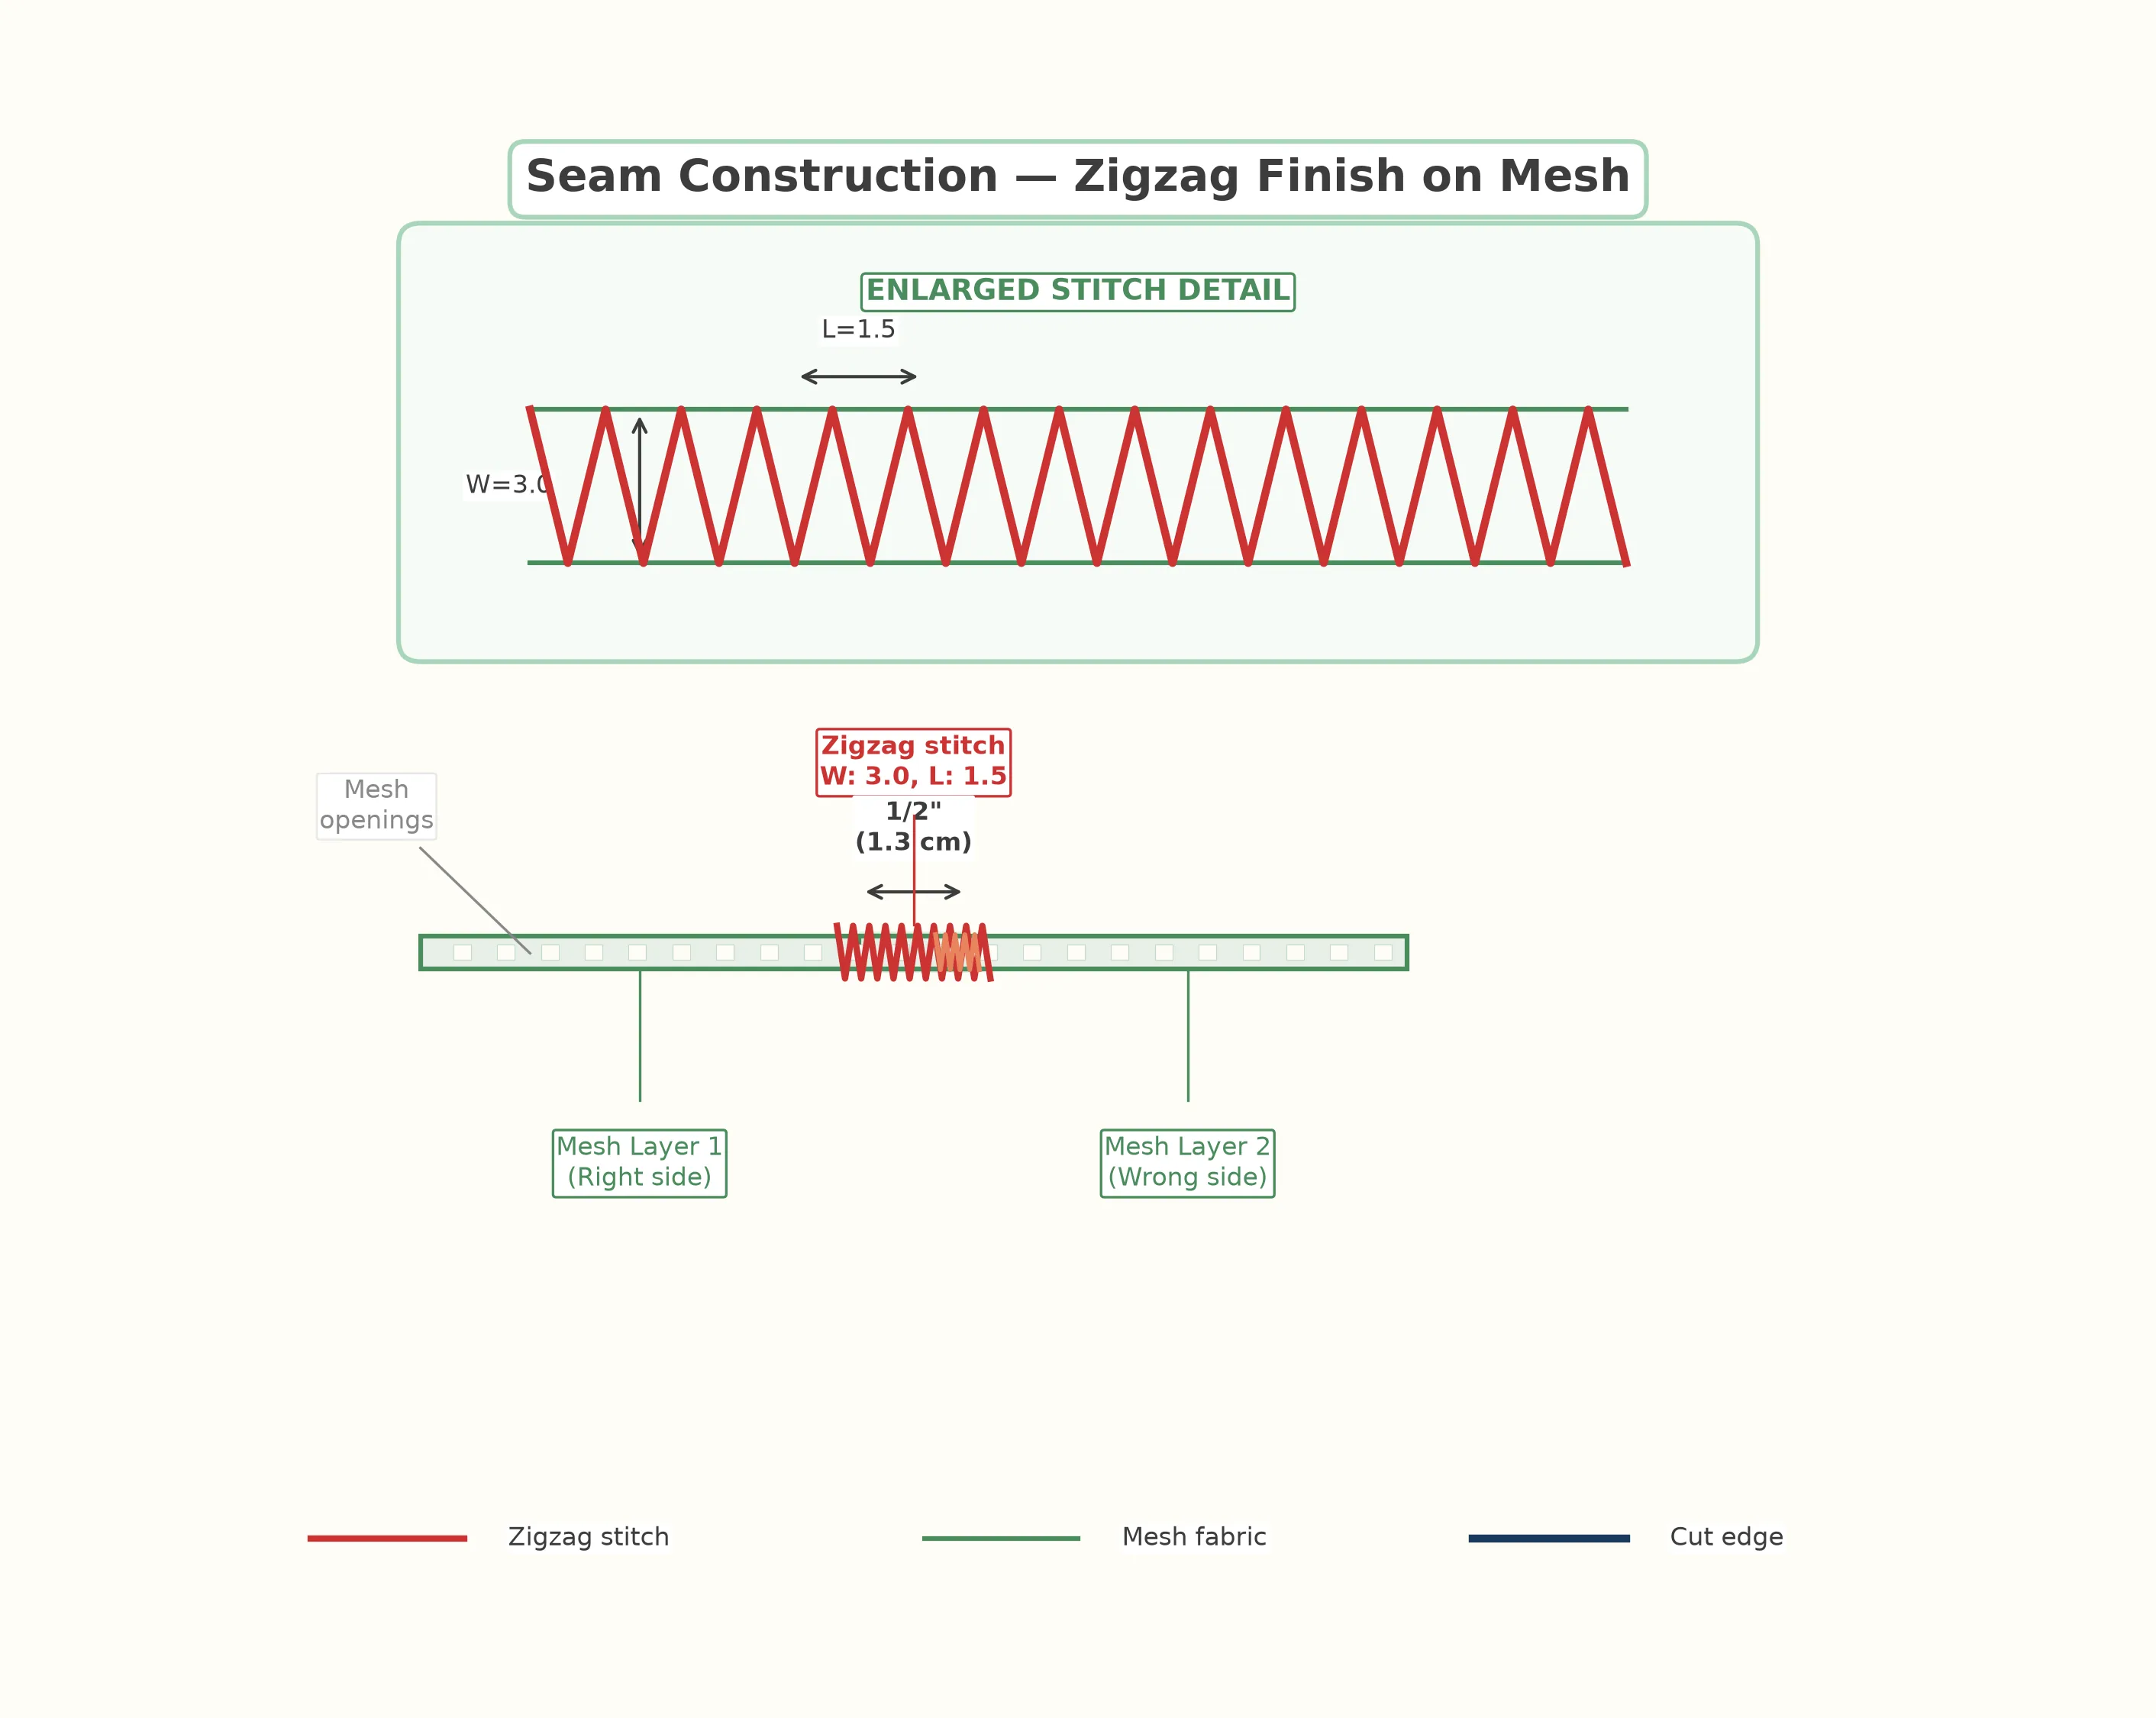
Fold the bag body rectangle in half, right sides together, aligning the short edges. Pin along the long side and the bottom edge. Sew with a 1/2 in (1.3 cm) seam allowance using a straight stitch at a 2.5 mm stitch length. Leave the top (folded) edge open. Backstitch at the beginning and end of each seam to lock the stitches.
Finish the Seam Allowances
Mesh fabric frays easily, so finishing the raw edges is essential. Use a zigzag stitch (width 3.0, length 1.5) along both seam allowances, stitching through both layers together. If you have a serger, a 3-thread overlock is even faster and cleaner. Trim any loose threads from the mesh weave after stitching.
Attach the Drawstring Casing
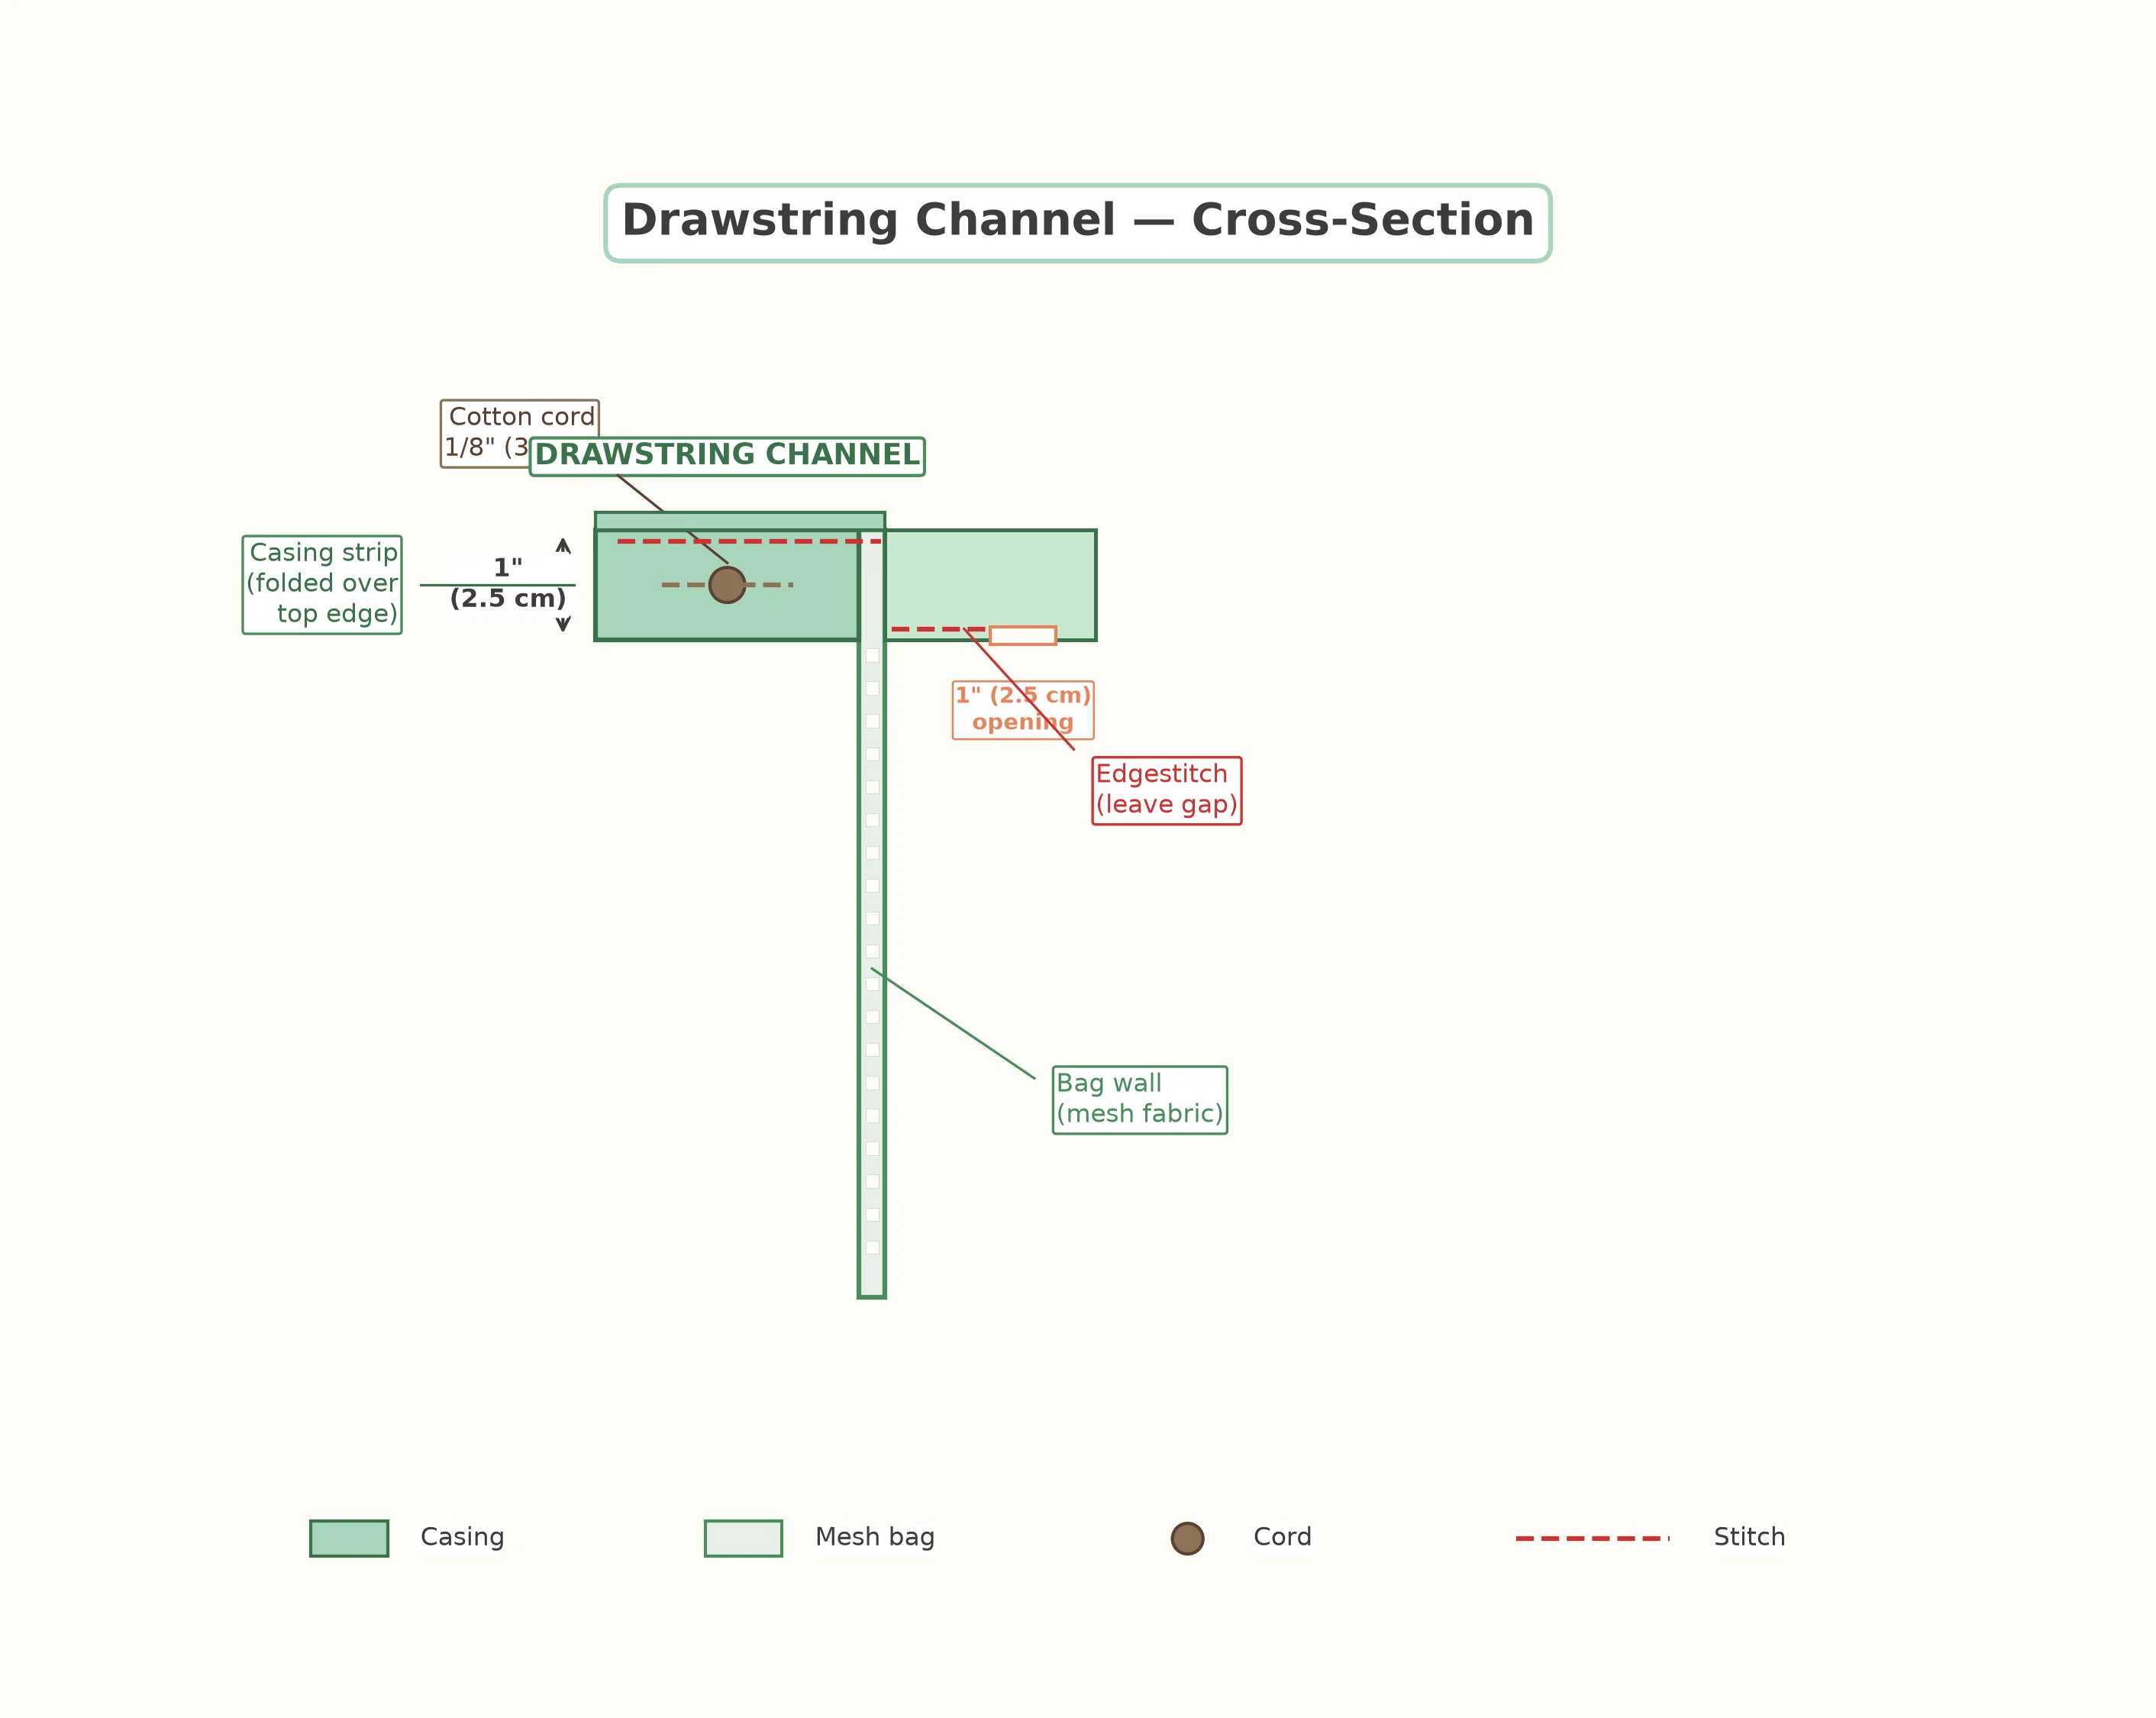
Turn the bag right side out. Open the folded casing strip and pin it around the top raw edge of the bag, right sides together, with the raw edges aligned. The casing strip should extend about 1/2 in (1.3 cm) beyond each side seam. Sew around the top edge with a 1/4 in (6 mm) seam allowance. Fold the casing up and over the raw edge to the inside of the bag, enclosing the seam. Press, then edgestitch along the bottom fold of the casing, leaving a 1 in (2.5 cm) opening on one side seam for threading the cord.
Thread the Drawstring
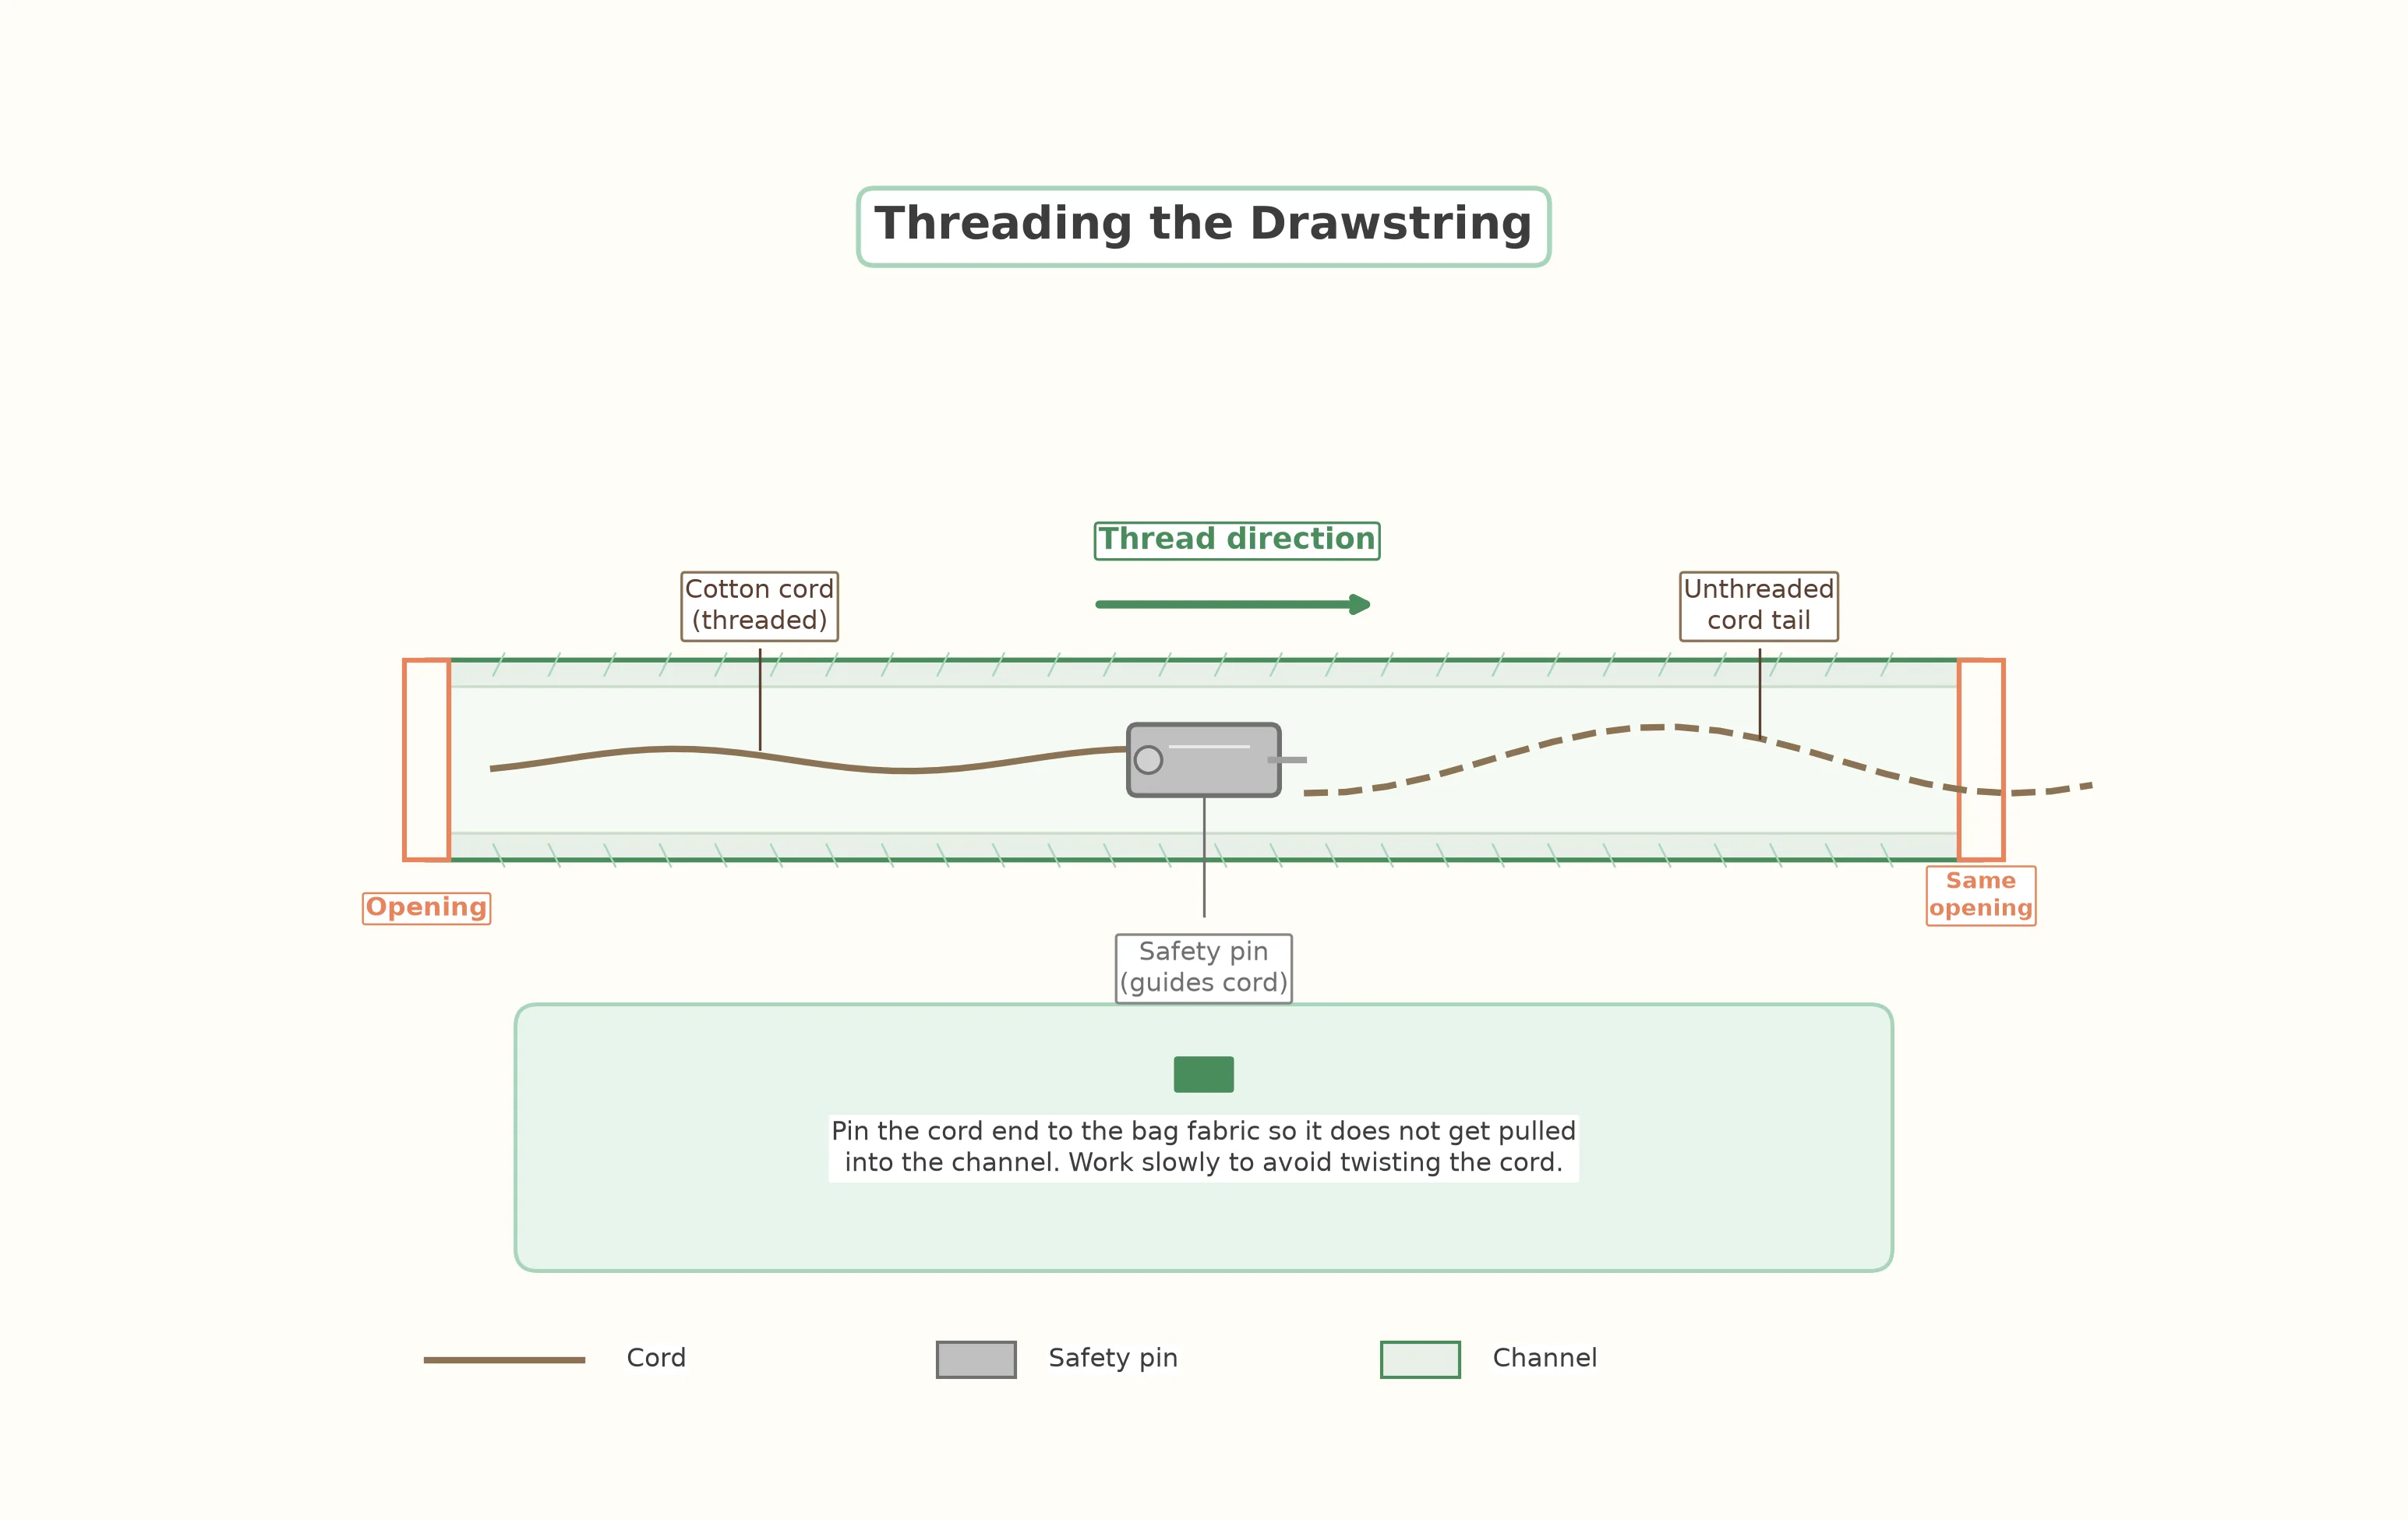
Attach a safety pin or bodkin to one end of your cotton cord. Insert the pin into the casing opening and work it through the channel, gathering the fabric as you go. Be careful not to twist the cord inside the casing. When the pin emerges from the same opening, remove the pin and tie the two cord ends together in a secure overhand knot. Trim the cord ends to your preferred length, leaving about 2 in (5 cm) of tail beyond the knot.
Finish and Press
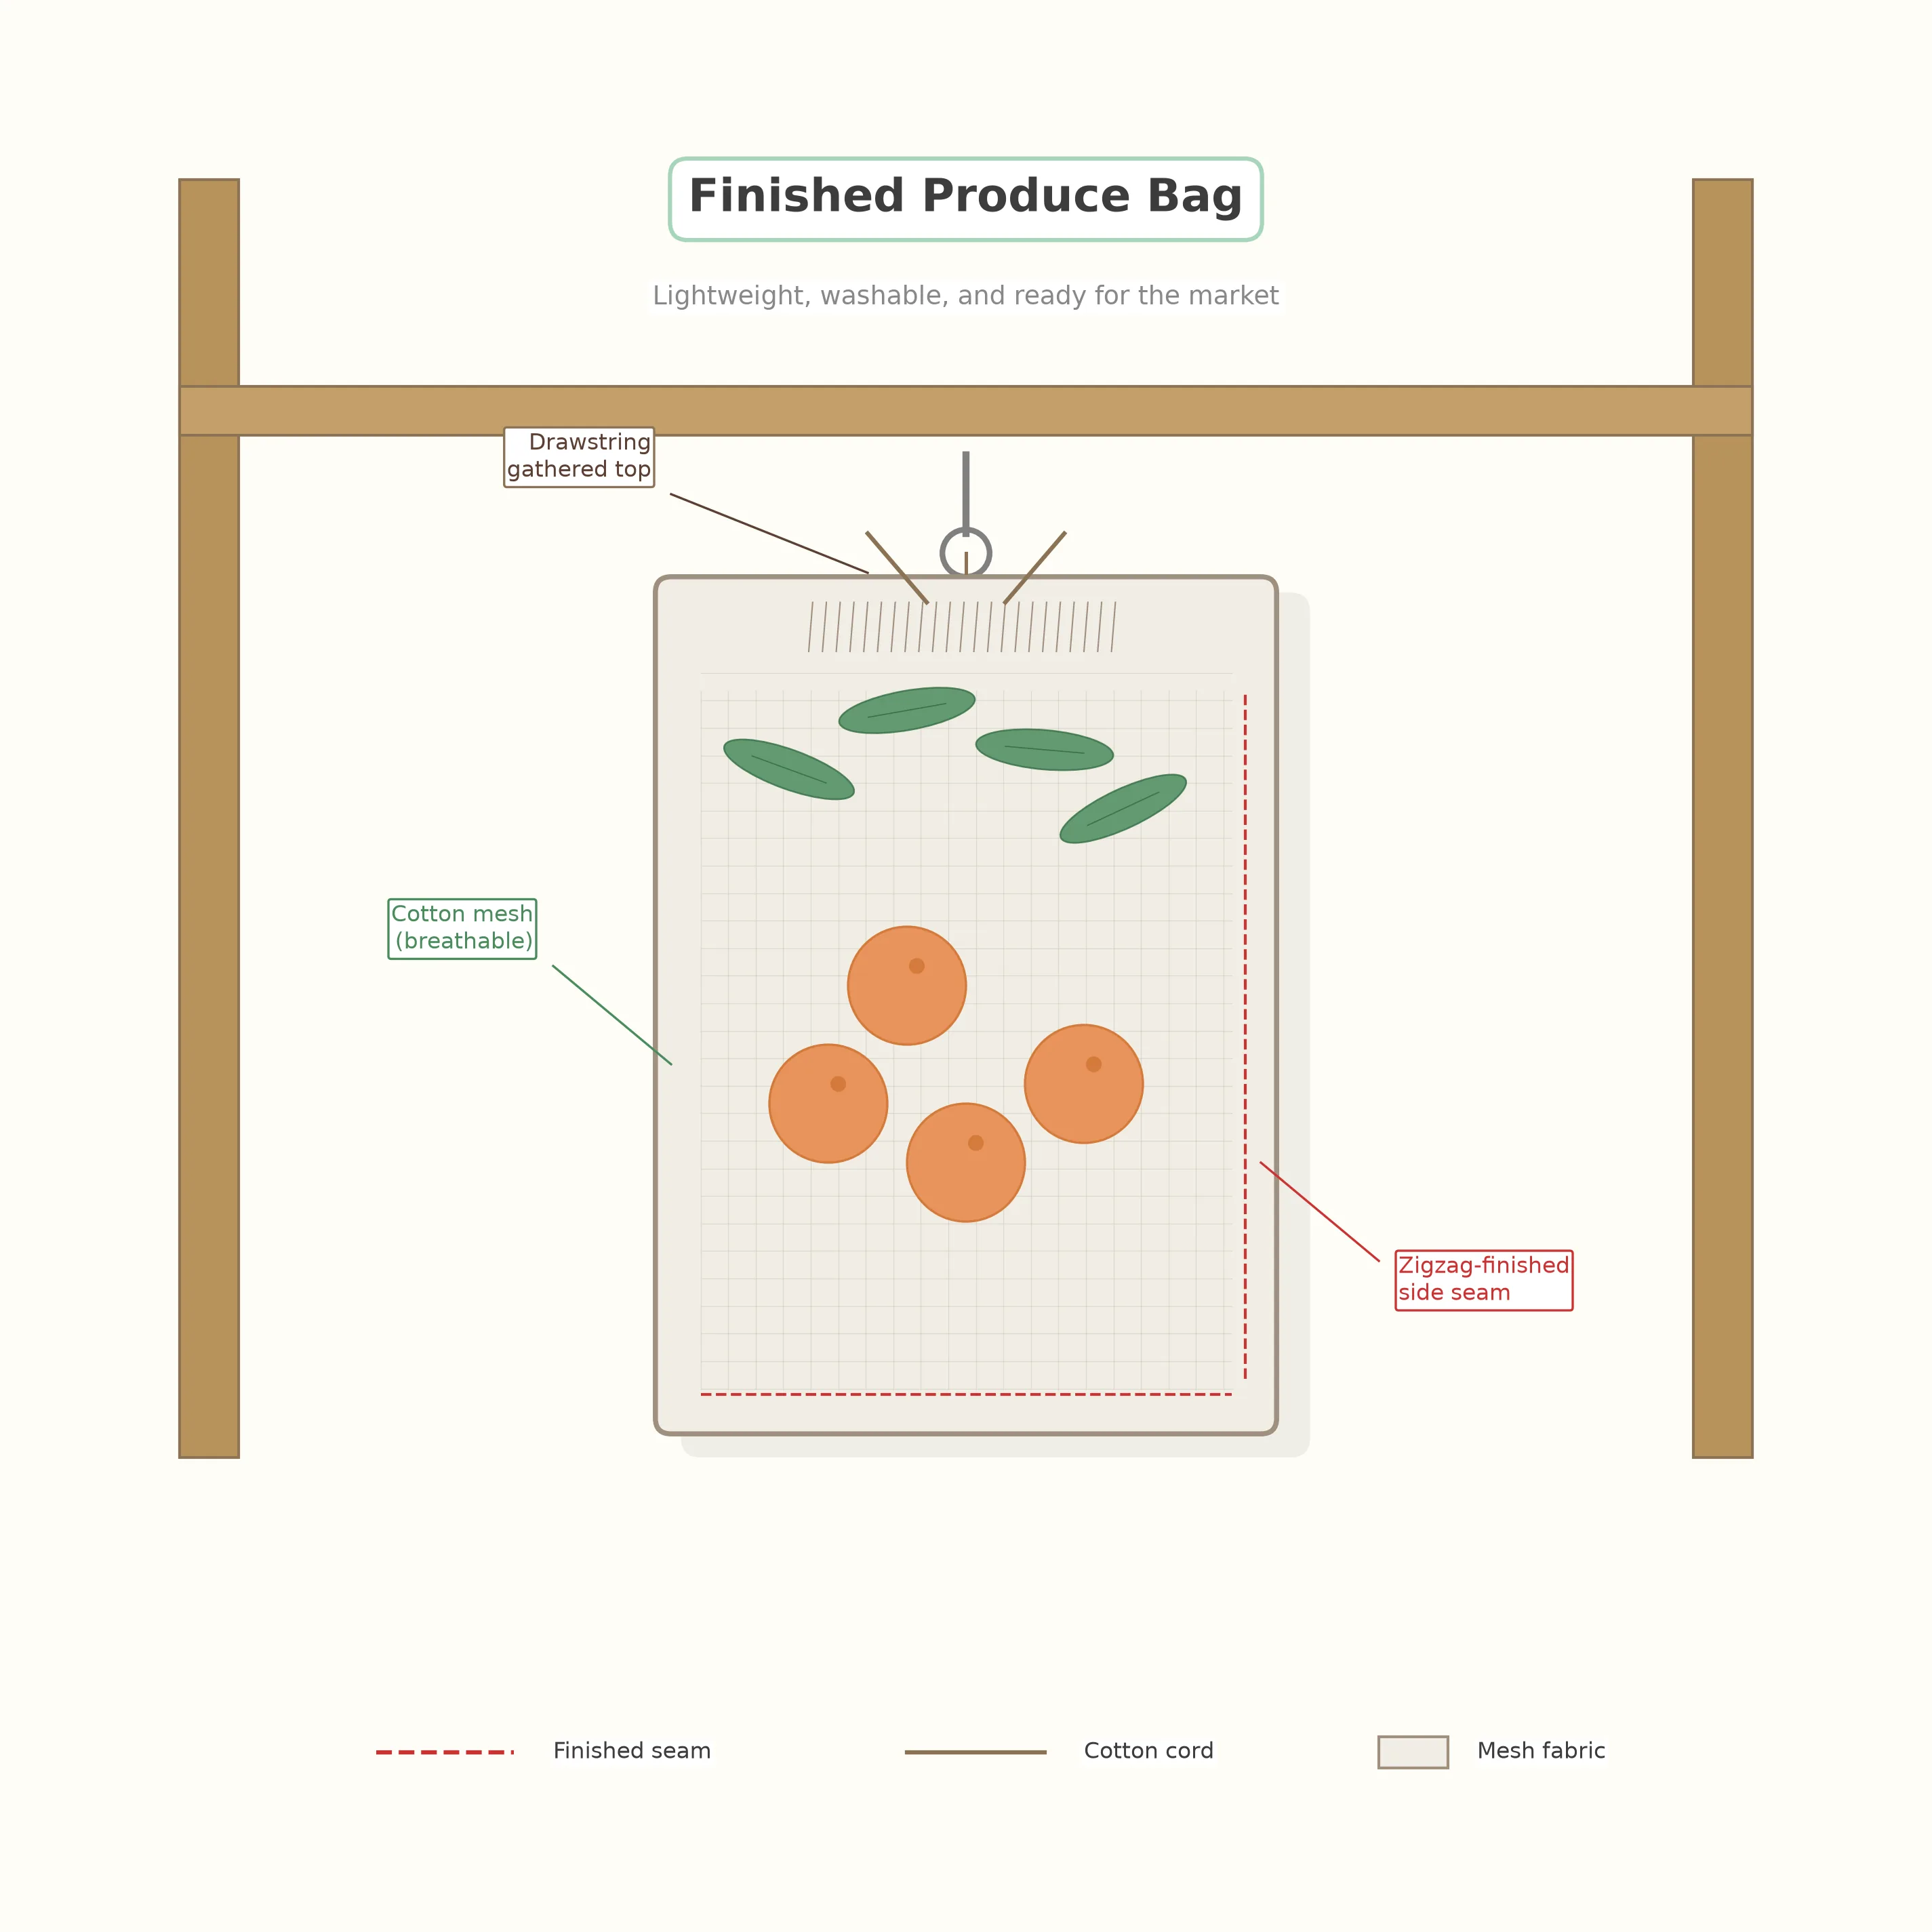
Close the casing opening with a few hand stitches or a short machine stitch. Give the entire bag a final press on low heat, paying special attention to the casing and seams. Turn the bag right side out, pull the drawstring to gather the top, and admire your work. Repeat for the remaining two sizes. Your complete set is ready for the farmer's market.
Pro Tips & Common Mistakes
Place a strip of tissue paper or tear-away stabilizer under the mesh when sewing seams. The feed dogs can chew up the open weave and cause skipped stitches. The paper tears away cleanly after sewing and makes a huge difference in seam quality.
If your machine has a walking foot (also called an even-feed foot), use it. Mesh layers tend to shift and creep under a standard presser foot, resulting in uneven seams. A walking foot feeds both layers at the same rate and eliminates most of the frustration.
Mesh fabric, especially any blend containing polyester, will melt and fuse under a hot iron. Always start on the lowest heat setting and test on a scrap first. If you see the mesh shrinking or becoming shiny, the iron is too hot. Use a pressing cloth between the iron and the fabric for extra protection.
It is tempting to skip the zigzag or overlock step because the bag "looks fine" without it. But mesh unravels quickly in the wash. After just two or three laundry cycles, unfinished seams will start to fray and the bag will develop holes along the side. Take the extra five minutes to finish every seam.
Instead of tying the drawstring ends together, thread both ends through a small plastic cord lock (available at craft stores for about $1 per pack). This lets you cinch the bag closed with one hand and adjust the opening easily — especially handy at the checkout counter.
Style Variations
Double-Layer Mesh
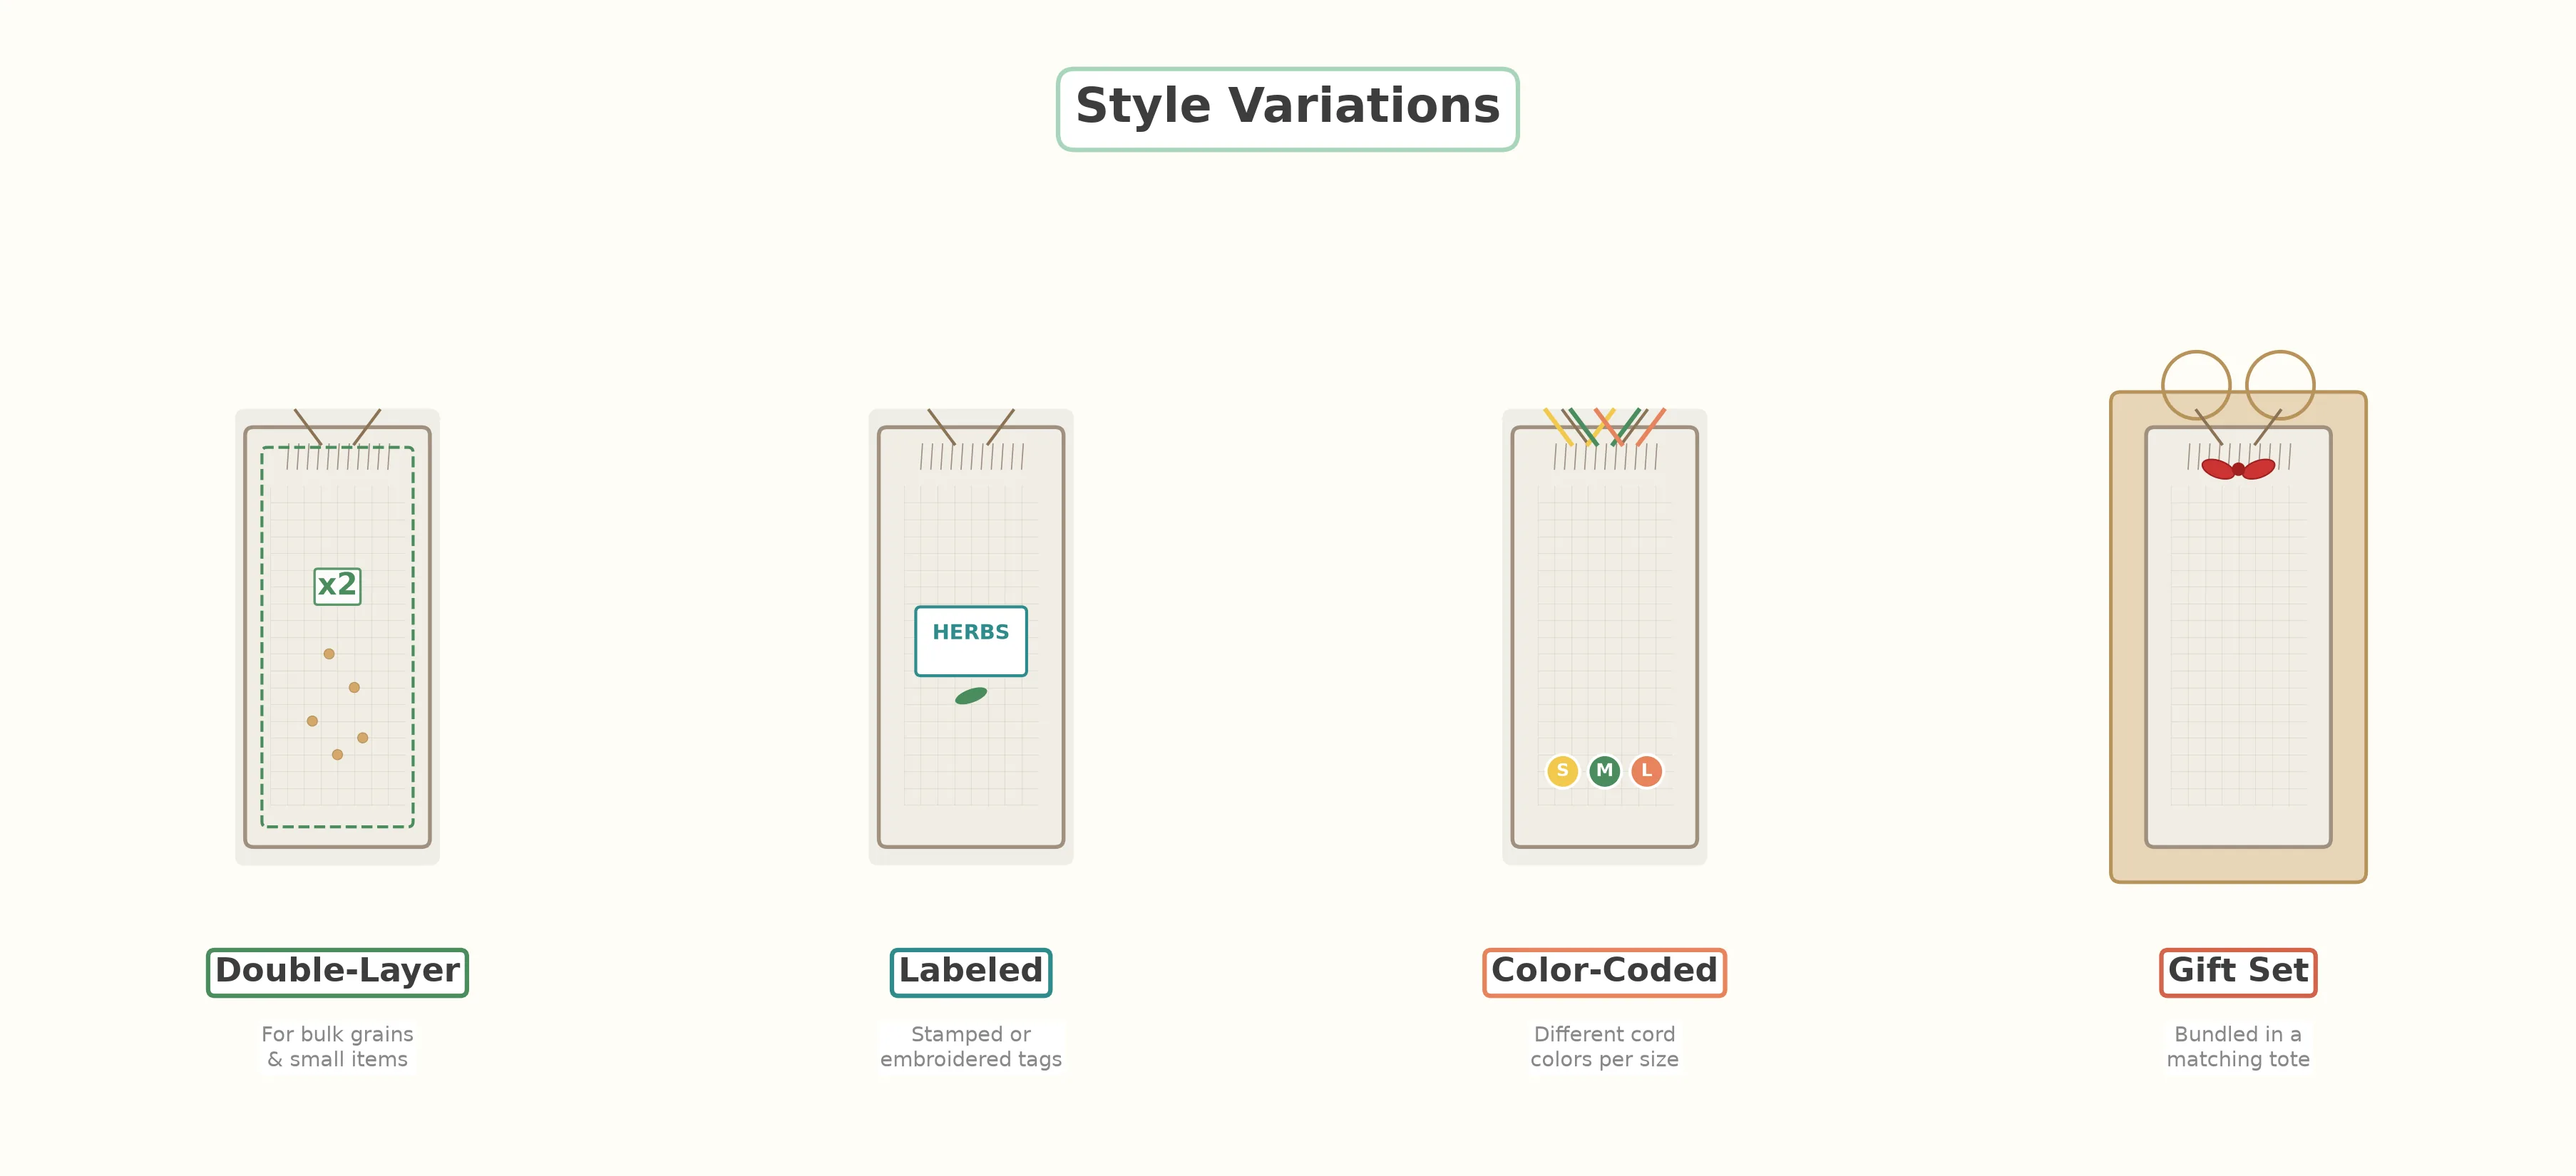
For bulk grains, nuts, and flour, sew two layers of fine mesh together to prevent small items from sifting through the weave.
Labeled Bags
Stamp or embroider labels like "HERBS," "FRUIT," and "GREENS" on each bag so you can grab the right size at a glance.
Color-Coded Sets
Use different colored drawstring cords for each size — yellow for small, green for medium, coral for large — for instant identification.
Gift Set with Tote
Bundle three produce bags inside a matching canvas tote (see our Everyday Canvas Tote pattern) for a thoughtful zero-waste gift.
Frequently Asked Questions
Keep Sewing
One Small Bag, One Big Difference
Every reusable produce bag you sew is one less plastic bag in the ocean. Share your finished set on social media and tag a friend who wants to go zero-waste — small actions multiply fast.
Next Project: Elastic Headband