There is a particular kind of magic that happens when you hang a curtain you made yourself. The fabric catches the light just so, the hem brushes the windowsill at exactly the right length, and you know — down to the very last stitch — that nobody else in the world has this exact panel on their window. I still remember the first time I sewed a curtain. It was a simple rod pocket panel in a soft oatmeal linen, and it took me maybe two hours from cutting to hanging. But when I stepped back and looked at that window, the whole room felt finished in a way it never had before.
If you have been following along with our envelope cushion cover and mitered corner table runner, you already have the core skills this project needs: straight stitching, pressing, and hemming. A rod pocket curtain is essentially a large rectangle with hems on all four sides and a casing — a folded and stitched fabric tunnel — at the top. That casing is the "rod pocket," and it is what gives this curtain style its name. You simply slide your curtain rod through the pocket, and the fabric gathers softly around it. No rings, no hooks, no clips. Just fabric and rod, working together.
In this guide, I will walk you through every decision and every stitch, from choosing your fullness ratio to pressing the final hem. By the end, you will have a beautiful, custom-fitted curtain panel and the confidence to dress every window in your home.
What You Will Learn
What Is a Rod Pocket Curtain?
A rod pocket curtain (sometimes called a pole top curtain) is a curtain panel with a sewn-in channel at the top edge through which the curtain rod is threaded. This channel is called the rod pocket or casing, and it is created by folding the top edge of the fabric down and stitching it in place, leaving both ends open so the rod can pass through.
The beauty of this style lies in its simplicity. When the rod is inserted, the fabric naturally gathers into soft, even folds that create a relaxed, classic look. The heading — the decorative top portion of the curtain above the rod — can be as small as a half-inch ruffle or as tall as two or three inches, depending on the look you want. A taller heading creates a more dramatic, gathered effect above the rod, while a minimal heading keeps things clean and modern.
Rod pocket curtains are best suited for windows where you do not plan to open and close the curtains frequently. Because the fabric wraps directly around the rod, it creates more friction than ring-hung styles, making daily sliding a bit of a workout. For stationary panels that frame a window beautifully, or for curtains you only draw at night, the rod pocket is an ideal choice.
Rod Pocket vs Tab-Top vs Grommet
Before you commit to the rod pocket style, it helps to understand how it compares to the other two most common curtain headings. Each has its strengths, and the right choice depends on how you use the curtain and the look you want.
| Feature | Rod Pocket | Tab-Top | Grommet |
|---|---|---|---|
| Difficulty | Beginner | Beginner | Intermediate |
| Hardware Needed | Rod only | Rod only | Rod + grommet kit |
| Ease of Sliding | Low friction | Moderate | Very smooth |
| Look | Classic, soft gathers | Casual, visible loops | Modern, clean pleats |
| Best For | Stationary panels | Light-use curtains | Daily open/close |
| Rod Visibility | Hidden by fabric | Visible between tabs | Visible through rings |
For your first curtain project, the rod pocket is the clear winner. It requires nothing beyond your sewing machine, an iron, and the fabric itself. Once you have mastered this style, you can explore gathered window valances and eventually move on to more complex headings like the lined Roman shade later in this series.
Understanding Fullness Ratio
The fullness ratio is the relationship between the width of your fabric and the width of your window. It determines how gathered or flat your finished curtain will look, and it is the single most important calculation you will make before cutting your fabric.
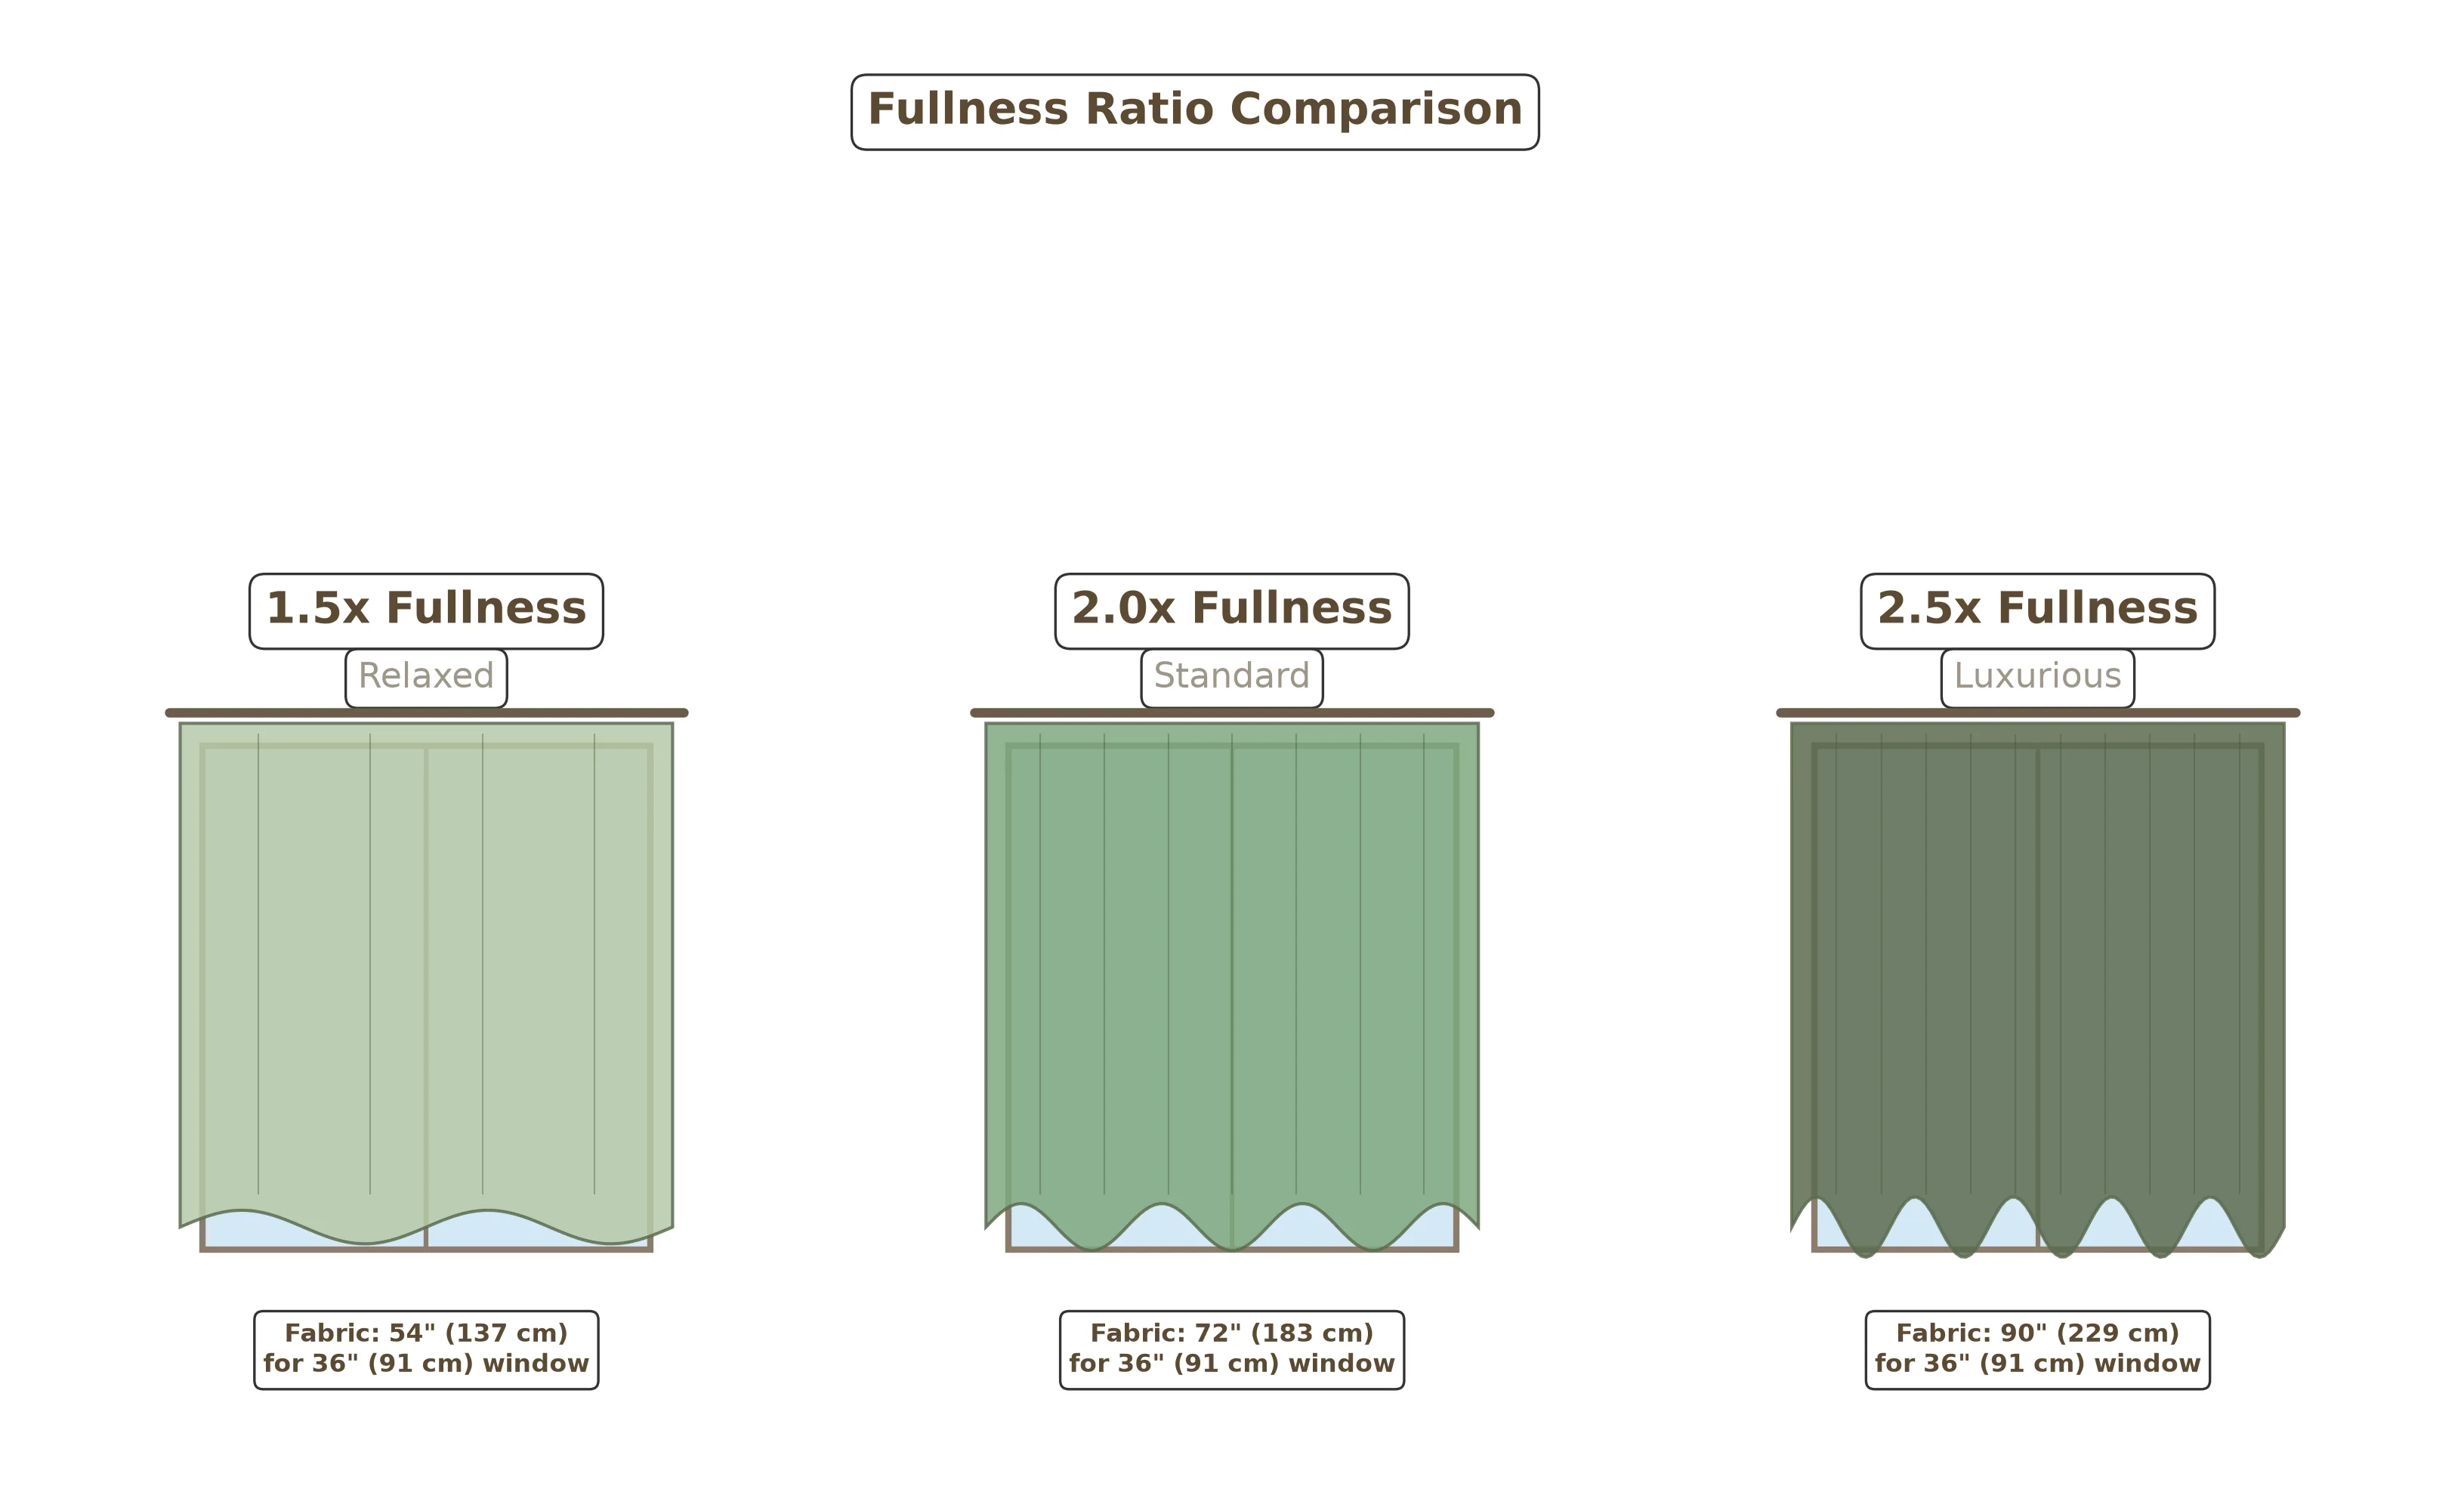
The same 36-inch (91 cm) window at three different fullness ratios — from relaxed to luxurious.
Here is how the three most common ratios break down:
1.5x fullness gives a relaxed, slightly gathered look. For a 36-inch (91 cm) window, you would cut your fabric 54 inches (137 cm) wide. This ratio works well for casual spaces, lightweight fabrics like voile, or when you want the curtain to lie fairly flat against the wall. It uses the least fabric, which is great if you are on a budget.
2x fullness is the industry standard and my recommendation for most projects. That same 36-inch (91 cm) window gets 72 inches (183 cm) of fabric width, creating soft, even gathers that look full without being overwhelming. This ratio works beautifully with cotton, linen, and medium-weight decorator fabrics.
2.5x fullness creates a rich, luxurious drape with deep, pronounced folds. You would use 90 inches (229 cm) of fabric for a 36-inch (91 cm) window. This ratio shines with lightweight sheers and silks, where the extra fabric creates a beautiful, cloud-like effect. It does use significantly more fabric, so factor that into your budget.
Measuring Your Window
Accurate measurements are the foundation of a curtain that looks custom-made rather than off-the-rack. You will need three key measurements: the window width, the curtain drop (the finished length from the top of the rod pocket to the bottom hem), and the rod placement height.
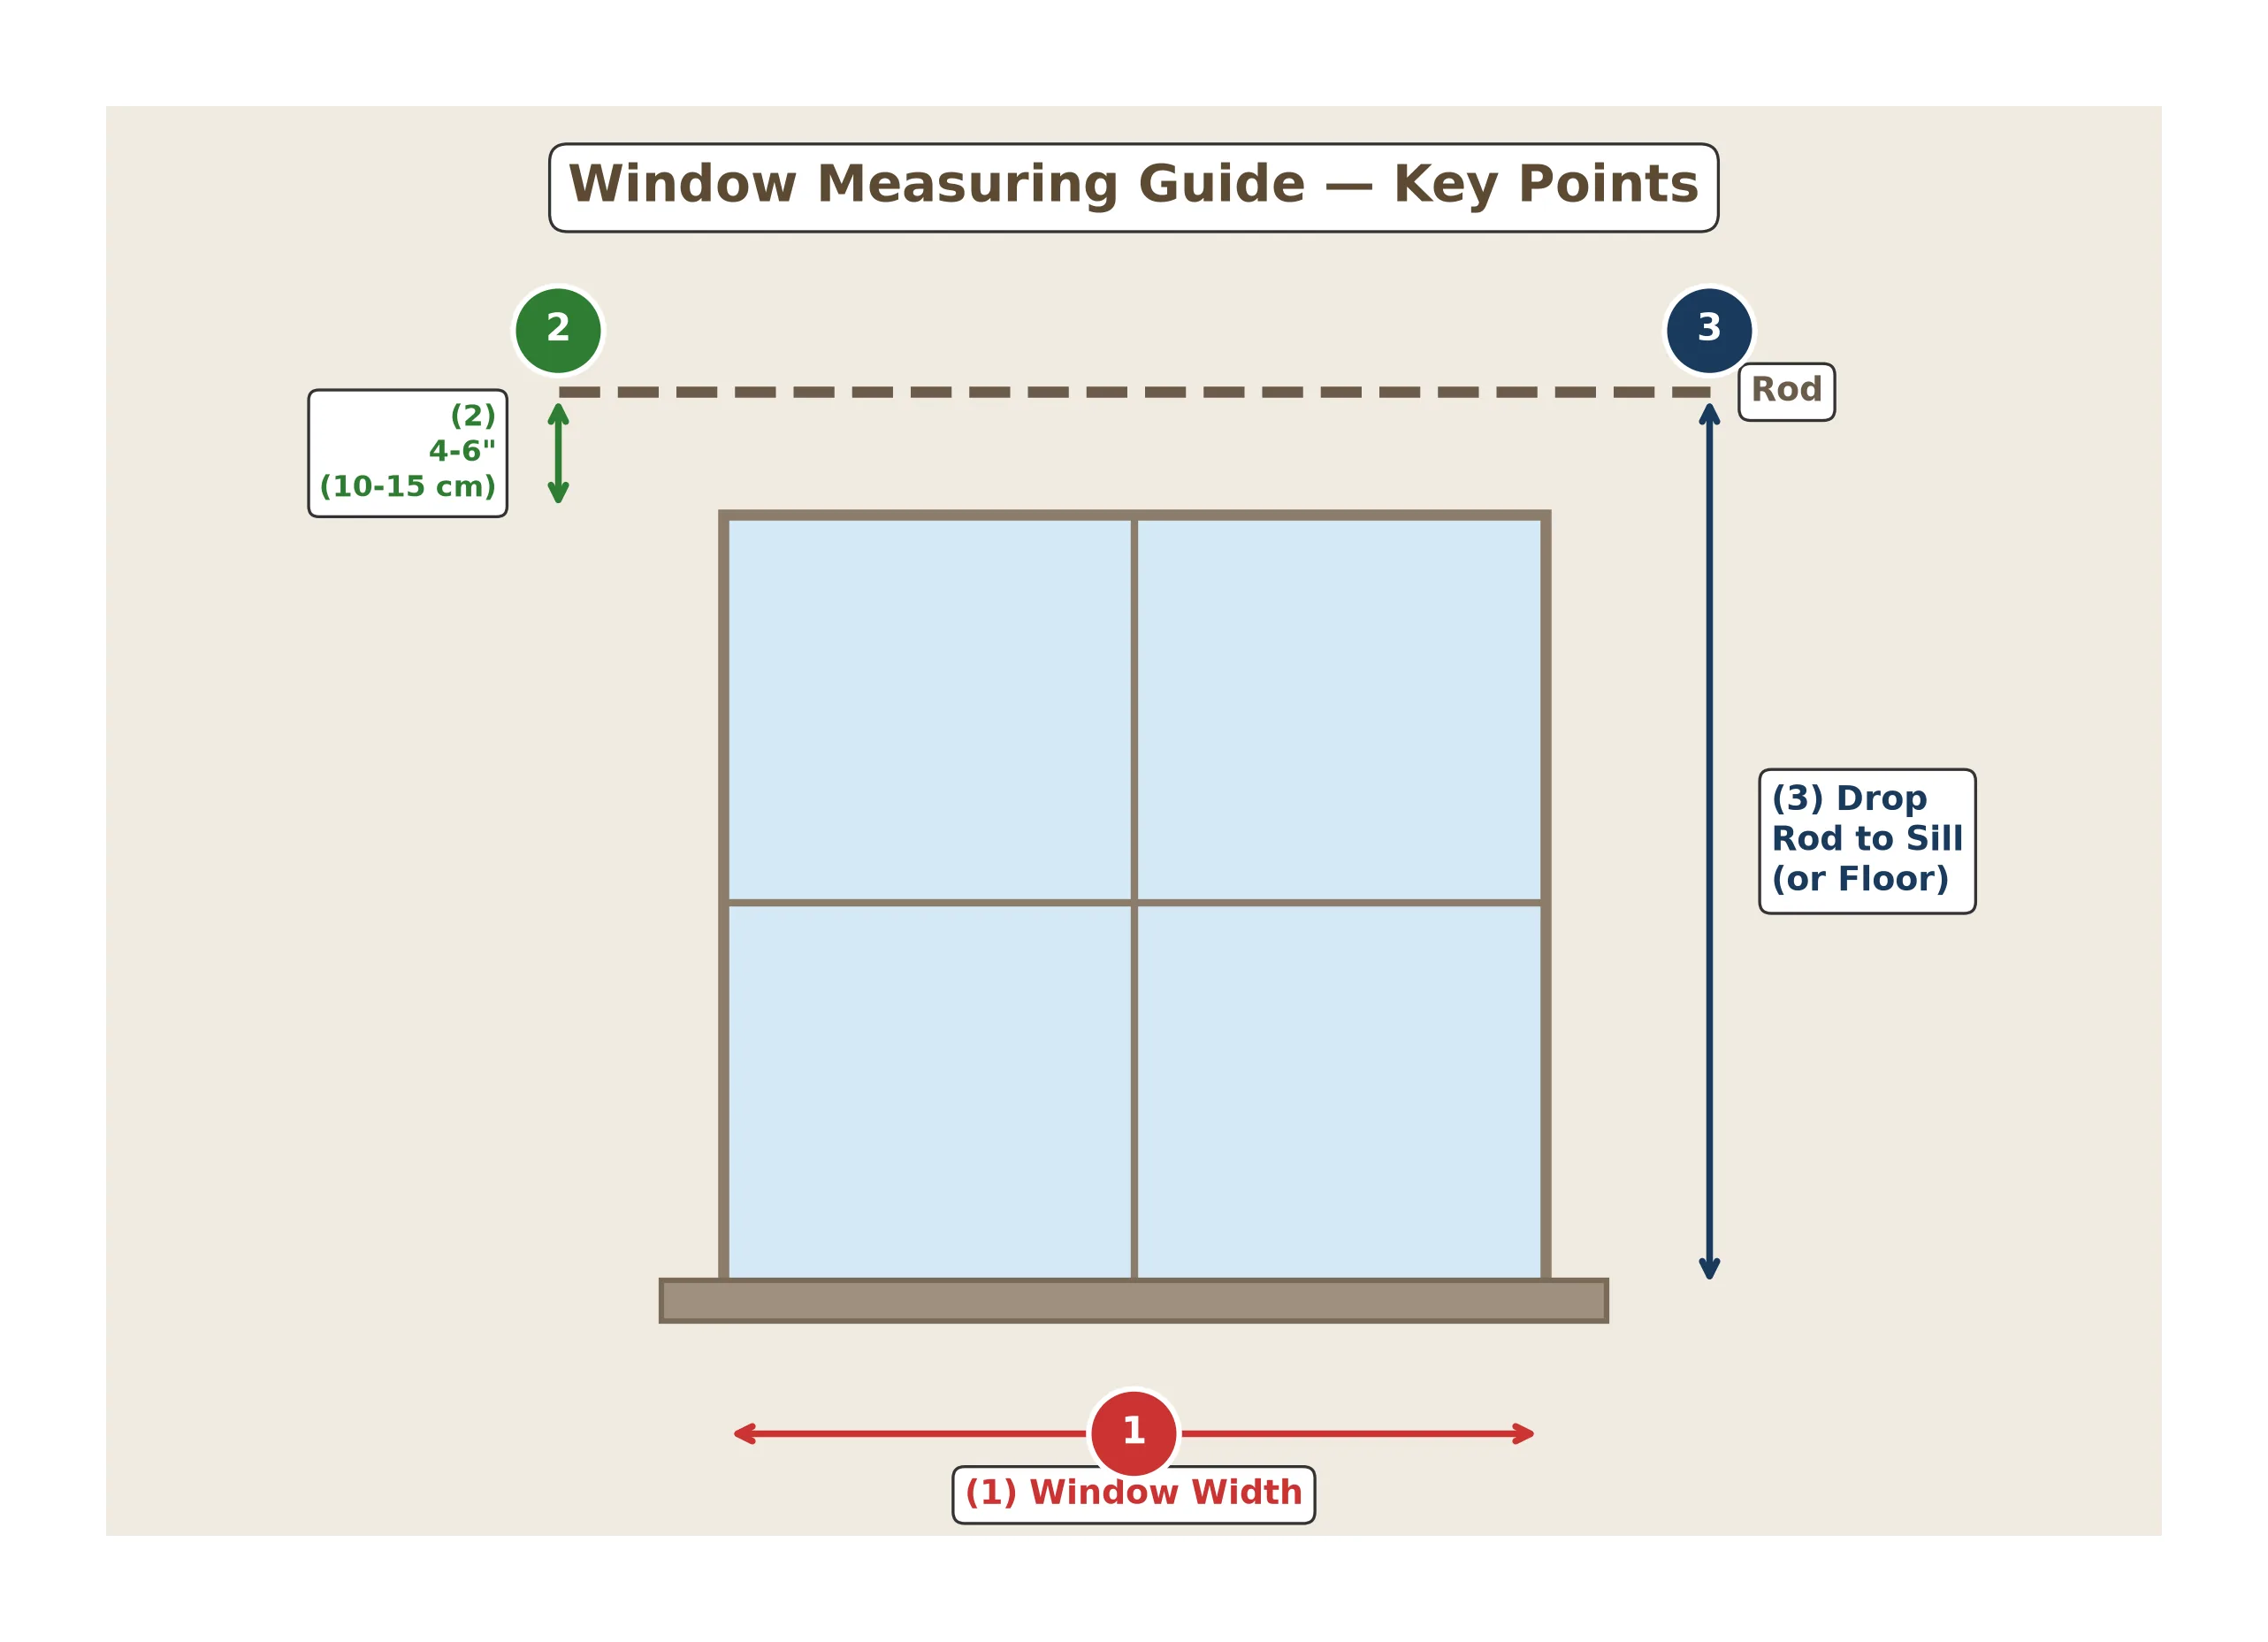
Key measurement points: (1) window width, (2) rod height above frame, (3) drop to sill or floor.
Step A — Width: Measure the window frame from the outer edge of the trim on one side to the outer edge on the other. This is your "finished width." Multiply by your chosen fullness ratio to get your fabric width. For example, a 48-inch (122 cm) window at 2x fullness = 96 inches (244 cm) of fabric width.
Step B — Rod Placement: Decide where your curtain rod will sit. I recommend mounting the rod 4 to 6 inches (10 to 15 cm) above the window frame. This creates the illusion of taller ceilings and lets more light in when the curtains are open. Measure from the top of the rod to your desired endpoint.
Step C — Drop: The drop is the finished length of your curtain. Common endpoints are the windowsill, 4 inches (10 cm) below the sill, or the floor. For sill-length curtains, measure from the rod to the sill. For floor-length, measure from the rod to the floor and subtract 1/2 inch (1.3 cm) so the fabric just kisses the floor rather than pooling.
Once you have your finished width and drop, add the following allowances to calculate your cut dimensions:
- Width: Add 4 inches (10 cm) for the side hems (2 inches / 5 cm per side for a 1-inch / 2.5 cm double-fold hem).
- Length: Add 9 inches (23 cm) total — 8 inches (20 cm) for the bottom double-fold hem (a 4-inch / 10 cm deep hem folded twice) and 1 inch (2.5 cm) for the top header above the rod pocket, plus the rod pocket depth itself (typically 3 to 4 inches / 7.5 to 10 cm, which is already accounted for in the top fold).
Choosing Your Fabric
The fabric you choose will affect everything from how easy the project is to sew to how the finished curtain drapes and filters light. Here are my top recommendations for beginners:
Medium-weight cotton is the easiest fabric to work with. It presses crisply, feeds through the machine smoothly, and holds a hem beautifully. Quilting cotton works, but a slightly heavier home-decor cotton will drape better and feel more substantial at the window. Look for fabrics labeled "cotton duck," "cotton canvas," or "home decor weight."
Linen is my personal favorite for curtains. It has a natural, slightly textured look that softens beautifully with washing, and it filters light in a way that feels warm and organic. Linen wrinkles more than cotton, but I think that is part of its charm. A cotton-linen blend gives you the best of both worlds — the drape of linen with the wrinkle resistance of cotton.
Voile and sheer cotton are wonderful for light-filtering curtains in living rooms and kitchens. They are lightweight and slightly transparent, so they let sunlight through while providing a bit of privacy. Sheer fabrics can be trickier to sew because they shift and stretch, so use plenty of pins and a sharp needle.
Avoid stretchy knits, slippery satins, and very heavy upholstery fabrics for your first curtain. They each present challenges that are better tackled once you have a few curtain panels under your belt.
Materials and Tools
Cutting Your Fabric
With your measurements calculated, it is time to cut. Lay your fabric flat on a large surface — a clean floor works perfectly if you do not have a cutting table. Smooth out any wrinkles and align the selvage (the tightly woven factory-finished edge that runs along both sides of the fabric) so the fabric is straight.
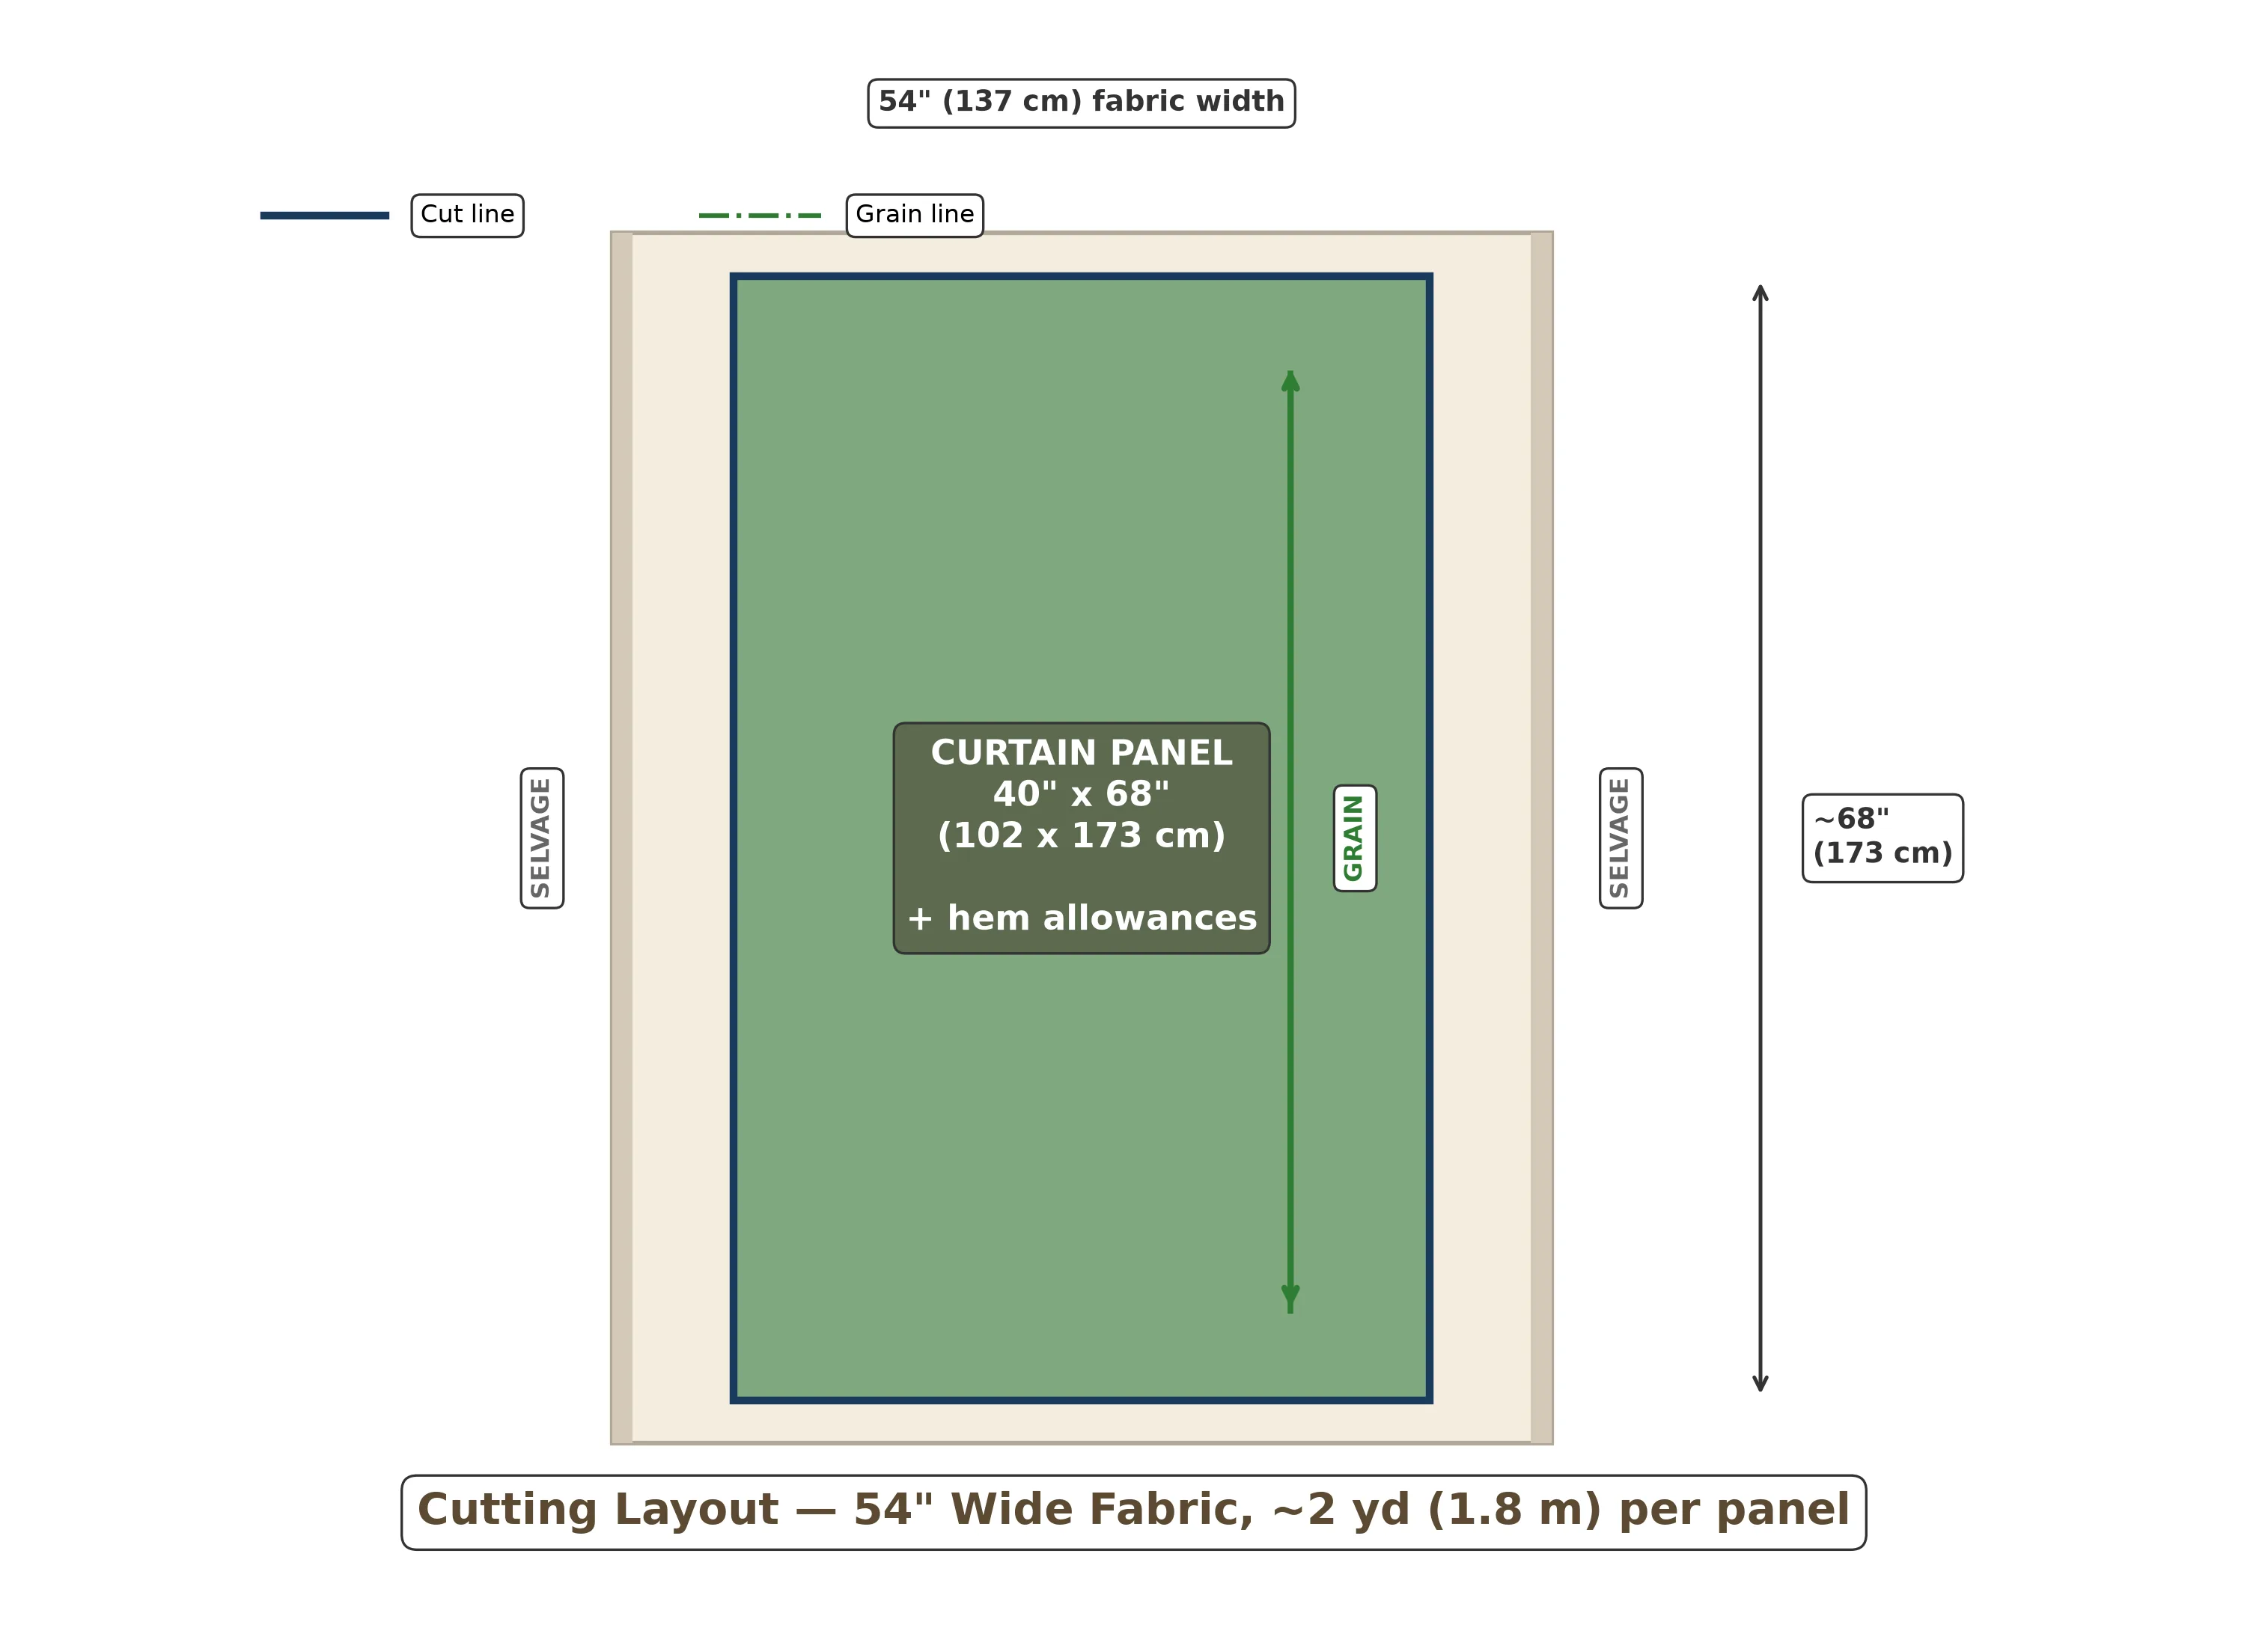
Cutting layout for one panel on 54-inch (137 cm) wide fabric. The grain line runs parallel to the selvage.
Measure and mark your cut dimensions using a measuring tape and a fabric marker or chalk. Use a long ruler or a straight edge to draw your cutting lines — a wobbly cut edge makes hemming much harder later. Cut with sharp fabric scissors or a rotary cutter, keeping the blade perpendicular to the fabric for a clean edge.
If your fabric width is narrower than your calculated panel width (common with 45-inch / 114 cm fabric and 2x fullness), you will need to join two widths of fabric with a French seam or a flat-felled seam before hemming. Sew the pieces right sides together along the selvage, trim the seam allowance, and press the seam open. This join will be nearly invisible once the curtain is gathered.
Step-by-Step Construction
Here is the full construction sequence at a glance. Each step is detailed below with photos and measurements.
Measure Your Window and Calculate Fabric
Using the measuring method described above, determine your finished width and drop. Multiply the width by your fullness ratio, then add 4 inches (10 cm) for side hems. Add 9 inches (23 cm) to the drop for the bottom hem and rod pocket. Write these numbers down — you will reference them at every stage. Double-check your math before you cut. I always measure twice and cut once, and I have never regretted the extra thirty seconds it takes to verify.
Cut Your Fabric to Size
Lay your fabric flat, smooth out wrinkles, and align the grain line (the direction of the threads running parallel to the selvage) so it runs vertically — this ensures your curtain hangs straight. Mark your cut dimensions with chalk or a fabric pen, using a long ruler for straight lines. Cut carefully with sharp scissors or a rotary cutter. If you are joining two fabric widths, sew the seam now and press it open before proceeding.
Hem the Side Edges
Start with the two long side edges. Working on the wrong side of the fabric, fold each edge 1 inch (2.5 cm) toward the center and press firmly with a hot iron and steam. Then fold the same edge another 1 inch (2.5 cm) to completely enclose the raw edge inside the fold. Press again. This is a double-fold hem — a hem where the raw edge is folded under twice so no unfinished fabric is visible.
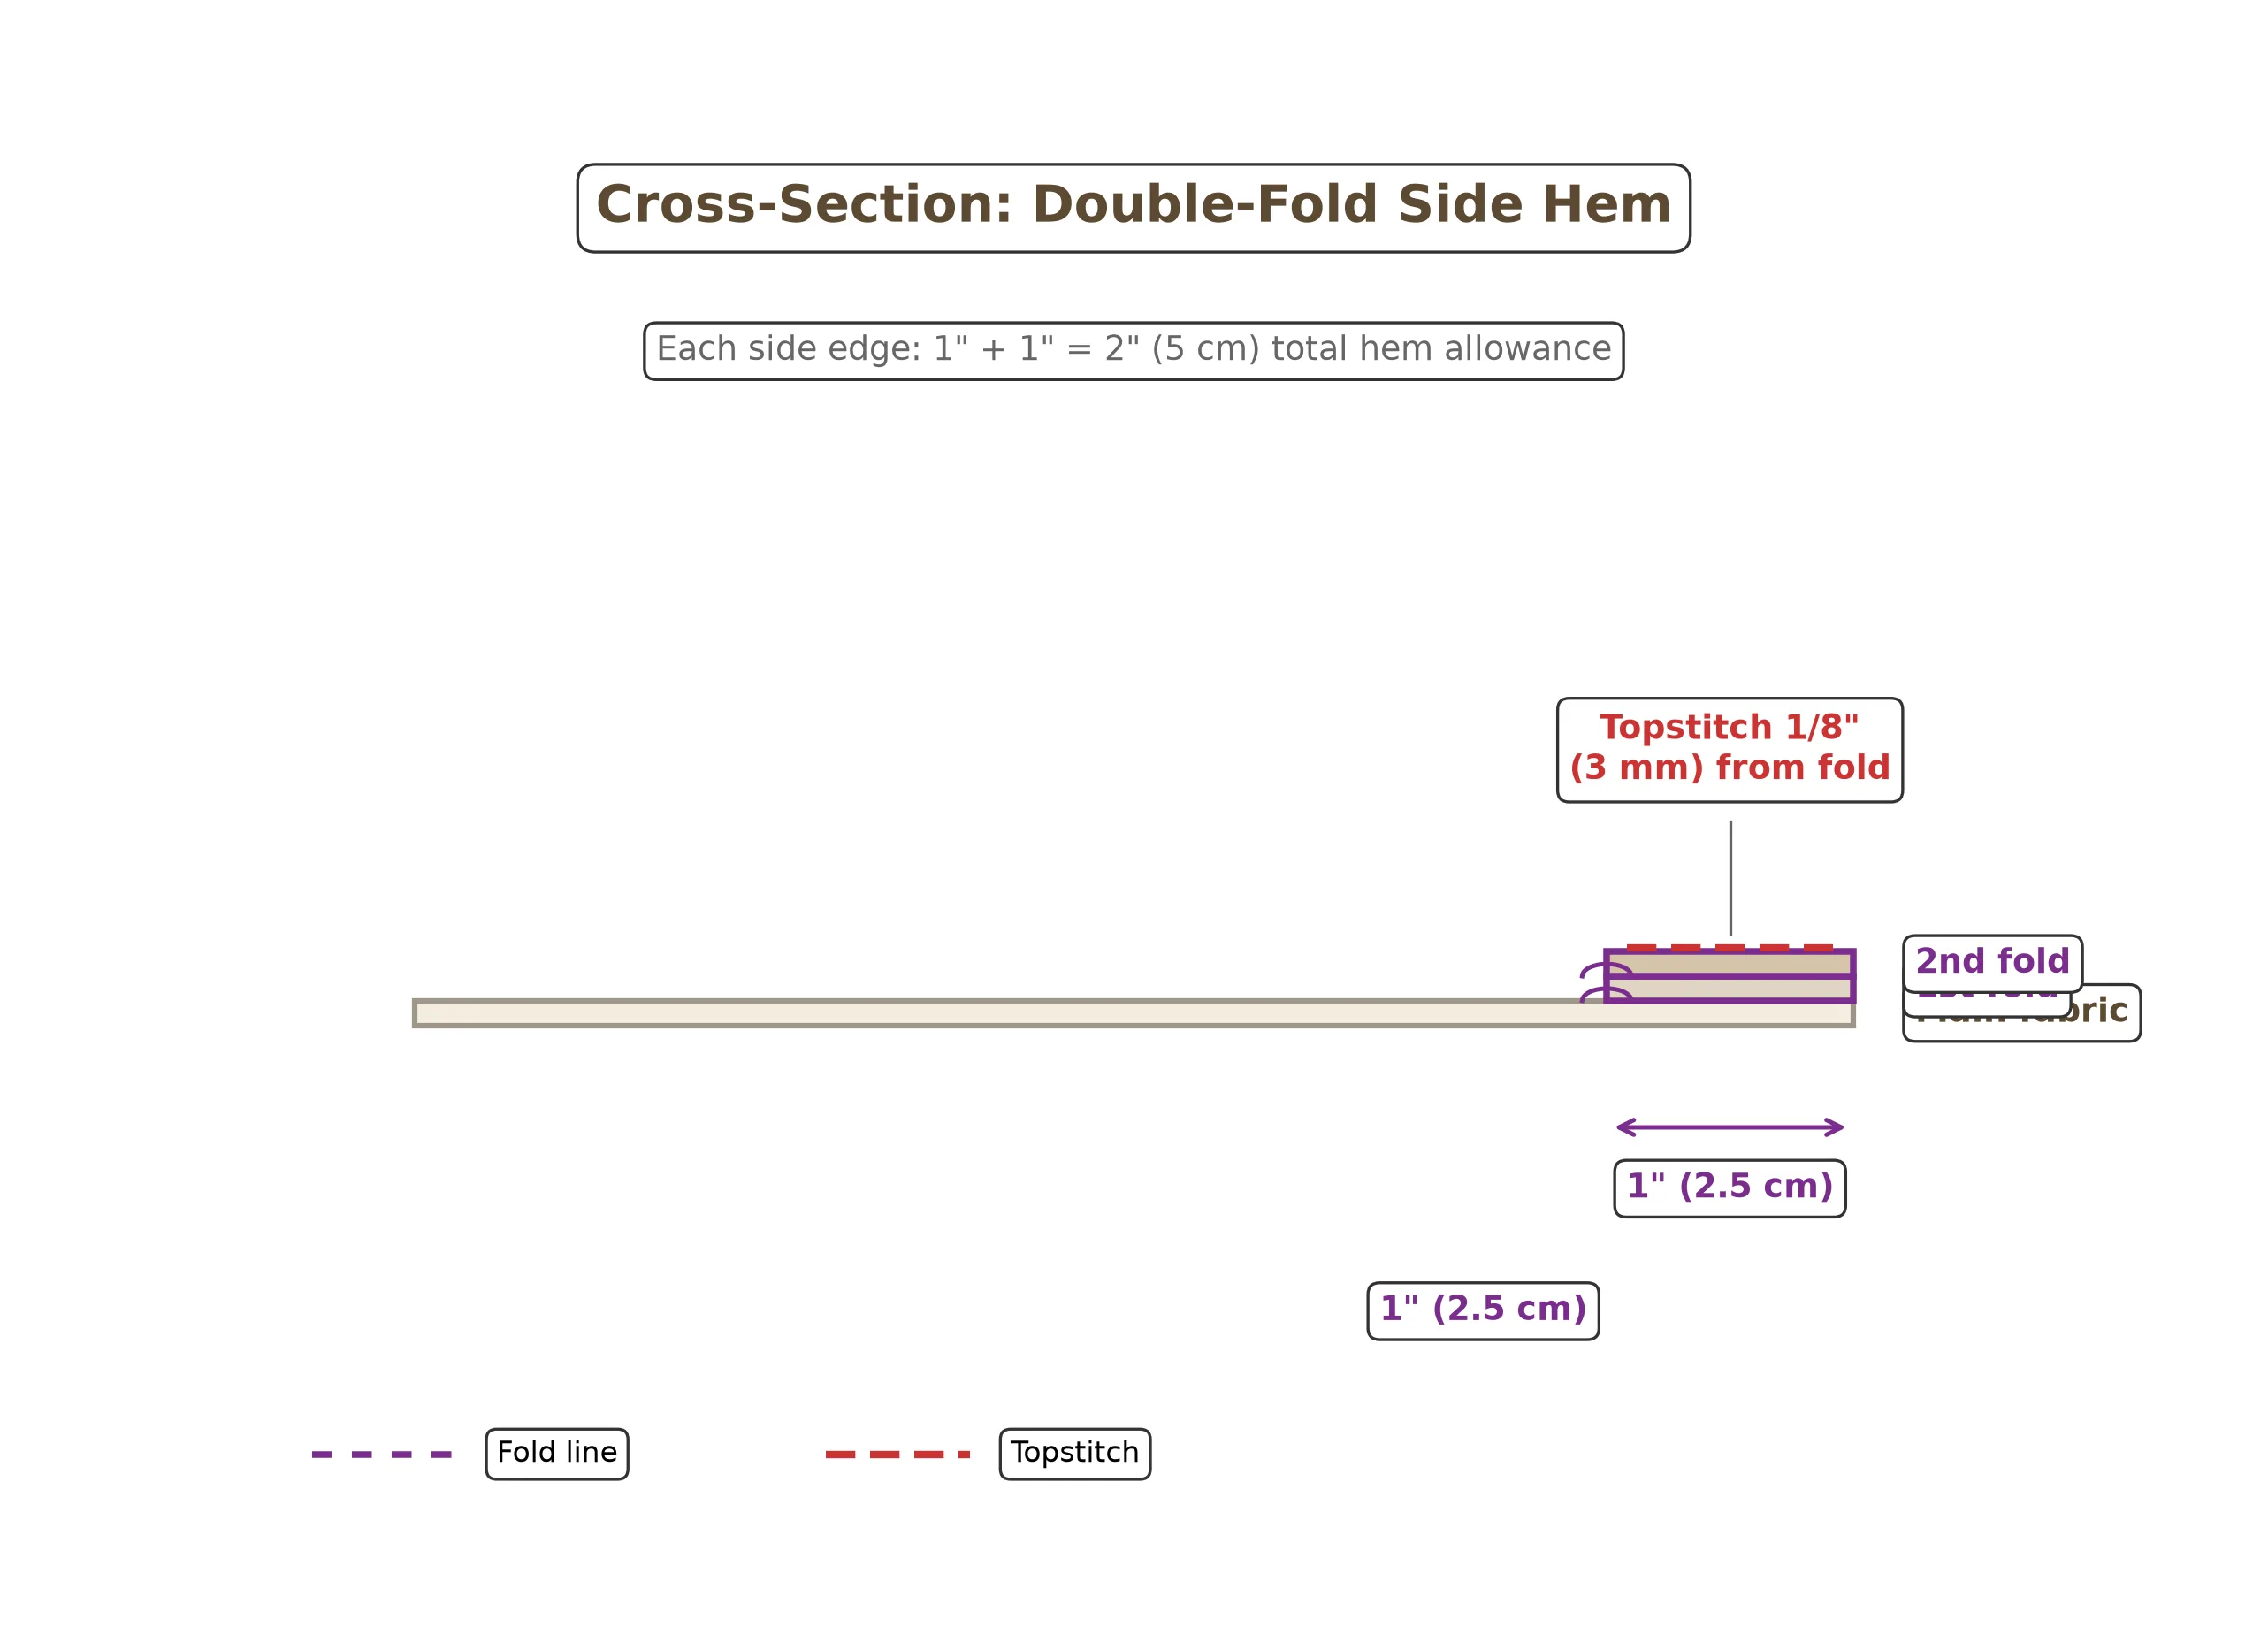
The double-fold side hem: 1 inch (2.5 cm) folded twice for a clean, enclosed edge.
Pin or clip the hem in place every 4 to 6 inches (10 to 15 cm). Topstitch (stitch on the right side of the fabric, close to the inner fold) about 1/8 inch (3 mm) from the folded edge, using a straight stitch and a stitch length of 2.5 to 3 mm. Repeat on the other side. Take your time here — neat side hems are the hallmark of a professional-looking curtain.
Hem the Bottom Edge
The bottom hem of a curtain is deeper than the side hems because the extra weight helps the fabric hang straight and resist blowing in a breeze. Fold the bottom edge up 4 inches (10 cm) toward the wrong side and press. Then fold it up another 4 inches (10 cm), enclosing the raw edge, and press again. You now have a substantial double-fold hem that is 4 inches (10 cm) deep.
Pin generously — a deep hem can shift while you sew, and you want it to stay perfectly even. Topstitch close to the inner fold, just as you did for the sides. When you reach the corners where the side hems meet the bottom hem, you may have a bit of bulk. Go slowly, and if your machine struggles, hand-crank the needle through the thickest spots. The result will be a beautifully weighted bottom edge that gives your curtain a luxurious drape.
Create the Rod Pocket and Header
This is the step that makes a curtain a curtain. With the wrong side facing you, fold the top raw edge down 1 inch (2.5 cm) and press — this small fold will become the decorative header (the little ruffle that sits above the rod). Now fold the fabric down again, this time by 3-1/2 inches (9 cm), to create the rod pocket casing. The total folded depth from the top edge is now 4-1/2 inches (11.5 cm), which gives you a rod pocket that is approximately 3 inches (7.5 cm) deep — perfect for a standard 1-inch (2.5 cm) curtain rod.
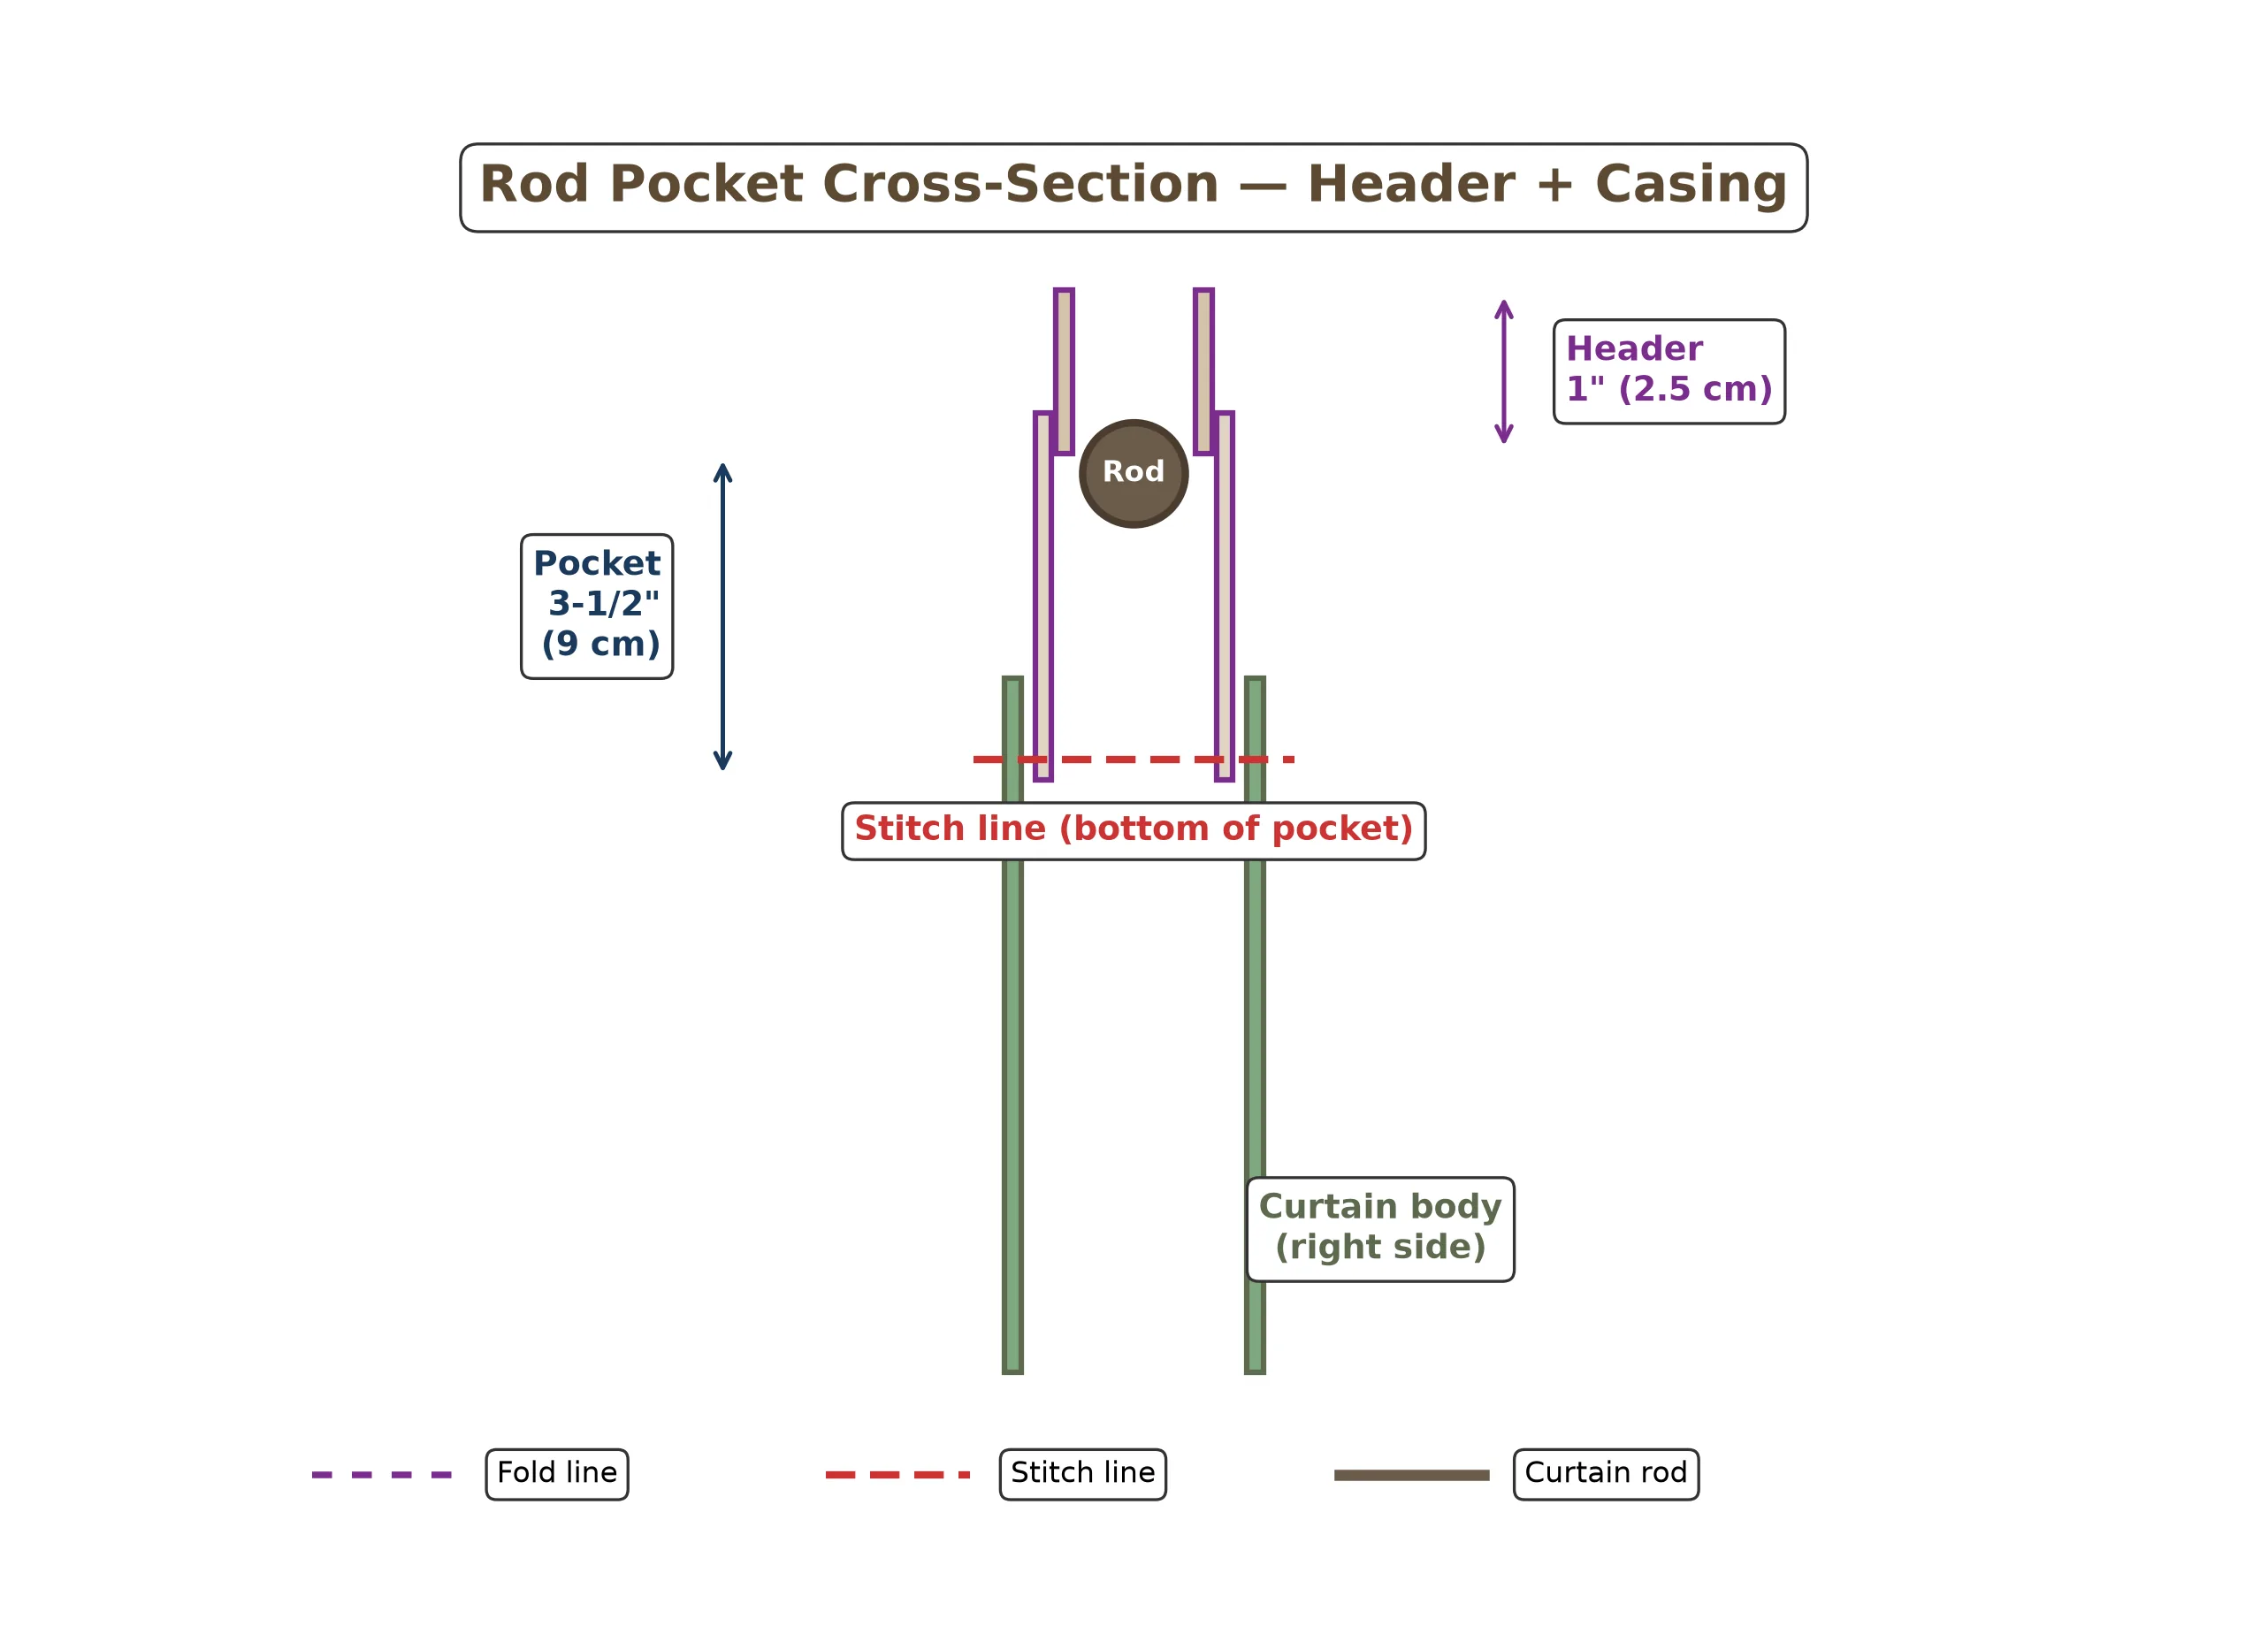
The rod pocket is formed by two folds: a 1-inch (2.5 cm) header ruffle and a 3-1/2-inch (9 cm) pocket depth.
Pin the pocket in place along the entire width. Stitch along the bottom edge of the pocket (the fold closest to the body of the curtain), backstitching at both ends to secure the seam. This single line of stitching creates the casing through which the rod will slide. Make sure you do not accidentally stitch the pocket closed at the sides — the rod needs to pass through from end to end.
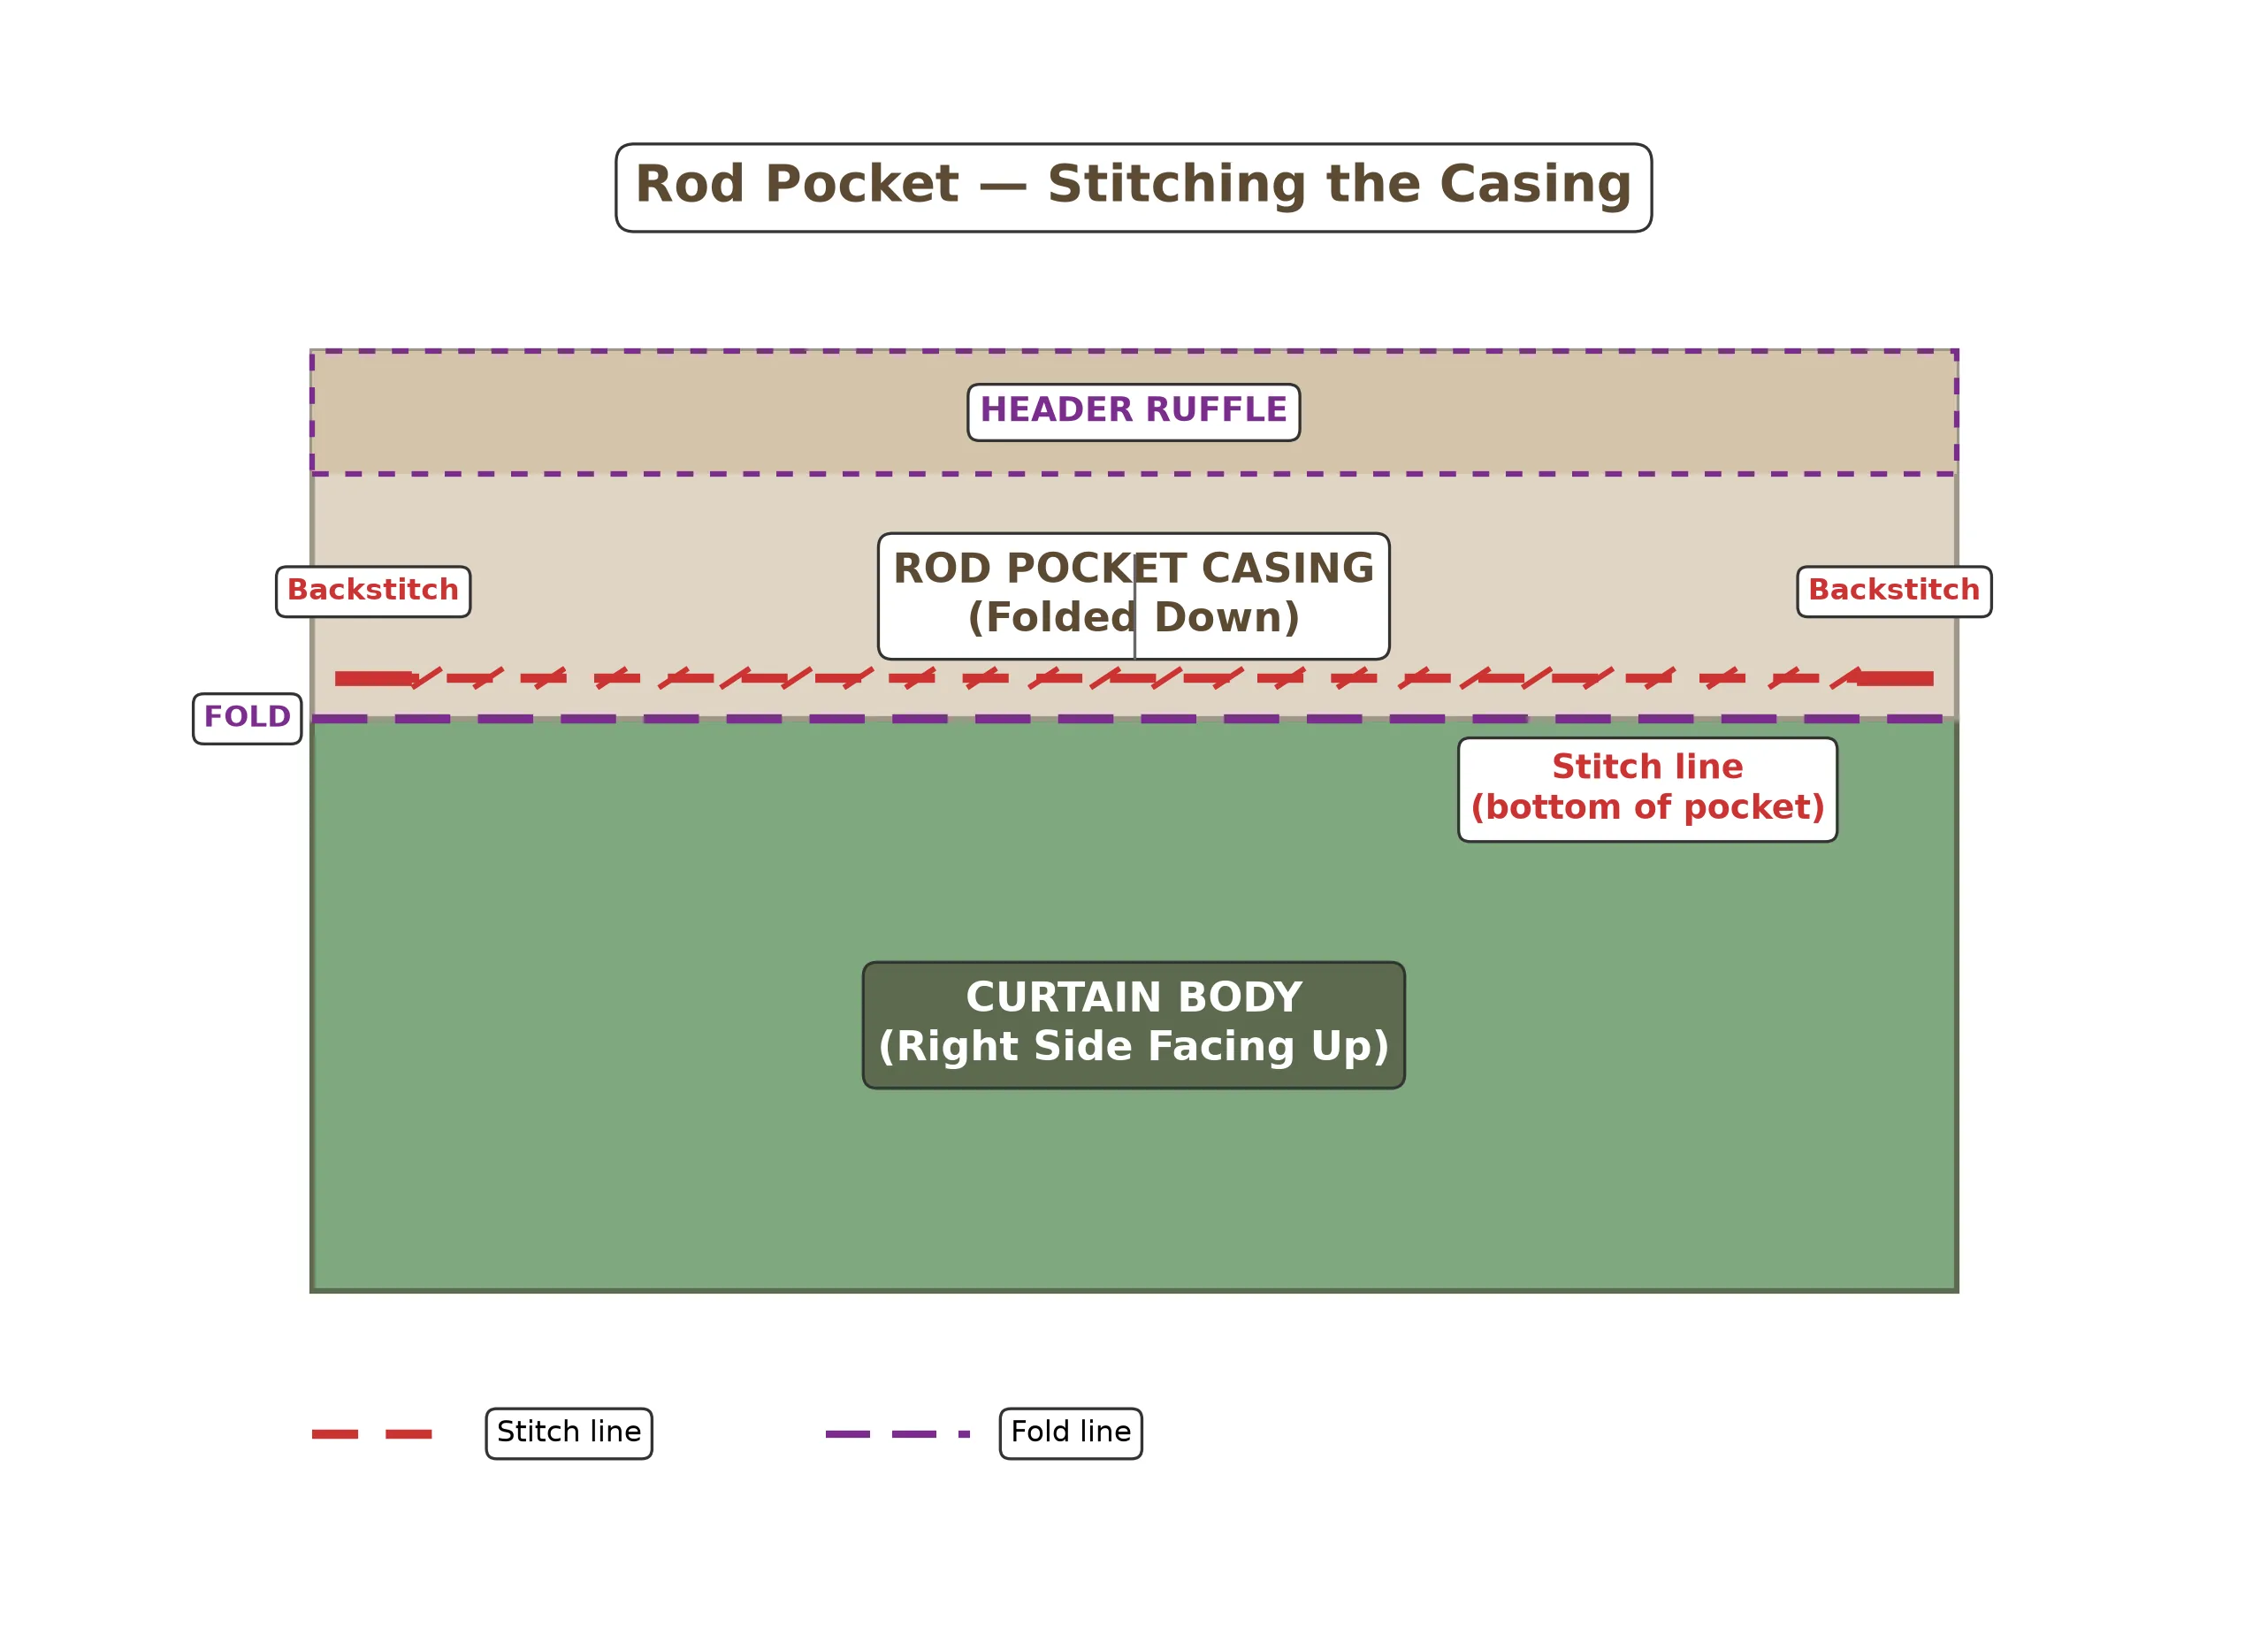
Stitch along the lower fold of the rod pocket, backstitching at each end for strength.
If you want extra security, you can add a second line of stitching 1/4 inch (6 mm) above the first, creating a narrow channel that prevents the pocket from stretching out over time. This is optional but recommended for heavier fabrics.
Press, Hang, and Adjust
Before you hang your curtain, give the entire panel a thorough press with steam. Pay special attention to the hems and the rod pocket — crisp, flat folds make a huge difference in the finished look. If your fabric is linen or a linen blend, press it while it is still slightly damp for the best results.
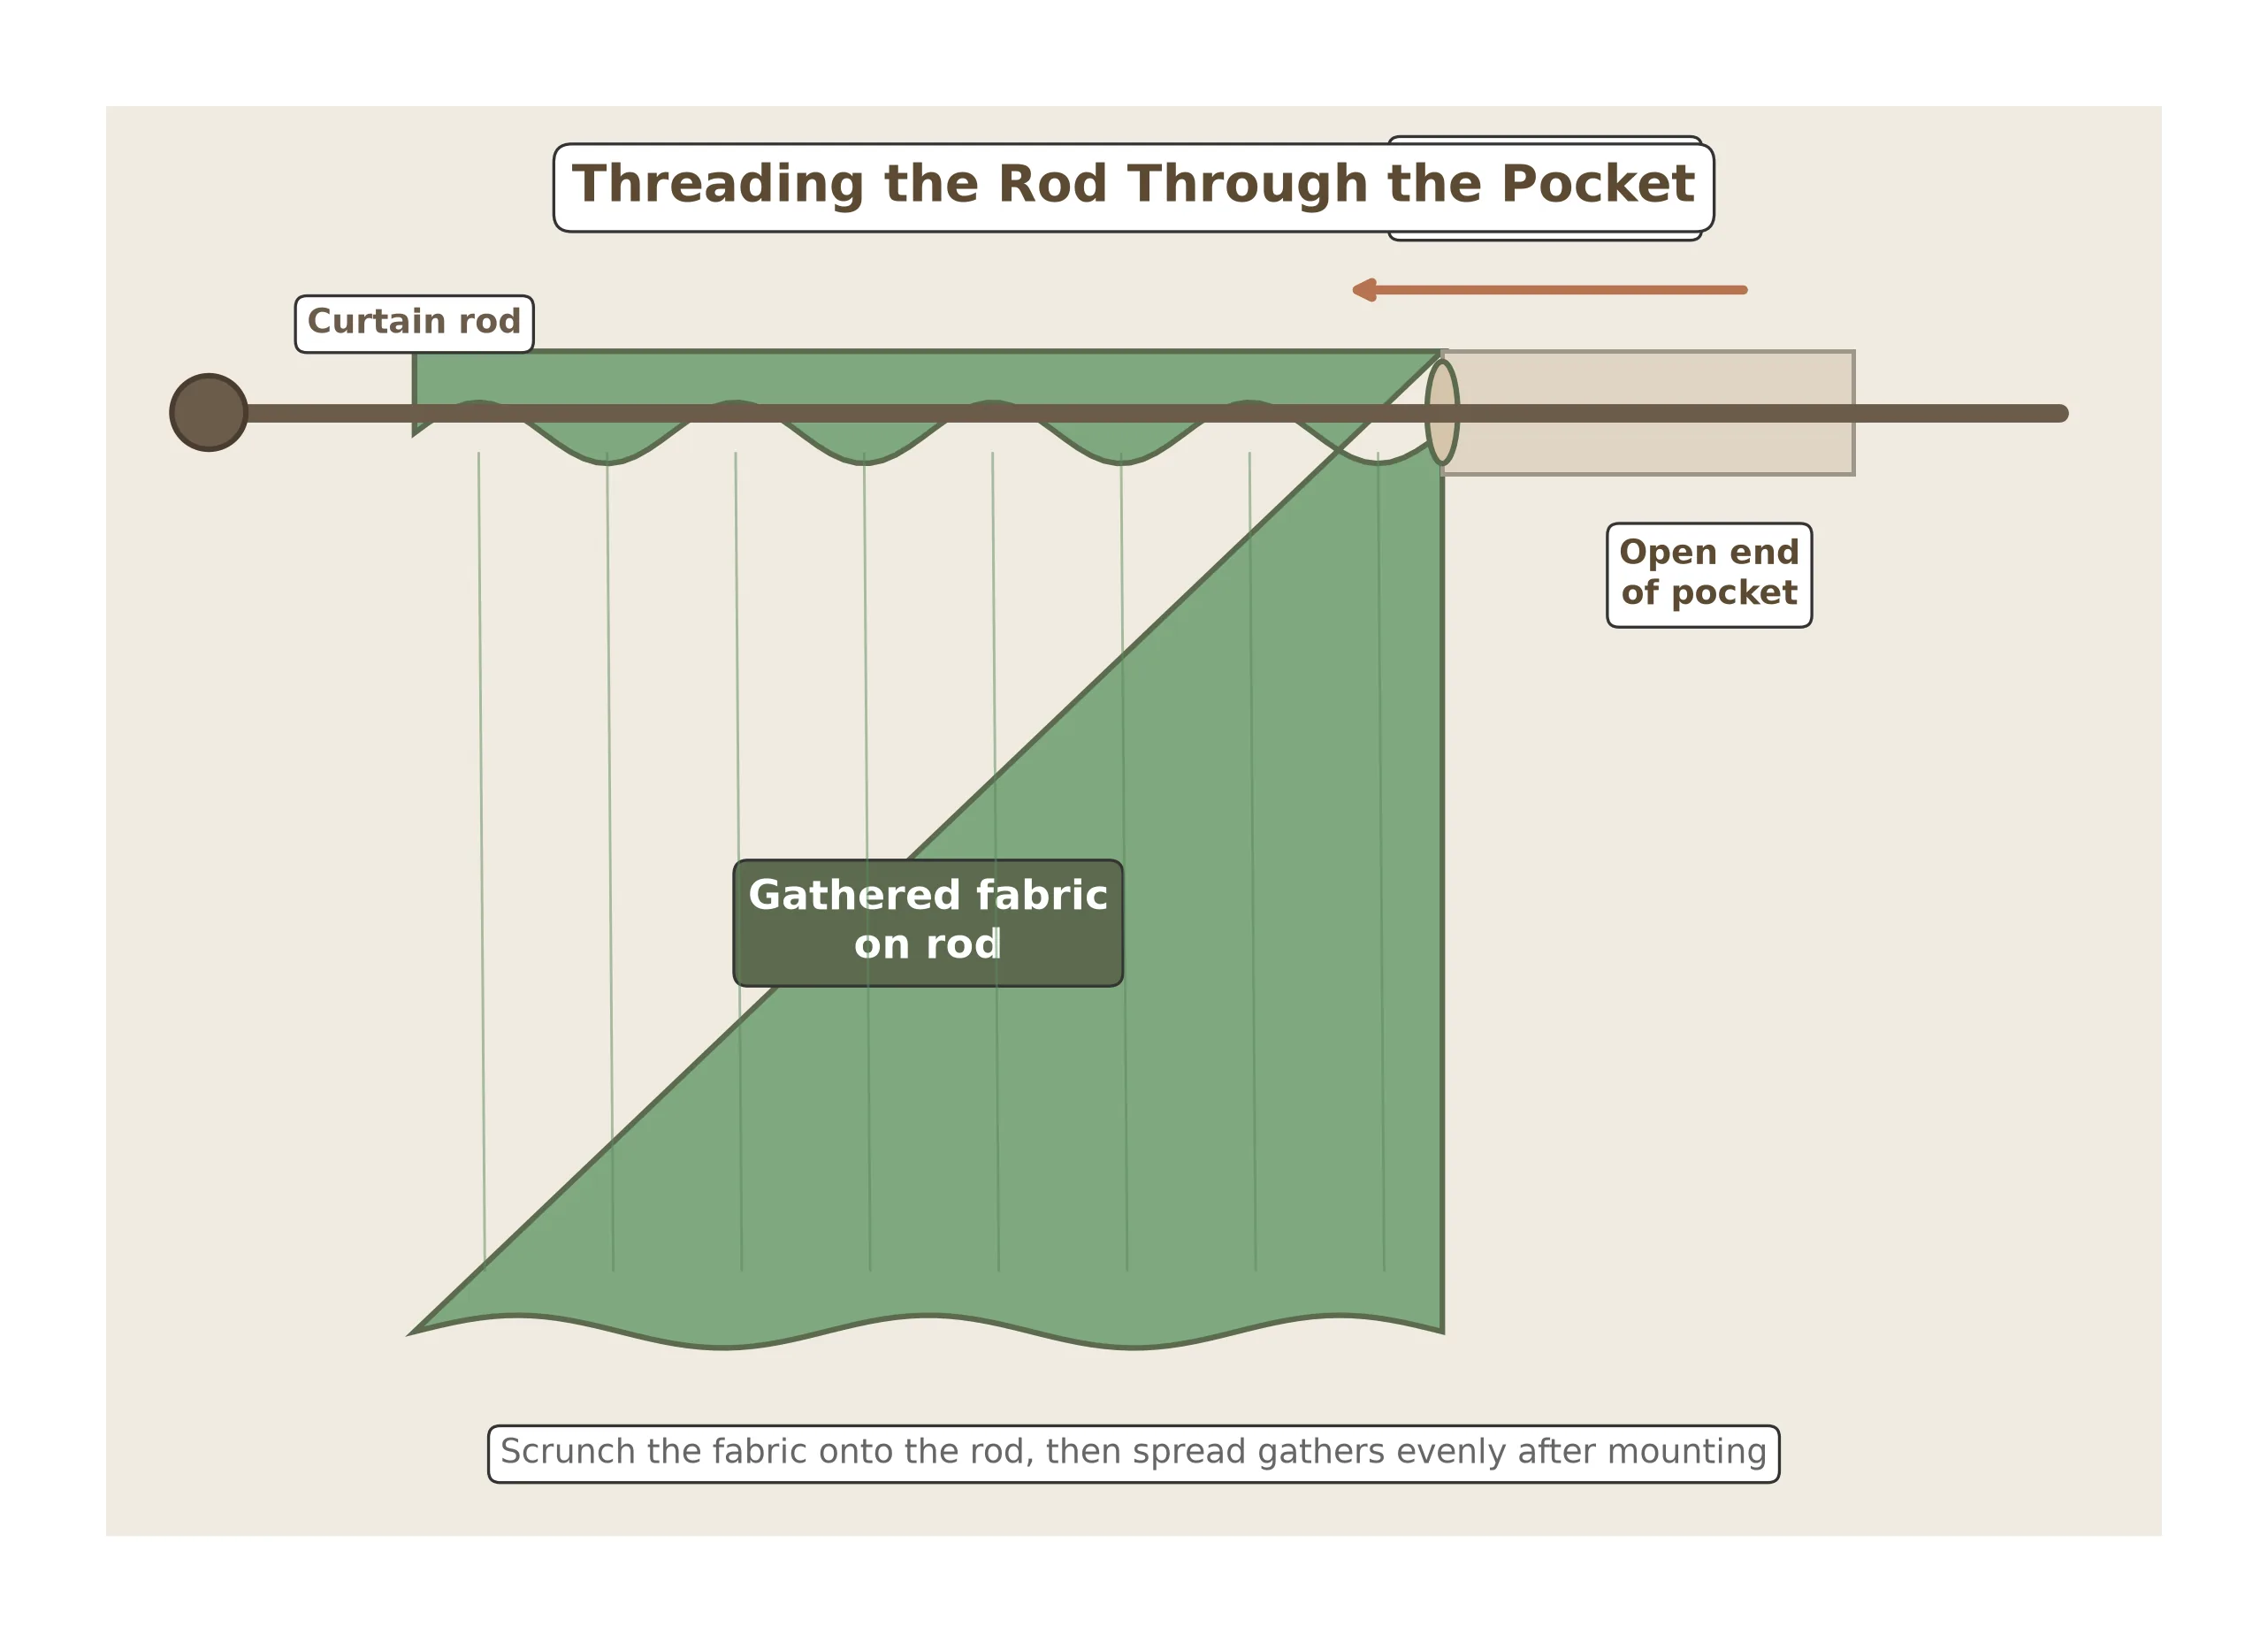
Thread the rod through the pocket, then gather the fabric evenly before mounting.
Thread your curtain rod through the rod pocket, scrunching the fabric as you go. Once the rod is fully through, mount it on its brackets and step back. Now comes the satisfying part: adjusting the gathers. Use your hands to space the folds evenly across the width of the window, aiming for pleats that are roughly 2 to 3 inches (5 to 7.5 cm) apart. The header ruffle above the rod should fan out naturally — you can gently fluff it with your fingers for a fuller look.
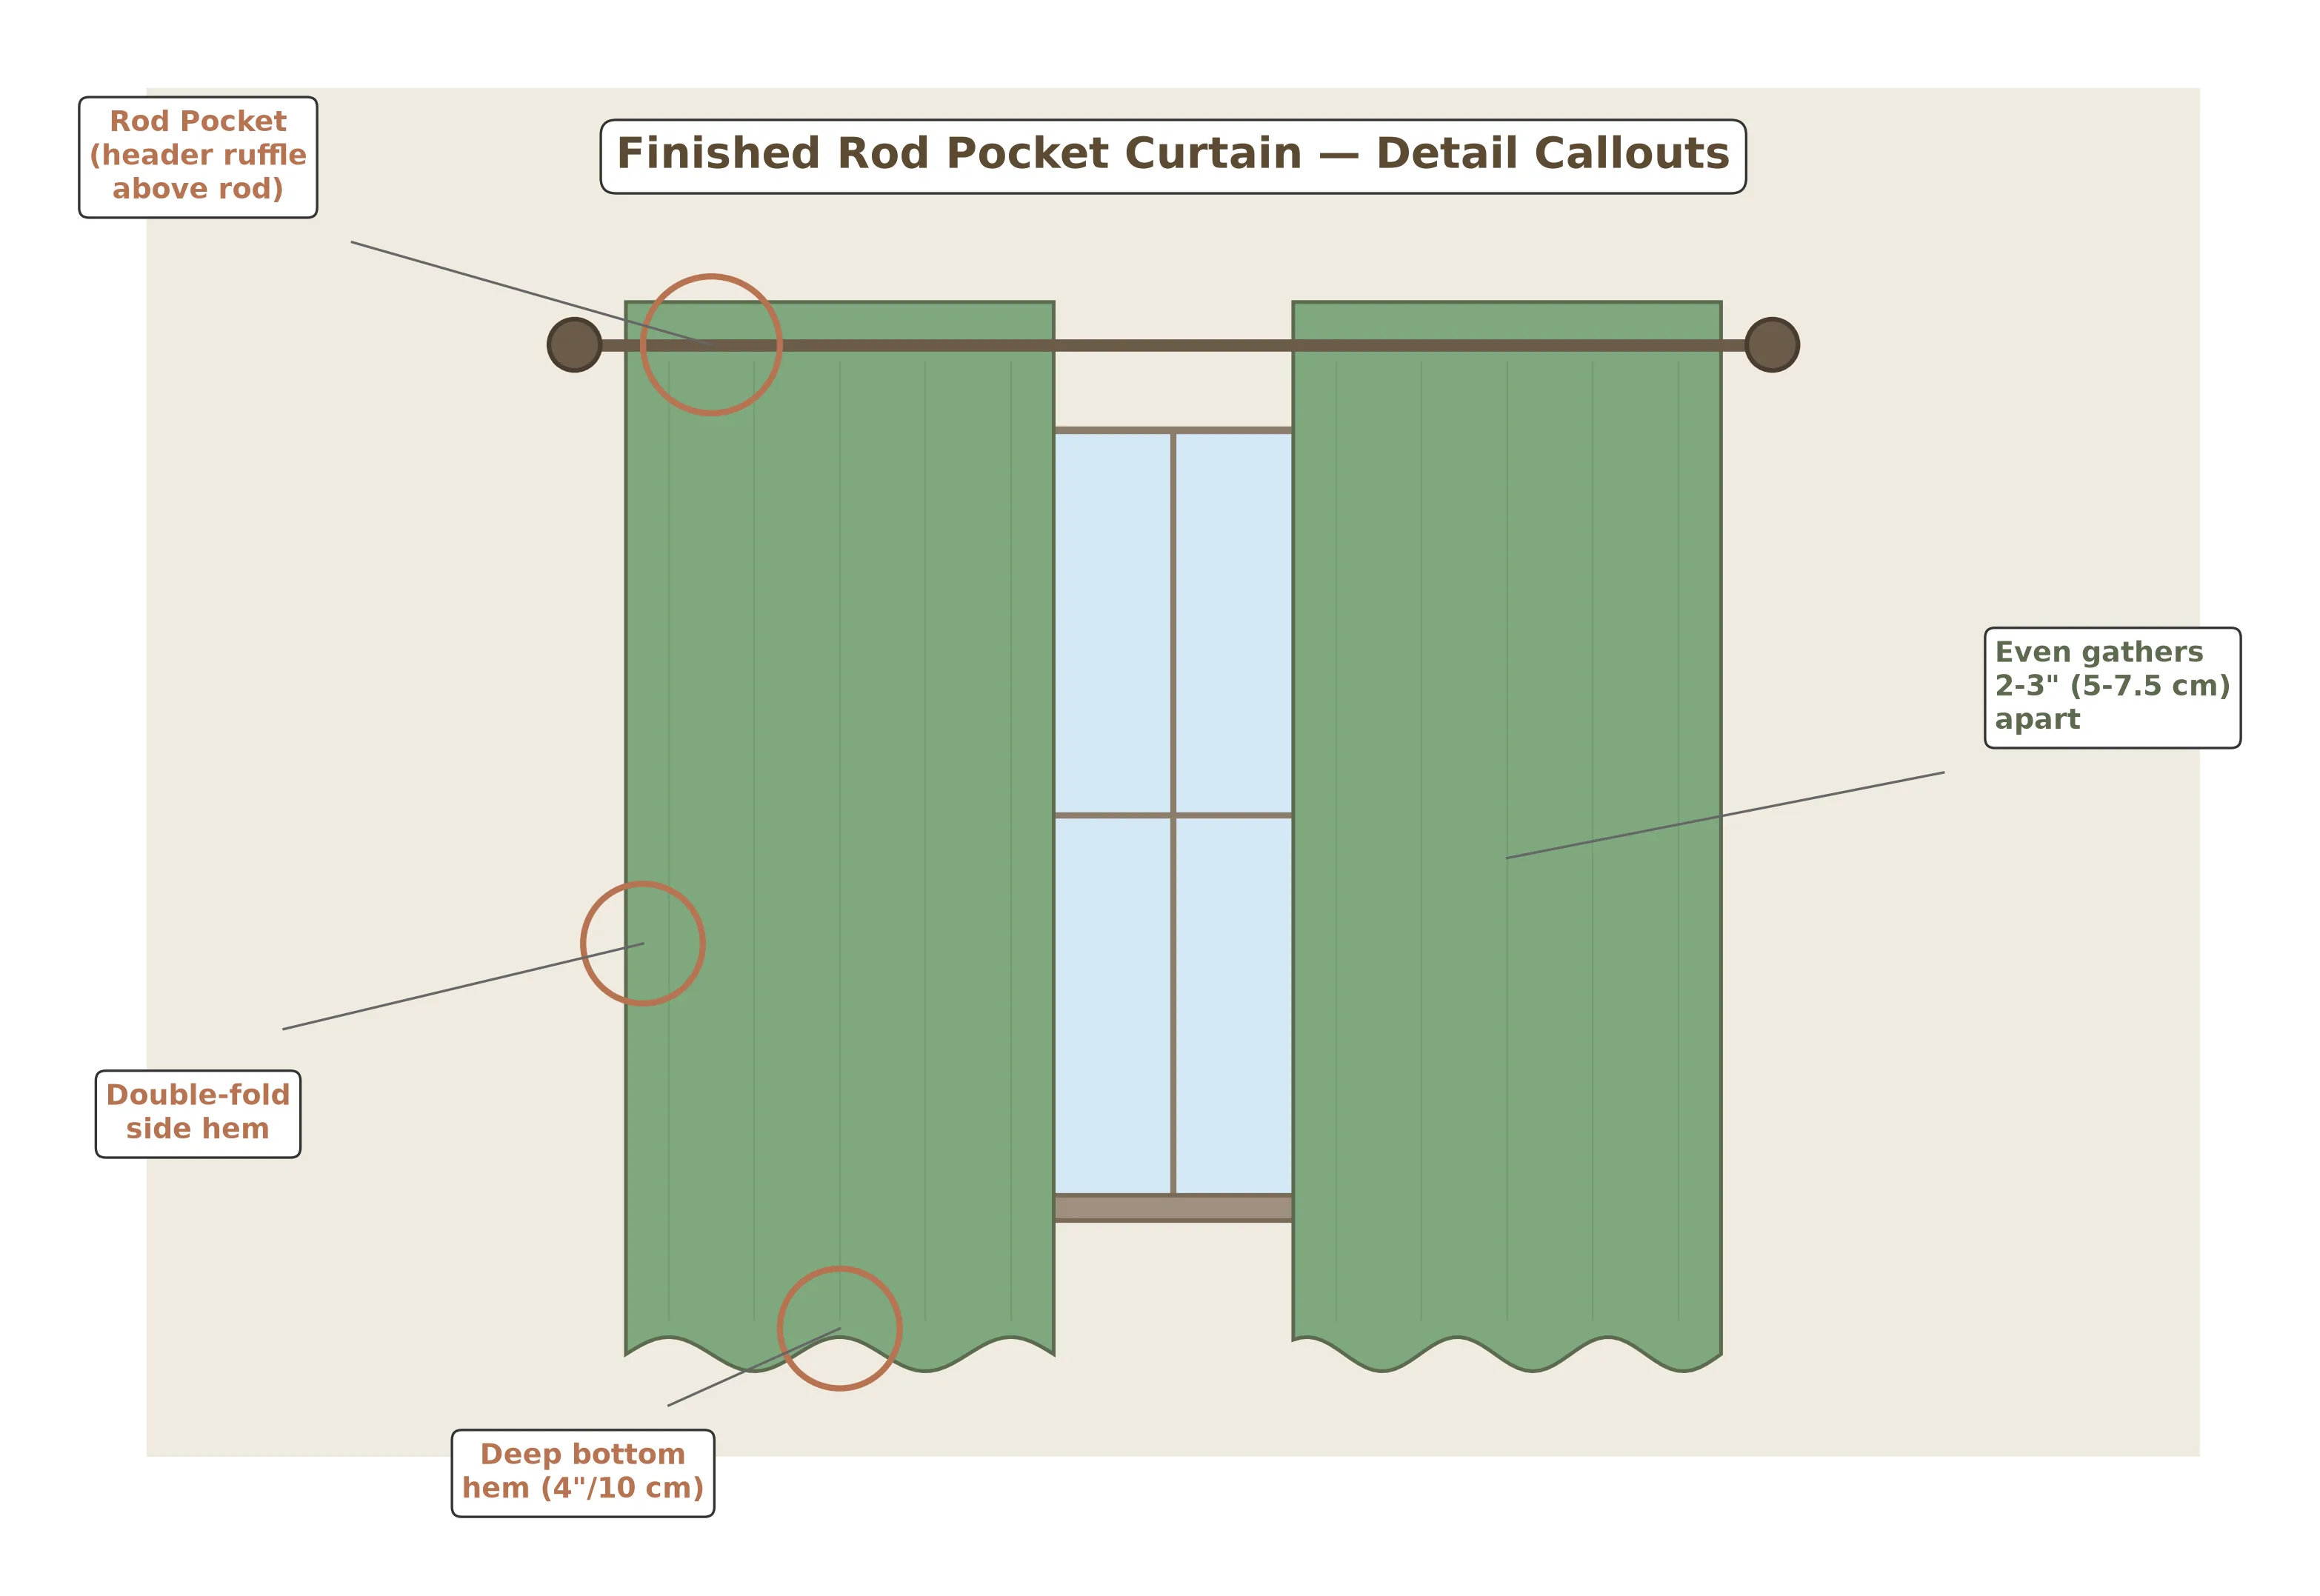
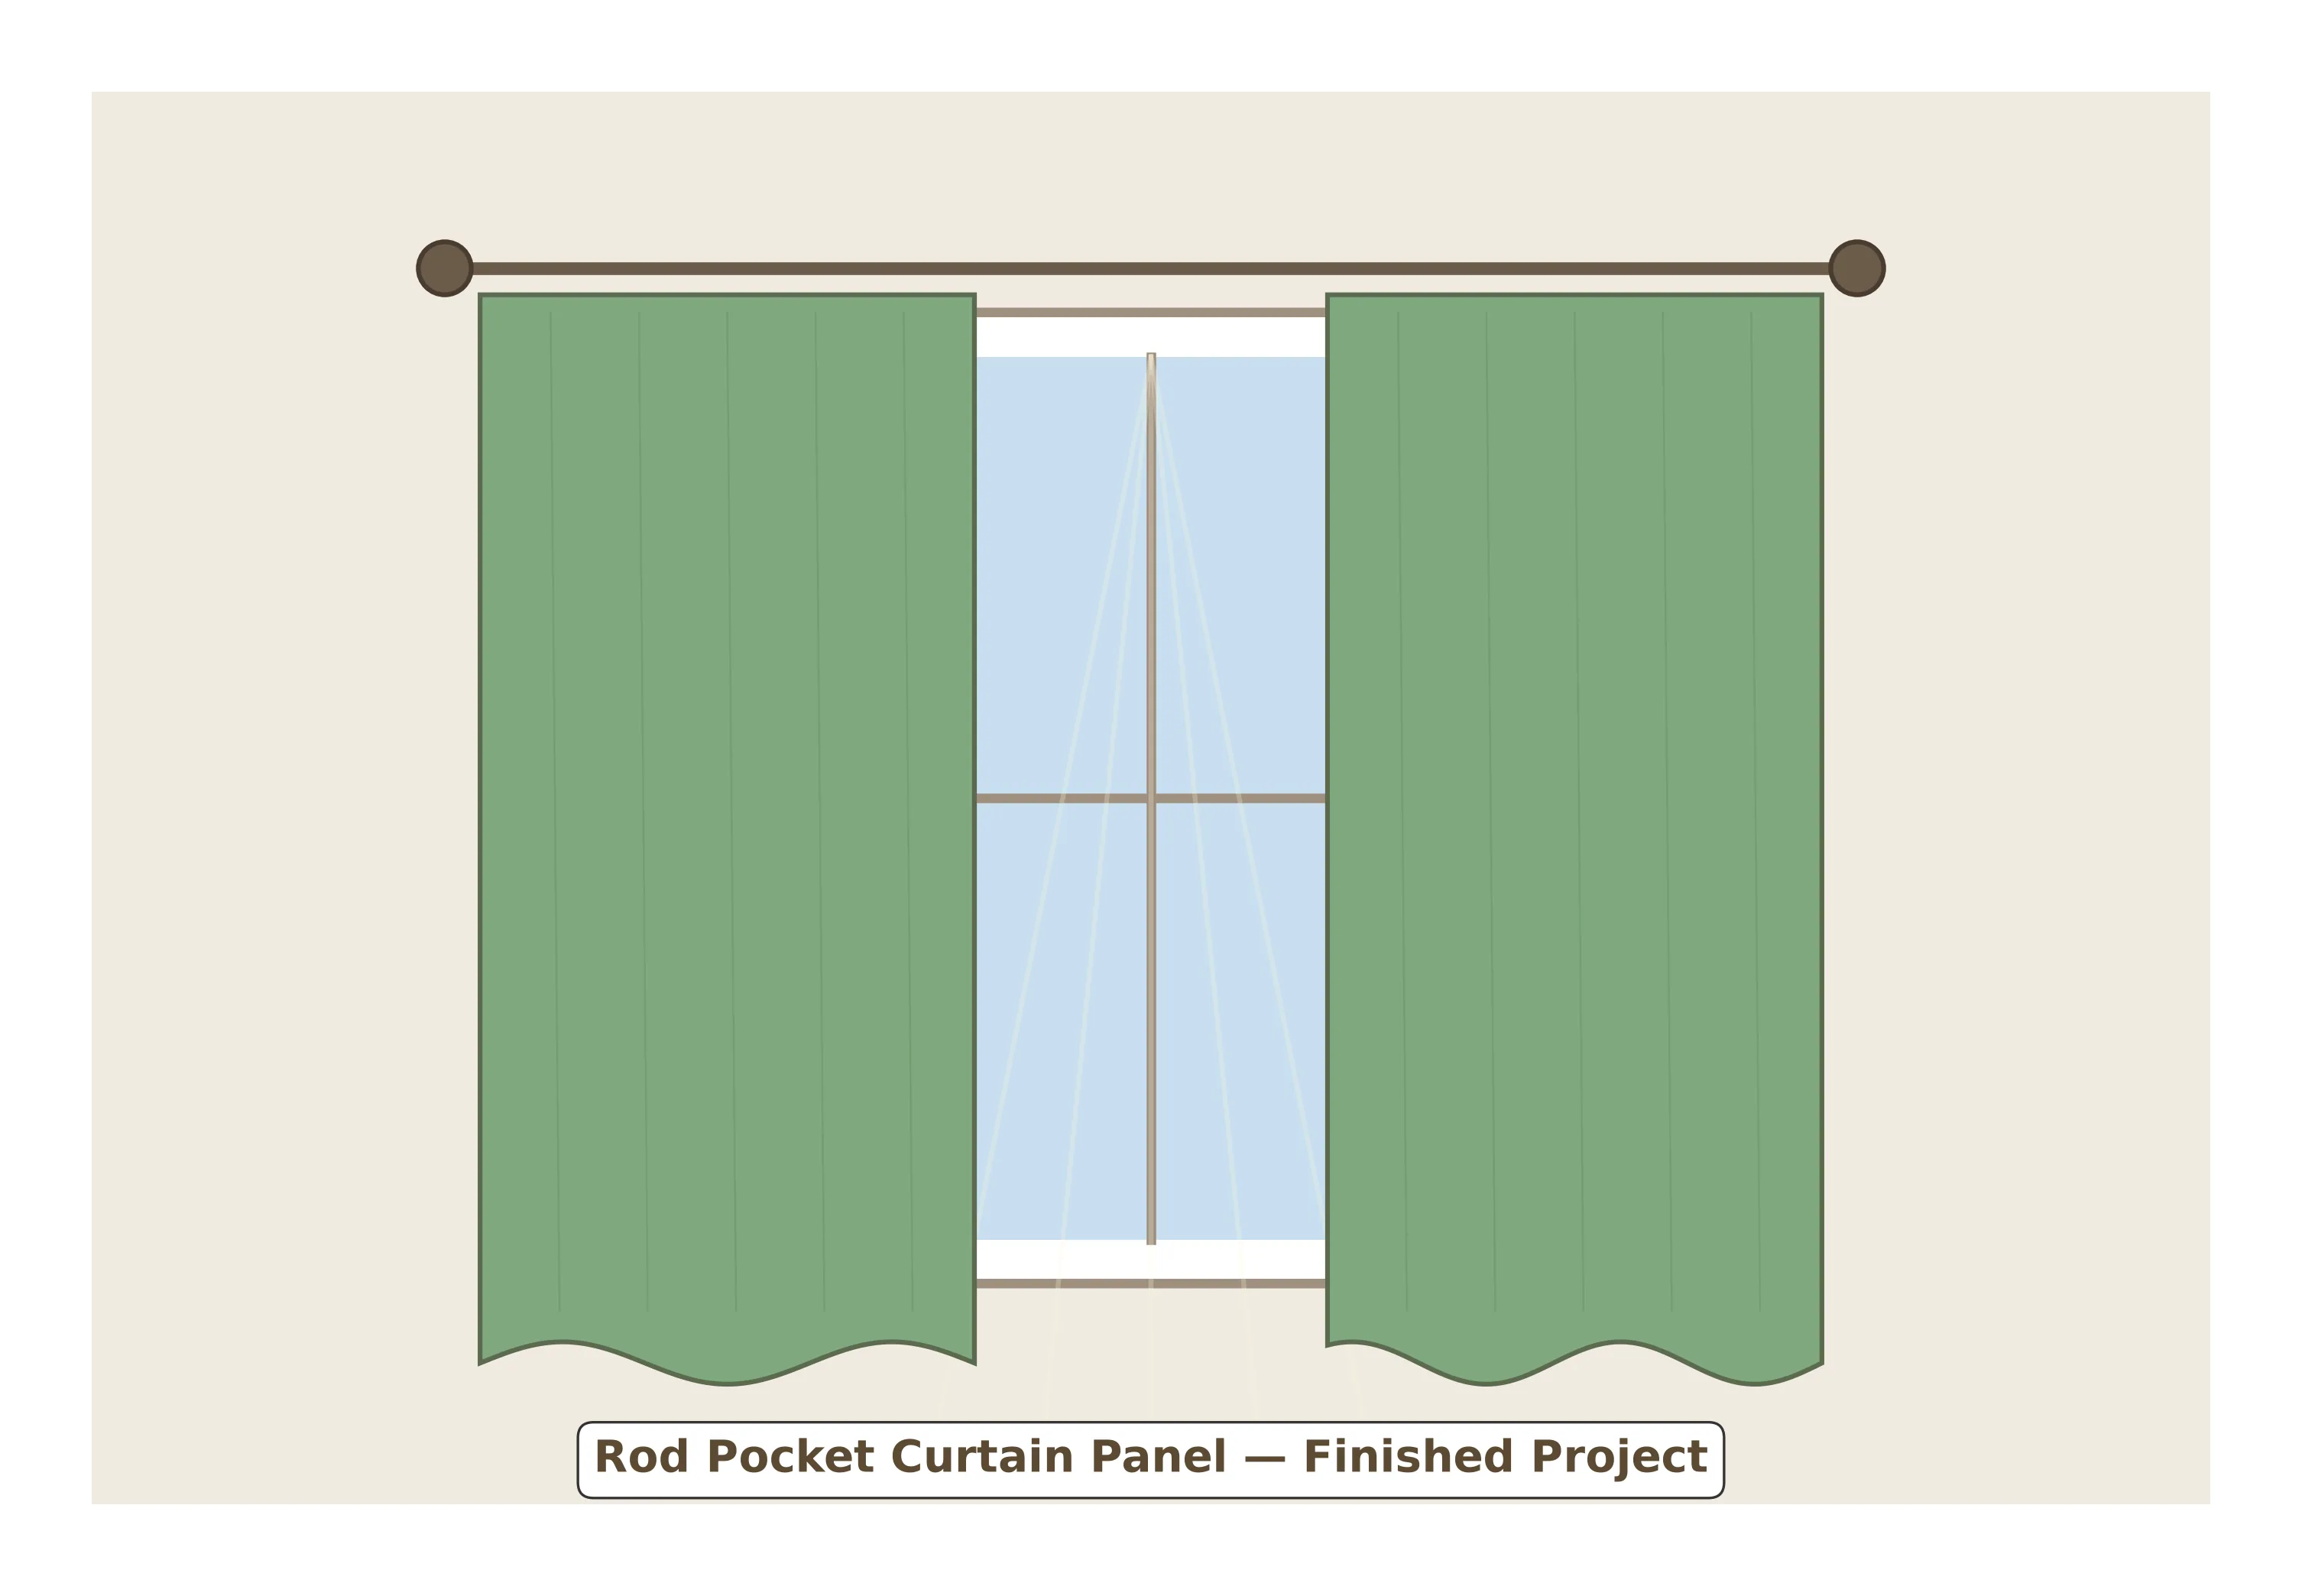
The finished panel — soft gathers, clean hems, and a custom fit that store-bought curtains simply cannot match.
Tips for Professional Results
- Pre-wash your fabric before cutting. Cotton and linen shrink, and you do not want your carefully measured curtains to shorten after the first wash. Wash and dry the fabric the same way you plan to launder the finished curtains.
- Use a walking foot on your sewing machine when topstitching deep hems. The walking foot feeds the top and bottom layers of fabric at the same rate, preventing the shifting that causes puckered hems.
- Press every fold before you sew it. I cannot overstate this. A well-pressed fold practically sews itself, while an unpressed fold will wander and wobble under the needle. Your iron is your best friend on this project.
- Match your thread colour to the fabric rather than to the hem. Since the topstitching is visible on the right side, you want it to blend in seamlessly.
- Hang the curtain immediately after sewing and let gravity do its work. The fabric will relax and settle into its final drape over the first 24 to 48 hours.
Common Mistakes to Avoid
- Making the rod pocket too tight. If the pocket is barely wider than the rod, the fabric will not gather smoothly and you will struggle to thread the rod through. Always make the pocket at least 1/2 to 1 inch (1.3 to 2.5 cm) wider than your rod diameter.
- Skipping the pre-wash. I mentioned this in the tips, but it bears repeating because it is the most common curtain-making disaster. Cotton can shrink 3 to 5 percent, which on a floor-length curtain could mean losing 2 to 3 inches (5 to 7.5 cm) of length after the first wash.
- Cutting the fabric off-grain. If the grain line is not running perfectly vertical, your curtain will twist and hang crookedly no matter how carefully you sew. Take the extra time to align the selvage and check that the crosswise threads are perpendicular to the lengthwise threads before you cut.
- Using a stitch length that is too short. Long, straight hems look best with a stitch length of 2.5 to 3 mm. Shorter stitches create a perforated line that can pucker the fabric and weaken the hem over time.
- Forgetting to backstitch at the start and end of the rod pocket seam. This seam bears the entire weight of the curtain, so it needs to be secure. Backstitch at least 1/2 inch (1.3 cm) at both ends.
Variations to Try
Once you have mastered the basic rod pocket panel, there are several easy variations that can dramatically change the look of your curtains without requiring any new skills.
Lined Panel
Cut a lining panel from lightweight cotton or curtain lining fabric to the same finished dimensions. Sew it to the main fabric along the top edge before creating the rod pocket, treating both layers as one. Lining adds body, blocks more light, and protects the face fabric from sun fading.
Contrast Border
Add a 3 to 6 inch (7.5 to 15 cm) strip of contrasting fabric to the bottom or leading edge of the panel before hemming. This is a wonderful way to tie the curtain colour to other elements in the room, such as throw pillows or upholstery.
Tiered Café Curtain
Make two shorter panels — one for the upper half of the window and one for the lower half — each with its own rod pocket. This classic café style is perfect for kitchens and bathrooms where you want privacy at eye level but light above.
Ruffled Header
Increase the header fold to 3 or 4 inches (7.5 to 10 cm) above the rod pocket for a dramatic, ruffled top. This works especially well with lightweight fabrics like voile and creates a romantic, cottage-style look.
Each of these variations uses the same basic construction method you learned in this post. The rod pocket is your foundation — once you understand it, you can adapt it to almost any curtain style you can imagine. Later in this series, we will explore the lined Roman shade and the gathered window valance, both of which build on the skills you developed here.
Frequently Asked Questions
What is a rod pocket curtain?
A rod pocket curtain is a curtain panel with a sewn-in fabric channel (called a casing or rod pocket) at the top edge. You slide the curtain rod through this channel, and the fabric gathers softly around the rod. It is the simplest curtain heading style and requires no rings, hooks, or clips — just your sewing machine and an iron.
How much fullness do I need for rod pocket curtains?
A fullness ratio of 2x (twice the window width) is the standard for most rod pocket curtains, giving soft, even gathers. Use 1.5x for a relaxed, casual look or 2.5x for a luxurious, formal appearance. For a 36-inch (91 cm) window at 2x fullness, you need 72 inches (183 cm) of fabric width per panel. When in doubt, 2x is the safest choice.
What fabric is best for rod pocket curtains?
Medium-weight cotton and linen are the best choices for beginners. They press crisply, sew easily, and drape well. Avoid stretchy knits, very slippery silks, or extremely heavy upholstery fabrics for your first curtain project. Voile and sheer cotton work beautifully for light-filtering curtains in living rooms and kitchens.
How wide should the rod pocket be?
The rod pocket should be about 1/2 to 1 inch (1.3 to 2.5 cm) wider than the diameter of your curtain rod. For a standard 1-inch (2.5 cm) rod, make the pocket 1-1/2 to 2 inches (3.8 to 5 cm) deep (the finished flat measurement before the rod is inserted). This gives enough room for the fabric to gather smoothly without being too tight or too loose.
Can I add lining to a rod pocket curtain?
Yes, you can add a separate lining panel cut to the same finished dimensions as your main curtain. Sew the lining to the main fabric along the top edge before creating the rod pocket, treating both layers as one. Lining adds body, blocks more light, and protects the face fabric from sun fading. It is a great option for bedrooms where you want to reduce morning light.
How do I keep rod pocket curtains from bunching on the rod?
Distribute the gathers evenly by hand after hanging, spacing the pleats roughly 2 to 3 inches (5 to 7.5 cm) apart. A slightly wider rod pocket helps the fabric slide more freely. You can also spray the rod with a light coat of silicone spray to reduce friction. For curtains you open and close daily, consider tab-top or grommet headings instead, as the rod pocket style is best suited for stationary panels.
Continue the Series
And there you have it — your very first handmade curtain panel. I hope you are as thrilled as I was the first time I stepped back and looked at a window dressed in fabric I had cut, pressed, and stitched myself. There is something deeply satisfying about making something that is both beautiful and functional, something you will see and use every single day.
If this is your first curtain, do not worry if it is not absolutely perfect. The hems might be a tiny bit uneven, the gathers might need a little more coaxing, and the header ruffle might lean slightly to one side. That is completely normal, and honestly, those small imperfections are what make handmade items so special. Nobody else will notice them, and every time you look at that curtain, you will know exactly what went into making it.
In the next post in this series, we will tackle the fabric storage basket — a sturdy, lined basket that is perfect for organizing your growing collection of sewing supplies. It introduces interfacing and boxed corners, two techniques that will expand your skills beautifully. Until then, enjoy your new curtains, and take a moment to appreciate the fact that you just transformed a window with nothing more than fabric, thread, and your own two hands.
Happy sewing, and I will see you at the next project.